Hello! Welcome back to our module on Cinematic Language.
In our last lesson, we focused on the art of blocking and staging, learning how to position actors to tell a story about their relationships and power dynamics. You now have the tools to compose a meaningful scene within the frame. But a brilliant composition can be undermined by a shaky camera.
Today, we shift from the "what" of composition to the "how" of capturing it. This lesson focuses on a fundamental technical skill: executing static shots using tripods for stable footage. A stable shot is the bedrock of professional-looking video, and mastering it is a non-negotiable step in your filmmaking journey. By the end of this lesson, you'll understand why static shots are so powerful and how to use a tripod to achieve them perfectly.
1. The Power of Stillness: The Static Shot
A static shot is one where the camera does not move at all. No panning, no tilting, no tracking. It remains completely fixed. While it might sound simple or even boring, the static shot is one of the most deliberate and powerful tools in a filmmaker's arsenal.
Why would a director choose to keep the camera still?
- To Emphasize Performance: By keeping the frame still, you direct the audience's entire focus to the actors' performances, dialogue, and movements within the scene.
- To Create a Mood: A static shot can create feelings of stability, calm, and tranquility. Conversely, holding a static shot for an unusually long time can build immense tension and anticipation.
- To Act as an Observer: It can make the audience feel like a quiet, detached observer, watching events unfold naturally.
- For Compositional Strength: It allows the careful compositions you learned about (rule of thirds, leading lines, foreground/midground/background) to be appreciated without distraction.
Look at the image below from the film Hunger (2008).
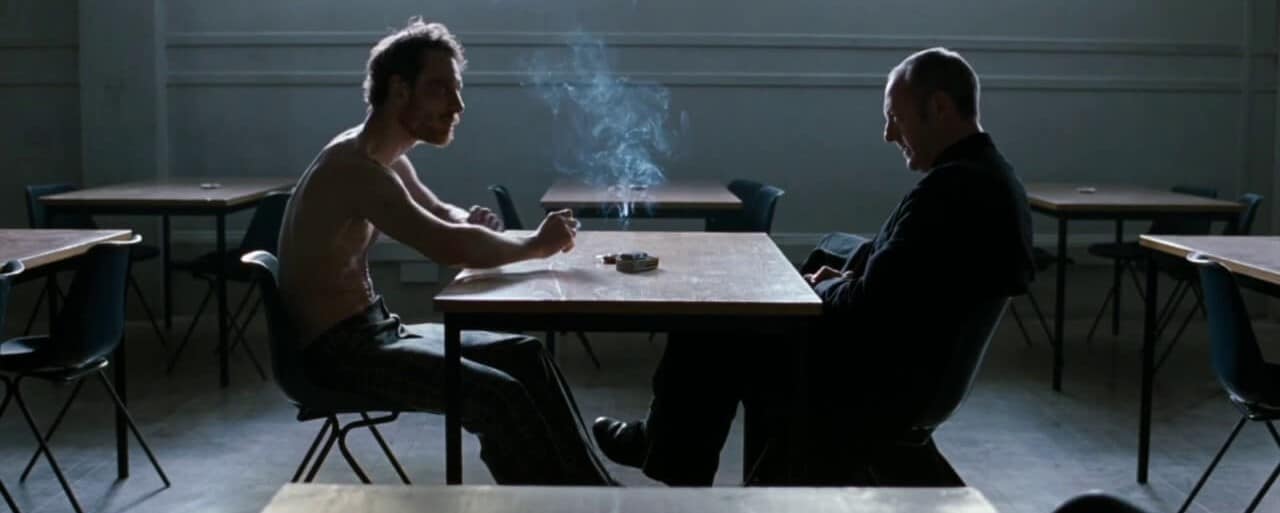
To achieve this level of professional stability, one tool is indispensable: the tripod.
2. Your Foundation: Setting Up a Tripod
For a true static shot, handheld footage won't cut it. Even the steadiest hands introduce micro-jitters that are noticeable on screen. A tripod provides a solid, stable base for your camera. While tripods vary in complexity, they all share the same basic components: legs that provide height and stability, and a head where the camera mounts and can be adjusted.
For a complete beginner, the initial setup can seem a bit clumsy. The following illustration provides a clear, step-by-step visual guide.
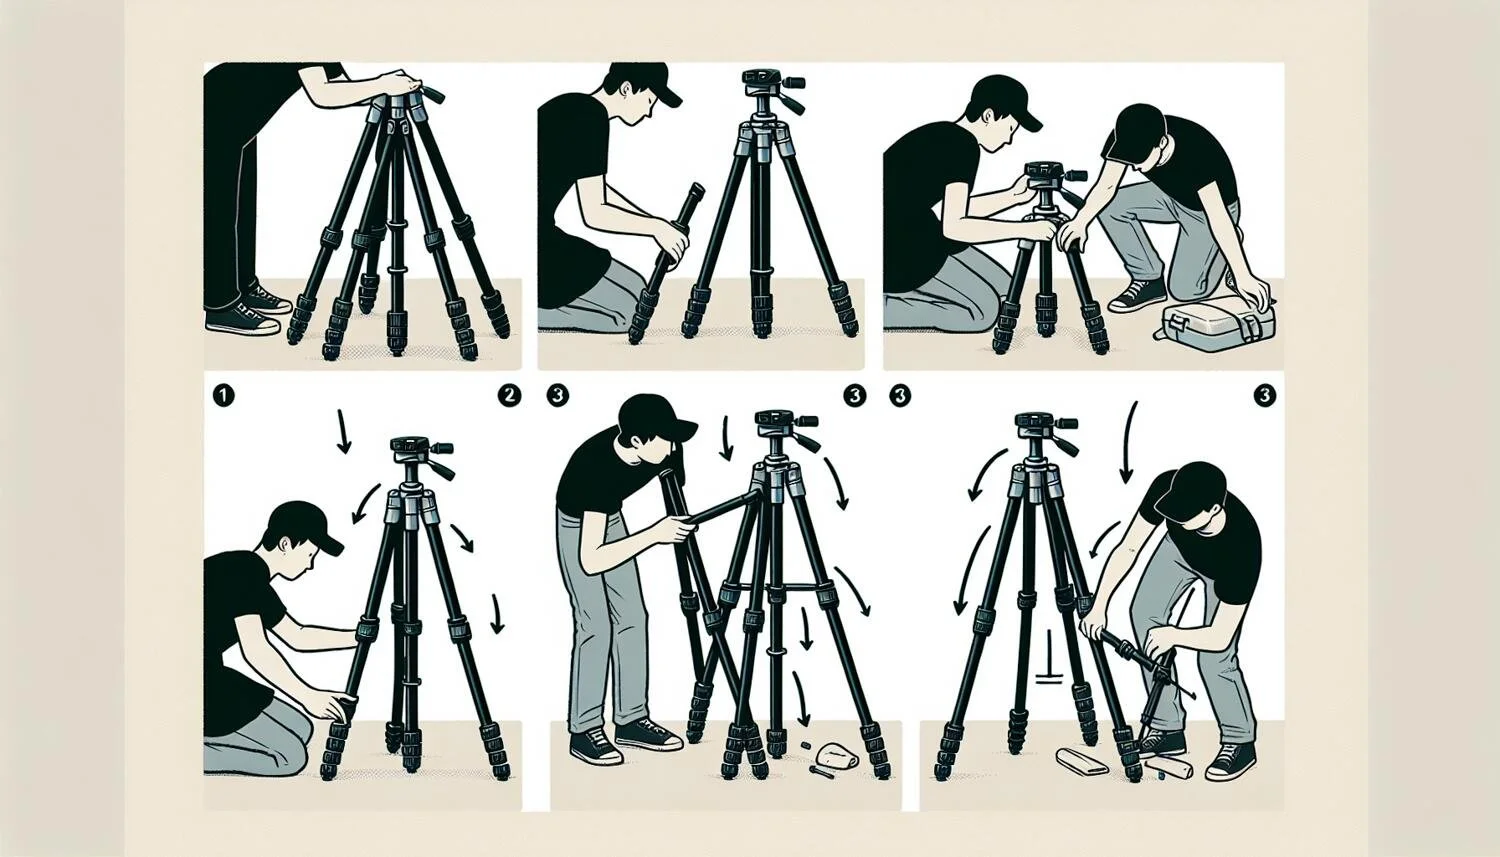
Now, let's move beyond the basic setup and dive into the techniques that ensure maximum stability.
3. Achieving Rock-Solid Stability
Simply placing your camera on a tripod isn't enough. Professional stability comes from proper technique. We'll draw on some excellent advice from professional photographers and videographers to build your tripod discipline.
Let's start with an article that covers the core principles.
How to Capture Smooth Tripod Shots (Pro Tips)
The article 'How to Capture Smooth Tripod Shots' from Ikan provides a great overview of the fundamentals of stability and common mistakes to avoid.
Please read the sections 'Understanding Tripod Fundamentals,' '3 Essential Tips for Smooth Tripod Shots,' and 'Common Mistakes to Avoid.' Focus on the concepts of stable framing, vibration control, and fully spreading the legs.
The article you just read introduces some crucial ideas. Let's expand on them with more specific, actionable tips to turn your tripod into an unshakeable platform.
How to Make Your Tripod More Stable
Now, let's get into the nitty-gritty details with the article 'How to Make Your Tripod More Stable' from Photography Life. It offers practical techniques that make a huge difference, especially in challenging conditions.
Read the following numbered sections: 1. Start on Stable Ground, 3. Go Low, 4. Extend the Thinnest Sections Last, 5. Don’t Hang Your Bag the Wrong Way, 6. Tighten Everything Down, 8. Balance Your Camera, and 9. Don’t Touch the Tripod. These tips are directly applicable to video and will help you troubleshoot any stability issues.
4. A Practical Checklist for Static Shots
Let's synthesize everything you've learned from those resources into a clear, actionable checklist. When setting up any static shot, run through these steps:
- Find Stable Ground: Your tripod is only as stable as the surface it's on. Avoid spongy grass or shifting sand if possible. Place the legs on solid, even ground.
- Create a Wide Base: Spread the tripod legs to their widest possible setting. A wider base is a more stable base.
- Prioritize Leg Sections: When adjusting height, always extend the thickest leg sections at the top first. Leave the thinnest, flimsiest sections at the bottom for last, and avoid using them if you can.
- Avoid the Center Column: The center column is the least stable part of a tripod. Raising it is like putting a monopod on top of your tripod. Keep it lowered for maximum stability. It's better to have a slightly lower shot that's stable than a shot at the perfect height that's shaky.
- Level the Head: Use the bubble level on your tripod head to ensure your shot is perfectly level. A crooked horizon is a classic sign of amateur cinematography.
- Balance Your Camera: Mount the camera so its center of gravity is directly over the center of the tripod. This prevents it from being front-heavy or back-heavy, which can cause drift or strain.
- Tighten Everything: Once your composition is set, firmly lock all the knobs and levers on the tripod head and legs. Any loose component can introduce subtle vibrations.
- Hands Off!: After you press record, do not touch the camera or tripod. Let it do its job. Your hands will only add shake.
Test your understanding!
You need to film a static shot of a flower in a windy park. You set up your tripod, but notice the footage is still a little shaky. Based on the principles you've learned, what are three adjustments you could make to improve stability?
Show answer
Here are several possible adjustments:
- Lower the Tripod: Reduce the tripod's height as much as possible, collapsing the thinnest leg sections first. A lower center of gravity is more resistant to wind.
- Don't Use the Center Column: Ensure the center column is fully lowered.
- Add Weight Correctly: Instead of hanging your camera bag from the tripod's center hook (where it can swing like a pendulum), place the bag on the ground and use a strap or bungee cord to pull down on the center of the tripod, anchoring it securely.
- Check Your Surface: Make sure the tripod feet are firmly planted on the most solid ground available, perhaps on a patch of pavement instead of soft grass.
Conclusion
You now understand both the artistic purpose of a static shot and the technical discipline required to execute it. By mastering the use of a tripod, you've built the foundation for all the camera work that follows. Stable footage is a mark of professionalism that instantly elevates the quality of your films and videos.
Key Takeaways:
- A static shot is a powerful narrative choice that directs audience focus and builds mood.
- A tripod is essential for achieving truly stable, professional-looking static shots.
- Maximum stability comes from a wide base, using the thickest leg sections, and keeping the center column down.
- "Tripod discipline" means finding stable ground, balancing your gear, tightening all locks, and keeping your hands off during the shot.
Next Lesson Preview:
Now that you can lock down a perfectly stable shot, it's time to learn how to move the camera with intention and control. In our next lesson, we will focus on how to "Perform smooth pan and tilt movements with controlled speed," turning your stable platform into a tool for dynamic visual storytelling.