Hello! Welcome back to our module on "Sound for Film."
In our last lesson, we focused on the physical art of placing microphones—positioning booms for natural sound and concealing lavaliers for consistent dialogue. You've learned how to get the mic in the right spot. Now, we need to ensure the audio signal it captures is recorded perfectly.
This lesson addresses the next crucial step in the audio chain. By the end of our session, you will be able to set recording levels to avoid clipping and excessive noise. Mastering this technical skill is fundamental. It's the difference between audio that is clean, clear, and ready for post-production, and audio that is either unusably distorted or buried in background hiss.
The "Goldilocks Zone" of Audio Recording
Think of setting audio levels like finding a "Goldilocks zone": you want it not too hot (loud), and not too cold (quiet), but just right.
- Too Hot (Too Loud): If the signal is too strong, it will exceed the maximum level your recorder can handle. This results in clipping, a nasty digital distortion that permanently damages the audio.
- Too Cold (Too Quiet): If the signal is too weak, it will be very close to the natural background noise of your equipment and environment (the noise floor). When you boost the volume in your editing software later, you'll also boost all that unwanted noise, resulting in a hissy, unprofessional sound.
Our goal is to find the sweet spot that gives us a strong, clean signal with enough safety margin to handle unexpected loud noises.
Understanding Audio Levels and Meters
Before we can set levels, we need to understand how they are measured and displayed. In the digital world, audio levels are measured in decibels full scale (dBFS or just dB). It's a negative scale where 0 dB is the absolute maximum level. Anything above 0 dB is clipped.
Your camera or audio recorder will have a level meter to show you how loud your signal is. Let's look at how to read one.
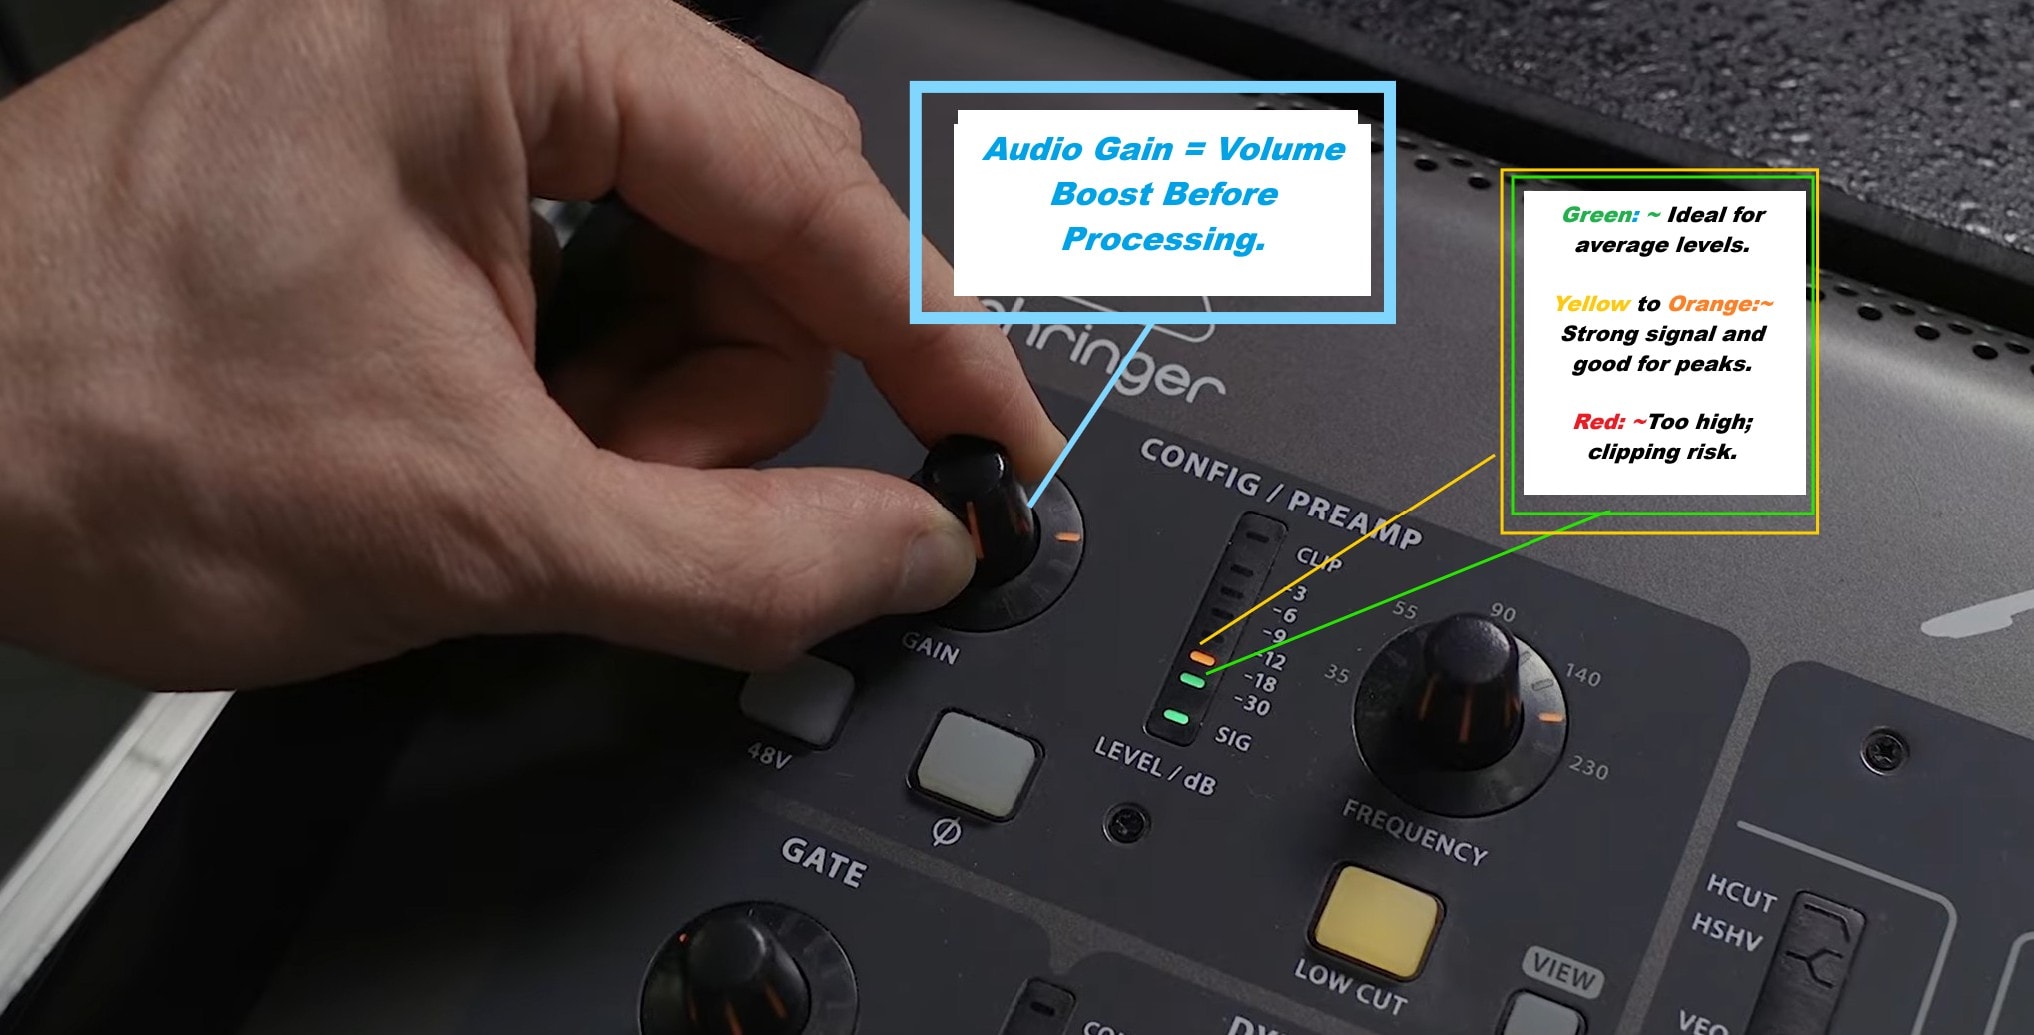

To get a foundational understanding of these concepts, let's start with a quick read.
Audio For Film 101: A Vlogger's Guide to Better Sound
The article 'Audio For Film 101' from RØDE provides an excellent explanation of audio levels, decibels, and how to interpret level meters.
Please read the section 'Thinking About Audio Levels When Recording'. It starts just after the first image in the article. Focus on understanding the concepts of the dB scale, clipping (the 'red zone'), and 'headroom'—the safety space you leave between your loudest signal and 0 dB.
Finding the Sweet Spot: Target Levels
So, what numbers should you aim for? While there's a general consensus, you'll find slightly different recommendations from various professionals. The underlying principle, however, is always the same: record as loud as you can without risking clipping, leaving sufficient headroom.
Let's watch a video from audio professional Curtis Judd as he explains his philosophy and target levels for dialogue.
Setting Input Level for Better Dialogue Audio
In 'Setting Input Level for Better Dialogue Audio', Curtis Judd breaks down the logic behind choosing a target level and provides a solid rule of thumb.
Please watch two short segments: First, watch the 'short version' from 00:22 to 01:22. He gives a great general rule for dialogue peaks. Then, watch from 05:34 to 07:21 where he outlines his refined strategy for setting input gain. Notice how he talks about the peaks of the voice hitting a certain range. This is the key.
As you saw, a common and safe target is to have the peaks of a person's normal speech hitting between -12 dB and -8 dB.
Other sources might give a slightly different range. For example, the guide "How to Record Audio for Film" suggests peaks between -6 dB and -12 dB. Don't let this variation confuse you. The key is that they all agree on keeping peaks well below 0 dB while staying far above the noise floor.
The -12 dB to -8 dB range is an excellent starting point for your projects. It provides a strong signal and plenty of headroom for unexpected laughs, shouts, or other loud sounds.
The Practical Workflow: How to Set Your Levels
Now let's walk through the step-by-step process of setting your levels on set. This is a procedure you will perform before every single take.
This next video demonstrates the process using a Zoom H5, a very popular audio recorder for filmmakers, but the principles apply to any camera or recorder with manual audio controls.
How to set the Gain / Levels on your Zoom H5 for Voice Recording
The video 'How to set the Gain / Levels on your Zoom H5' provides a clear, practical demonstration of adjusting gain while monitoring the levels.
Watch from 02:24 to 04:41. The presenter does exactly what you'll need to do on set: He speaks into the mic and sees the level is too low. He adjusts the gain knob and checks again. He speaks loudly to test the peaks and finds the level is too high (clipping). He backs it off to find the final 'just right' level, explaining the concept of headroom.
Here is a summary of your workflow for setting levels:
- Connect and Monitor: Plug in your microphone and, most importantly, plug in your headphones. You must listen to what you're recording. We'll cover this in detail in the next lesson.
- Get a Level Check: Ask your actor to speak the dialogue from the scene. It's important they use the same volume and tone they will use during the performance. Reading from a book or just chatting might not give you an accurate level.
- Adjust the Gain: While they are speaking, watch your audio meter. Turn the gain/level knob up or down until their average speech is hovering somewhere around -20 dB to -18 dB.
- Check the Peaks: Watch for the loudest parts of their speech (the peaks). These should be landing consistently in that -12 dB to -8 dB range.
- Test the Limits: Ask your actor to laugh or speak a line much louder than normal. Watch the meter to see where this loudest sound lands. It should still be safely below 0 dB. This confirms you have enough headroom.
Test your understanding!
During a level check, you've set your actor's normal speaking voice to peak nicely at -10 dB. Why is it still important to ask them to laugh or shout before you start recording?
Show answer
It's crucial because the actor's performance will be dynamic. While their normal dialogue might be at a perfect level, a sudden laugh, shout, or moment of excitement could be much louder. Asking them to perform that louder sound ensures your levels can handle the performance's full dynamic range without clipping. If the shout causes the meter to hit the red (0 dB), you know you need to lower your gain slightly to create more headroom.
Essential Safety Nets
Even with careful level setting, unexpected things can happen. Thankfully, modern recorders and cameras often have built-in tools to help you protect your audio.
The #1 Enemy: Automatic Gain Control (AGC)
First, a crucial warning. Many consumer cameras (DSLRs, mirrorless) have a feature called Automatic Gain Control (AGC) turned on by default. You must turn this off.
Audio For Film 101: A Vlogger's Guide to Better Sound
Let's return to the RØDE article to understand why AGC is so detrimental to good audio.
Please read the section 'Remember To Turn Off AGC'. It clearly explains how this 'helpful' feature can actually ruin your audio by making background noise loud and causing inconsistent levels.
Always dig into your camera's menu and set the audio recording mode to "Manual."
Helpful Recording Tools
Now, for the tools that actually help.
How to Record Audio for Film: A Beginner's Guide
The guide 'How to Record Audio for Film' explains three fantastic features that can act as a safety net: Low-Cut Filters, Limiters, and Dual Recordings.
Read the subsections on 'Low-Cut Filters', 'Limiters', and 'Dual Recordings'. You don't need to be an expert yet, just understand the basic function of each: Low-Cut Filter: Removes low-frequency rumble (like A/C or traffic). Limiter: Acts like a safety brake, preventing sudden loud sounds from clipping. Dual Recording: Records a second 'safety' track at a lower volume, giving you a backup if your main track clips.
When available, using a low-cut filter and a limiter is good practice. If your recorder offers dual-channel recording, it's an invaluable feature that can save a take.
Conclusion
You now have a complete framework for setting proper recording levels. This is a non-negotiable skill for anyone serious about creating content with high production value. Bad audio can make an otherwise beautiful film unwatchable.
Key Takeaways:
- The Goal: Record a clean, strong signal that avoids both clipping (distortion) and the noise floor (hiss).
- The Target: Aim for dialogue peaks to fall between -12 dB and -8 dB. This provides a healthy signal with ample headroom.
- The Process: Always perform a level check with your talent using their performance voice. Adjust gain, check peaks, and test for the loudest possible sounds.
- The Golden Rule: Always disable Automatic Gain Control (AGC) on your camera and set levels manually.
- The Safety Nets: Use tools like low-cut filters, limiters, and dual-channel recording when available to protect your audio from unexpected problems.
Next Lesson Preview:
Setting your levels by watching a meter is only half the battle. Are you recording the dialogue, or the sound of the microphone rubbing on a shirt collar? Is there a high-pitched whine from a refrigerator that you didn't notice? In our next lesson, we will focus on the most important monitoring tool you have: your ears. We'll cover how to monitor audio in real-time using headphones to catch issues during recording.