Hello! Welcome back to our module on "Sound for Film: On-Set Audio Recording."
In our last lesson, we focused on the technical process of setting your audio levels. You learned how to read a meter and adjust the gain to find that "Goldilocks zone" between -12 dB and -8 dB, ensuring your audio is free from clipping and excessive noise. But watching a meter only tells you how loud the sound is; it tells you nothing about what that sound actually is.
This lesson addresses the other, equally critical, half of the equation: listening. By the end of our session, you will be able to monitor audio in real-time using headphones to catch issues during recording. Failing to do this is one of the most common mistakes that separates amateur content from professional work. For your goal of creating compelling short films and YouTube videos, mastering this skill is non-negotiable.
The Most Important Rule of Audio Recording
Imagine a cinematographer deciding to shoot an entire scene with their eyes closed, just trusting that the camera was pointed in the right direction. It sounds absurd, yet countless aspiring filmmakers do the audio equivalent every day.
Let's start with a video that makes this point perfectly clear.
How do I record good audio for my film? Top tips for budget filmmaking
In this short clip from 'How do I record good audio for my film?', filmmaker Steve Ramsden explains why not monitoring your audio is like filming with your eyes shut.
Please watch from 05:32 to 06:01. Pay close attention to the analogy he uses and his point about the consequences of discovering audio problems later.
As he states, discovering a problem in post-production means you have to do it all again. For a short film, this could mean re-assembling actors and crew. For a YouTube video, it might mean a great take is completely unusable. Real-time monitoring with headphones is your only defense against this.
What Are You Listening For? A Sound Recordist's Checklist
Your brain is incredibly good at filtering out unimportant sounds. A humming refrigerator, distant traffic, or the faint buzz of a light fixture might be completely ignored by you on set. A microphone, however, hears everything. When you monitor with headphones, you are forcing yourself to hear what the microphone hears.
Your job is to become an active, critical listener. Here is a checklist of common problems to listen for.
1. Equipment and Connection Issues
These are technical gremlins that can appear at any time.
- Cable static or crackle: A loose or faulty cable (especially the 1/8-inch mini-plugs on many cameras) can introduce static, crackles, or pops.
- Wireless interference: If you're using wireless microphones, you might hear static, strange digital artifacts, or complete signal dropouts from radio frequency (RF) interference.
- Hum or Buzz: Often caused by electrical issues, such as power cables running too close to audio cables.
- Dying Batteries: Can cause distortion or other strange sounds in wireless transmitters or audio recorders.
The article below expands on how headphones are essential for spotting these technical problems before they ruin a take.
Sound Advice: Headphones for the Videomaker
The article 'Sound Advice: Headphones for the Videographer' from Videomaker provides a practical overview of how headphones are used in production.
Please read the section titled 'Using Your Headphones'. Focus on the first paragraph, which lists several key issues (bad connections, dead batteries, wireless interference) that monitoring helps you identify.
2. Microphone-Specific Problems
These issues relate directly to how the microphone is being used or placed.
- Wind Noise: Even a light breeze can cause a low-frequency rumbling on an unprotected microphone.
- Clothing Rustle: A very common issue with lavalier microphones. You'll hear the scratchy sound of fabric rubbing against the mic capsule.
- Handling Noise: If you or a boom operator are holding the microphone, any movement of the hands on the pole or mic body can be transmitted as a low thumping sound.
- Plosives and Sibilance: Plosives are the pops caused by blasts of air from 'p' and 'b' sounds hitting the mic. Sibilance is the harsh, hissy sound from 's' and 'sh' sounds. While some of this is fixed in post-production, severe cases are best caught on set.
3. Unwanted Environmental Noise
This is the category of sounds your brain tunes out, but the microphone captures perfectly.
- Interior Noise: Air conditioners, refrigerators, computer fans, buzzing lights.
- Exterior Noise: Distant sirens, airplanes, traffic, construction, dogs barking, neighbors.
- Unintended Background Conversations: People talking in another room can be more audible than you think.
This next article provides a fantastic, detailed list of these unwanted sounds.
How to monitor audio for better sounding video
Let's look at the article 'How to monitor audio for better sounding video' to build out our checklist of what to avoid.
Read the section 'What you don’t want'. It gives a comprehensive list of equipment woes, dialogue issues like plosives, and a great bullet-point list of background noises to avoid.
Test your understanding!
You are recording a dialogue scene in a kitchen. Through your headphones, you hear the actor's lines clearly, and the audio levels on your recorder are peaking perfectly at -10 dB. However, you also notice a persistent, low hum. Why should you stop and investigate this hum, even if the dialogue sounds fine?
Show answer
The hum is likely from the kitchen's refrigerator or another appliance. While you might be able to filter it out in post-production, it's always better to solve the problem at the source. The hum adds to the overall noise floor, and the process of removing it can sometimes negatively affect the quality of the dialogue. The professional approach is to identify the source (the refrigerator) and, if possible, unplug it for the duration of the take to get the cleanest possible recording.
The Right Tool for the Job: Production Headphones
Just as you wouldn't use any random lens for a specific shot, you shouldn't use just any headphones for monitoring. The goal is not a "pleasant" listening experience, but an accurate one that reveals flaws.
Let's watch a detailed breakdown of headphones for filmmakers.
Headphones for Filmmakers: My Impressions of 7 Headphones
Audio expert Curtis Judd provides an in-depth look at 'Headphones for Filmmakers'. This video is a fantastic guide to the different types of headphones and what makes them suitable for production sound.
We'll watch this in a few parts. Focus on the core concepts: Introduction (00:00 - 01:54): Pay attention to the distinction between closed-back and open-back headphones and why one is preferred for recording. The Purpose of Monitoring (06:53 - 08:06): Listen for his explanation of what you're trying to achieve with monitoring and the idea of having headphones you can 'trust'. Over-ear vs. On-ear (11:15 - 11:49): Understand why over-ear headphones are generally better for production sound mixers. Noise-Cancelling Headphones (23:30 - 24:21): Note his strong recommendation against using noise-cancelling features while recording.
Here's a summary of the key characteristics of good production headphones:
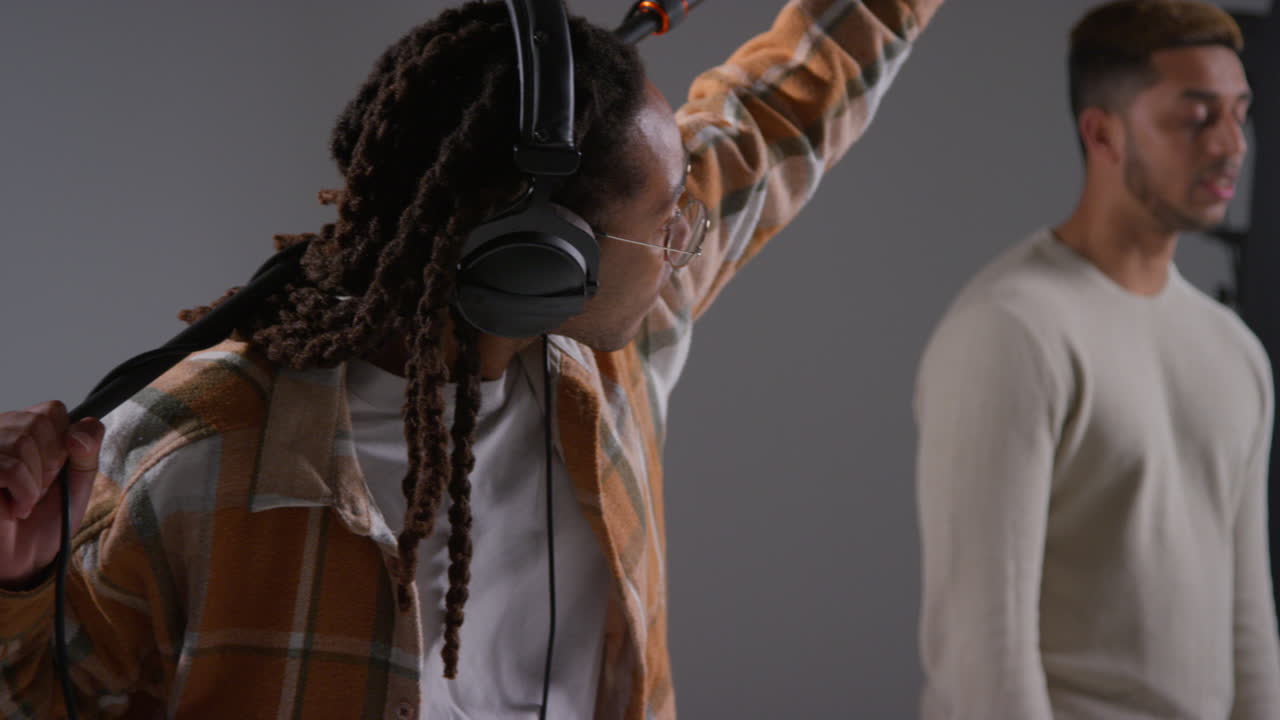
- Type: Closed-Back, Over-Ear.
- Closed-back designs are essential. They isolate you from the surrounding environment, ensuring you're hearing the signal from the microphone, not a mix of the mic and the live sound in the room. They also prevent sound from leaking out of your headphones and into the microphone, which is critical when recording quiet scenes.
- Over-ear (circumaural) designs are generally preferred over on-ear designs because they create a better seal for isolation and are more comfortable to wear for long periods.
-
Avoid Consumer Features:
- Noise-Cancelling: As Curtis Judd and the Videomaker article both warn, you should never use the noise-cancelling feature when monitoring for recording. The electronics that cancel noise also alter the audio signal, which means you're not hearing a true representation of your recording. They might even hide a low-frequency hum that you need to be aware of.
- Wireless/Bluetooth: Avoid Bluetooth headphones for monitoring. The signal is compressed and has a slight delay (latency), so you're not hearing the full quality audio in perfect real-time. Stick to wired headphones.
-
Trustworthiness over "Best Sound": As highlighted in the video, you don't necessarily need the best-sounding, most expensive headphones. You need a pair you can trust to accurately reveal problems like hum, hiss, and distortion. Industry standards like the Sony MDR-7506 (mentioned in the video) are popular not because they sound beautiful, but because they are durable, comfortable, and reliably expose flaws in the audio.
Conclusion
You now understand that the audio meters and your ears work as a team. The meters tell you if the signal is too loud or too quiet, while your headphones tell you if the signal is clean. Integrating this practice into your workflow is a massive step toward achieving professional sound in your films.
Key Takeaways:
- Don't record with your ears closed. Monitoring with headphones is as vital as looking through the viewfinder.
- The goal is to catch problems on set, not discover them later in the edit when it's too late.
- Listen actively for a checklist of issues: equipment noise (hum, static), microphone problems (wind, rustle), and environmental sounds (A/C, traffic).
- Use the right tool: Your monitoring headphones should be wired, closed-back, and over-ear for the best isolation and comfort. Avoid using noise-cancelling or Bluetooth headphones for this task.
Next Lesson Preview:
We've spent this lesson discussing all the unwanted sounds you need to listen for and eliminate. But what about the sound of the room itself? Sometimes, silence isn't truly silent, and capturing the unique "silence" of a location is crucial for smooth editing. In our next lesson, we'll cover how and why to record dedicated room tone for use in post-production.