Introduction
Welcome to the next lesson! In our last session, you configured a service principal, creating a secure, non-human identity for running automated processes. This was a crucial step in setting up a production-ready environment. Now, it's time to build the automation that this service principal will execute.
This lesson directly addresses the learning outcome: Create and configure multi-task jobs in Databricks Workflows. Databricks Workflows is the native orchestration tool within the Lakehouse platform, conceptually similar to other orchestrators you're familiar with, like Airflow. It allows you to define, schedule, and monitor complex data processing pipelines.
Today, we will cover:
- The basic components of a Databricks Workflow: Jobs and Tasks.
- A hands-on exercise to create a multi-task job using two separate notebooks.
- Key configuration options for tasks, including compute (job clusters vs. all-purpose clusters) and parameters.
- How to run your job and monitor its execution.
By the end of this lesson, you'll have built and run your first multi-task job, a foundational skill for orchestrating any data engineering pipeline on Databricks.
1. The Anatomy of a Databricks Workflow
At its core, a Databricks Workflow is an orchestrator. It acts like a conductor, ensuring that each part of your data pipeline runs in the correct order and at the right time. The main components are:
- Job: A job is the top-level container for a workflow. It defines the overall process you want to automate, such as a daily ETL pipeline or a model retraining process.
- Task: A task is a single unit of work within a job. A job is composed of one or more tasks. Each task executes a specific piece of code, such as a Databricks notebook, a Python script, a SQL query, or a dbt model.
A key advantage of Databricks Workflows is its ability to orchestrate a wide variety of task types, allowing you to unify your entire data and AI lifecycle within a single tool.
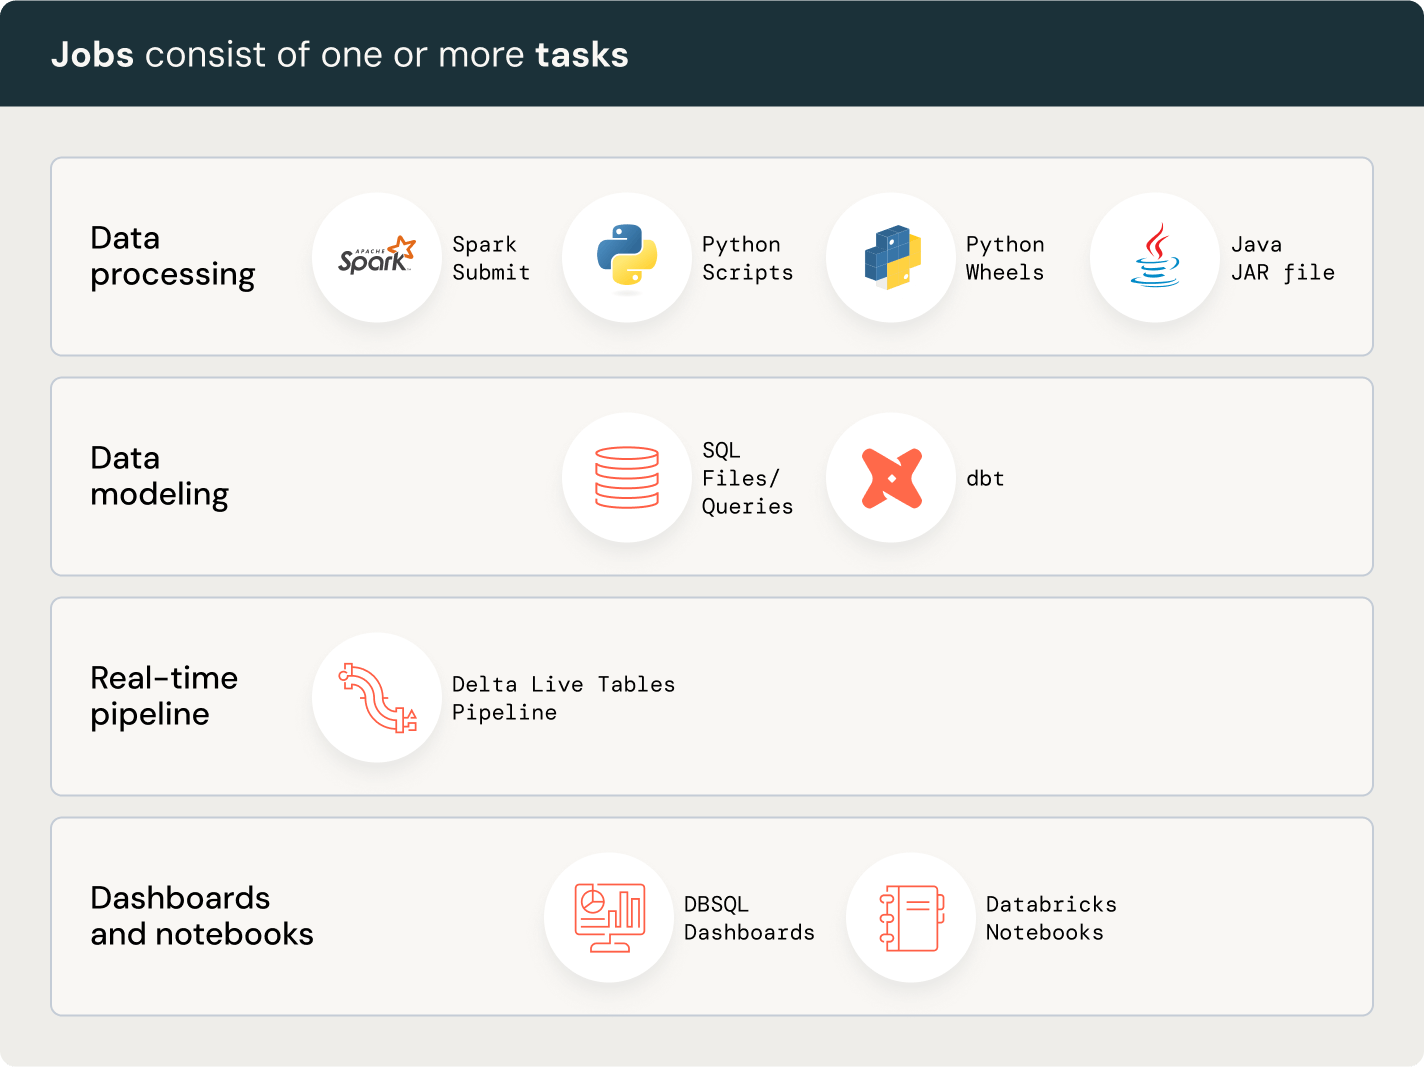
For a quick conceptual overview of how these pieces fit together, watch the first part of the following video.
83. Databricks | Pyspark | Databricks Workflows: Job Scheduling
The video 'Databricks | Pyspark | Databricks Workflows: Job Scheduling' from the Raja's Data Engineering channel provides a clear introduction to the concept of workflows, jobs, and tasks.
Watch the segment from the beginning until 01:41. Focus on how the video defines the relationship between jobs and tasks and the purpose of setting up dependencies.
2. Hands-On: Creating Your First Multi-Task Job
Let's put theory into practice. You will now create a simple, two-task job. The first task will retrieve a public dataset, and the second task will read and filter that data. This hands-on approach aligns with your preference for practical learning.
We'll follow the excellent quickstart guide from the official documentation.
Create your first workflow with Lakeflow Jobs - Azure Databricks
The article 'Create your first workflow with Lakeflow Jobs' provides a step-by-step walkthrough. We'll start by creating the two notebooks that will serve as our tasks.
Follow the instructions in the 'Create notebooks' section to create two separate notebooks in your workspace. The first, 'Retrieve name data', fetches a CSV file. The second, 'Filter name data', reads this data and uses a widget to filter it. Note: This example uses Unity Catalog volumes. Ensure you have the necessary permissions or adjust the file paths to a location you can write to, like the Databricks File System (DBFS) /tmp/ directory if needed.
Now that you have your two notebooks, you can create a job to orchestrate them. The second task will depend on the first one completing successfully.
Create your first workflow with Lakeflow Jobs - Azure Databricks
Continuing with the same guide, you will now create the job and add your two notebooks as sequential tasks.
Follow the instructions in the 'Create a job' section. You will: Create a new job and name it. Create the first task, retrieve-baby-names, using your first notebook. Create the second task, filter-baby-names, using your second notebook. Notice that a dependency on the first task is automatically created. Add the year parameter with a value of 2014 to the second task. This demonstrates how to parameterize your tasks.
After completing these steps, your job UI should look similar to this, showing a clear, linear dependency between your tasks.
3. Key Configuration Settings for Tasks
You've just configured a basic job, but professional data engineering requires a deeper understanding of the available settings. Let's explore some of the most important ones.
Compute: Job Clusters vs. All-Purpose Clusters
When configuring a task, you must specify the compute resource it will run on. You have two main choices:
- All-Purpose Cluster: An interactive cluster that you create and manage manually. These are great for development and ad-hoc analysis in notebooks but are more expensive and less efficient for automated jobs.
- Job Cluster: A cluster whose lifecycle is tied to a job run. It is created just-in-time for the job, runs the tasks, and terminates automatically upon completion. This is the recommended and most cost-effective option for production jobs.
Your experience with infrastructure on AWS and GCP highlights the importance of ephemeral resources; job clusters follow this best practice.
The following video segment explains this distinction and shows you where to configure it.
22 Workflows, Jobs & Tasks | Pass Values within Tasks | If Else Cond | For Each Loop & Re-Run Jobs
Let's watch a segment from the '22 Workflows, Jobs & Tasks' video by Ease With Data. It provides a concise explanation of job clusters.
Watch from 02:42 to 03:00. Pay attention to the benefits of a job cluster—specifically, that it terminates automatically when the job is finished, saving costs.
Parameters
In the hands-on exercise, you passed a static year parameter to your second task. This is a powerful feature for making your jobs reusable and dynamic. You can parameterize things like input/output paths, filter conditions, or processing dates. In more complex workflows, you can even pass outputs from one task as inputs to another, a topic we'll explore later.
Dependencies
You saw that Databricks automatically created a dependency, making your second task wait for the first to succeed. This "Depends On" setting is the foundation of orchestration. By default, a task runs only when all its dependencies have succeeded. We will dive much deeper into building complex dependency graphs (e.g., parallel tasks, conditional branching) in our next lesson.
4. Running and Monitoring Your Job
A job definition is just a blueprint. To execute it, you need to trigger a run.
First, let's run the job you just created.
Create your first workflow with Lakeflow Jobs - Azure Databricks
The final step in the quickstart guide is to run the job and view the results.
Follow the instructions in the 'Run the job', 'View run details', and 'Run with different parameters' sections. This will show you how to start a run, inspect the output of each task, and trigger a new run with a different parameter value.
In a production environment, jobs will sometimes fail. A crucial skill is knowing how to diagnose and re-run only the failed parts of a pipeline, rather than starting over from scratch. Databricks Workflows has a "Repair run" feature for this.
This next video demonstrates how to monitor a run and use the repair feature.
22 Workflows, Jobs & Tasks | Pass Values within Tasks | If Else Cond | For Each Loop & Re-Run Jobs
Let's return to the '22 Workflows, Jobs & Tasks' video. It shows a live run of a multi-task job, including how to handle a failure.
Watch the segment from 18:17 to 20:35. Focus on how you can click into a run to see the status of each task, identify which one failed, and then use the 'Repair run' button to re-execute only the failed and subsequent tasks after fixing the underlying issue.
Conclusion
Congratulations! You have successfully created, configured, and run a multi-task job in Databricks Workflows. You've moved from creating an identity for automation to building the automation itself.
Key Takeaways:
- Databricks Workflows is a native orchestrator for defining jobs composed of multiple tasks.
- Tasks can be of various types, including Notebooks, Python scripts, SQL queries, and more, allowing you to orchestrate diverse data pipelines.
- For production jobs, it's a best practice to use Job Clusters, which are ephemeral and cost-effective compute resources tied to a job run.
- You can make your jobs dynamic and reusable by configuring parameters for your tasks.
- The Runs tab is your central hub for monitoring job executions, viewing task outputs, and repairing failed runs.
Preview of the Next Lesson:
In this lesson, you created a simple linear workflow where one task follows another. In our next lesson, we will expand on this by learning how to set up task dependencies and execution order within a job. You'll learn how to build more complex workflows with tasks that run in parallel and how to implement conditional logic, which are essential patterns for building sophisticated, real-world data pipelines.