Hello! In our previous lessons, we successfully connected to an external API, fetched data, and displayed it dynamically on your pages. This is a huge step. However, real-world applications must be resilient. External services can fail, and our app needs to respond gracefully instead of breaking.
This lesson addresses that exact challenge. We will focus on implementing basic error handling for failed API calls. You will learn how to catch these errors and present a clear, user-friendly message instead of the default, unstyled browser alert. Mastering this will make your multi-tool platform more professional and reliable for your users.
When Good APIs Go Bad
Before we dive into the "how," let's quickly understand the "why." An API call can fail for many reasons:
- The external service's server might be temporarily down.
- Your request might have an error (e.g., a wrong parameter).
- The specific data you requested might not exist (a "404 Not Found" error).
- Your API key could be invalid or expired.
By default, when a Bubble workflow encounters such an error, it simply stops and shows a generic browser pop-up. This isn't a great experience. We can do much better. Bubble provides two main strategies for managing these situations, and we'll explore both.
Strategy 1: Let the Workflow Continue and Check for Errors
The first approach involves telling Bubble not to halt the workflow on an API error. Instead, we let the workflow continue and use conditional logic to react to the error. The key to this strategy lies in a specific setting within the API Connector.

By checking this box for a specific API call, you are telling Bubble: "If this call fails, don't stop everything. Just package the error information into the response and let me decide what to do next in the workflow."
Once this is enabled, the output of your API call step will include information about the error, such as a boolean (has_error) and the HTTP status code (status_code). You can then use this in subsequent workflow steps.
How to handle errors in API workflows on Bubble.io?
This guide from RapidDev provides a concise overview of using this conditional approach.
Please read the section under the heading Implementing Error Handling. Focus on the example provided. It shows how you can add an action that runs only when the API response contains a specific error code, like 404.
This method is powerful when you need to handle a specific, predictable error. For example, if you know a "404 Not Found" error is common, you could create a specific workflow action to inform the user that the item they searched for doesn't exist. However, for handling any unexpected error, our next strategy is often more effective.
Strategy 2: The Global Error Catcher
A more robust and user-friendly approach for client-side errors is to create a "global" error handler for your page. This involves using a special workflow event that triggers whenever an error isn't caught by any other process.
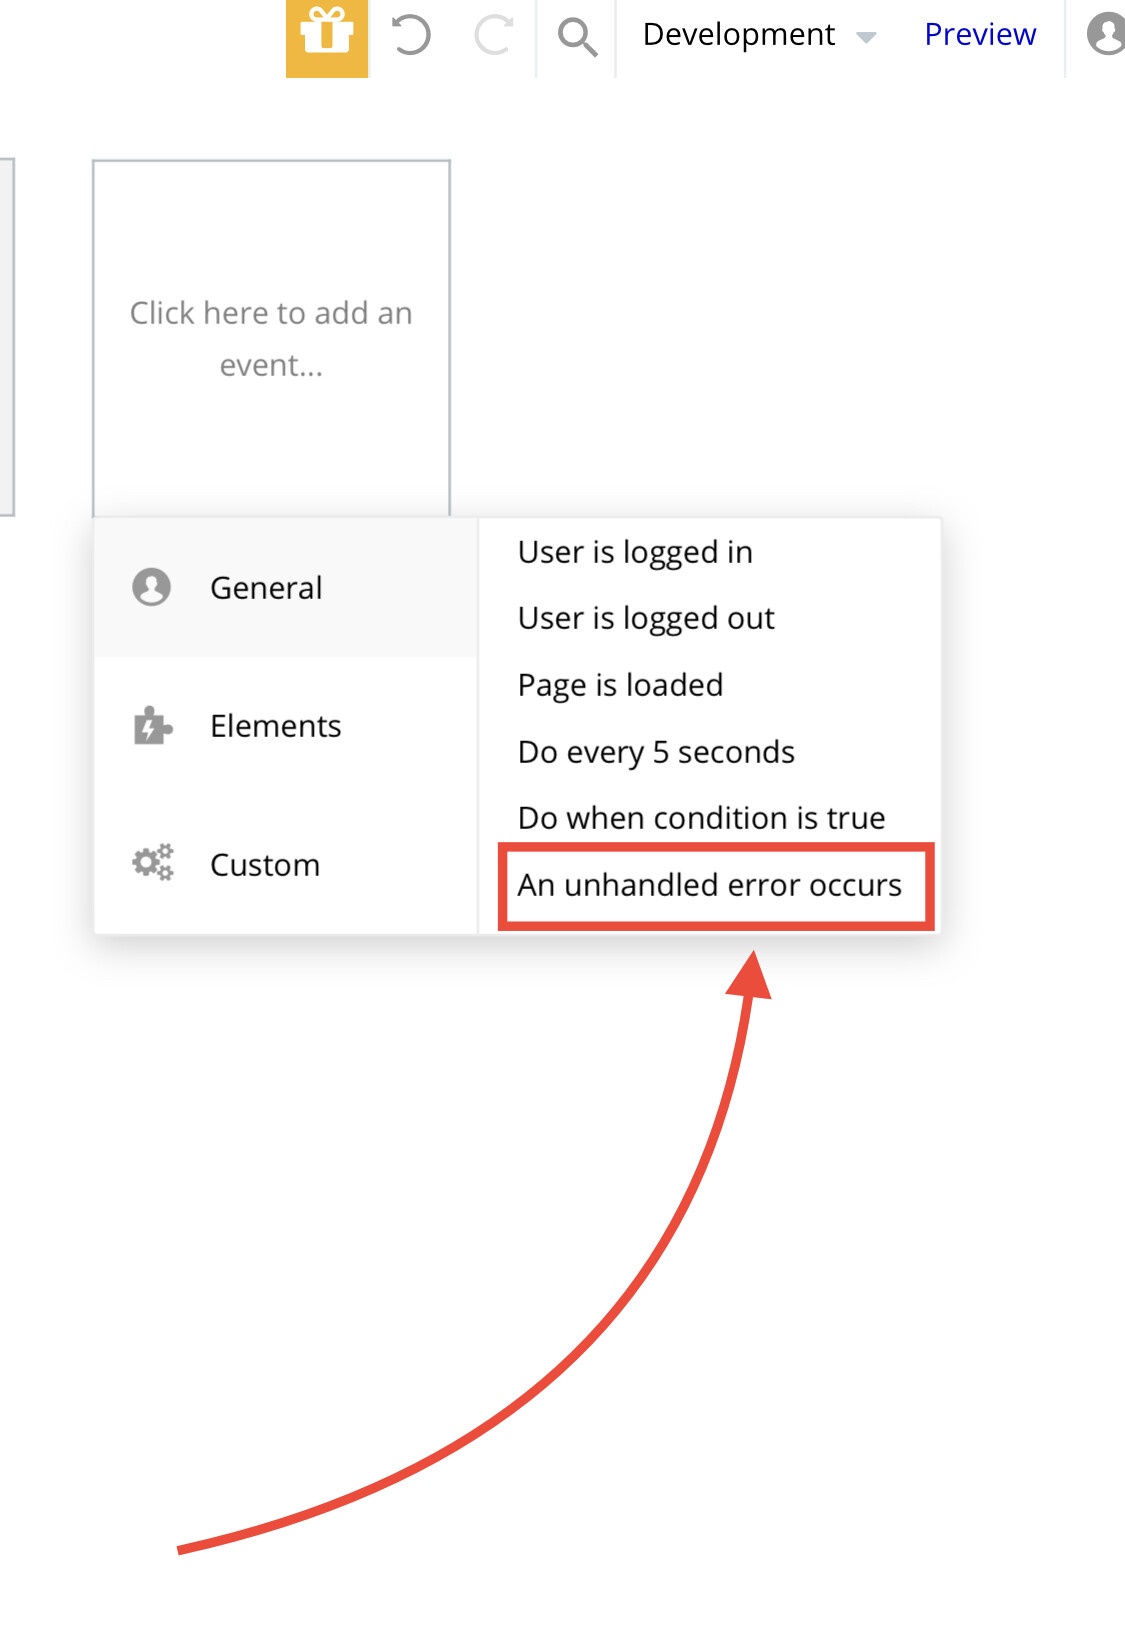
This event is your go-to for creating a consistent and branded error-messaging system. Instead of reacting to individual API calls, you create one workflow that says, "Anytime something goes wrong on this page, do this."
So, what should it do? A great pattern is to:
- Store the error message in a custom state.
- Show a custom-designed pop-up or alert element.
- Display the error message from the custom state in that pop-up.
This gives you full design control over the error message, making it feel like a seamless part of your app. The following video provides a perfect, step-by-step guide to implementing this.
Custom Error Messages | Bubble.io Tutorial
This tutorial from Buildcamp walks you through creating beautiful, custom error messages that replace Bubble's default alerts. It's a fantastic technique for polishing your app's user experience.
Please watch the entire video (it's short!). As you follow along, pay close attention to these key moments: The Event: Watch how the workflow is created using the "An unhandled error occurs" event. The Logic: The core of the technique is explained between setting the state. You'll create a custom state (e.g., on a pop-up element) and set its value to Current workflow's error's message. This dynamic expression is how Bubble gives you the specific error text. The UI: Finally, see how to build and trigger the pop-up that displays the message from your custom state, and how to reset it.
This "unhandled error" method is highly recommended for your multi-tool platform. You can design one error pop-up and reuse it across your entire application, ensuring a professional and consistent user experience no matter what goes wrong.
To fully understand this concept, it's helpful to review Bubble's official documentation on how it categorizes workflow errors.
This section of the Bubble manual explains the different types of error events.
In the documentation, find the "Errors in workflows" heading and read the subsection on Handling errors. This will clarify the distinction between an error tied to a specific element and a general "unhandled" error, reinforcing why the pattern from the video is so useful as a catch-all solution.
Conclusion
You've now learned how to build a more resilient application by anticipating and handling API errors. This is a hallmark of a professional developer and a crucial skill for building a reliable platform that users can trust.
Let's summarize the key takeaways:
- API calls can fail for various reasons, and default error handling provides a poor user experience.
- You can use the "Include errors in response" setting in the API Connector to check for specific error conditions within a workflow.
- A more robust, global approach is to use the "An unhandled error occurs" event to trigger a custom workflow.
- The best practice is to store the
Current workflow's error's messagein a custom state and display it in a custom-designed pop-up or alert.
With this lesson, we've completed our module on integrating external services with APIs. You can now connect to third-party data, display it dynamically, and manage failures gracefully.
In our next module, we will explore another powerful form of integration: embedding custom code. You'll learn how to find suitable open-source tools on platforms like GitHub and embed them directly into your Bubble pages, opening up a new world of possibilities for your multi-tool platform.