Hello! In our last lesson, we discussed the two essential tools for any web developer: the code editor for writing code and the web browser for viewing it. You learned that we'll be using Visual Studio Code as our digital workshop.
Today, we move from theory to practice. This lesson is all about setting up that workshop. By the end of this session, you will have successfully installed Visual Studio Code on your computer and configured a few key settings to make it a comfortable and efficient place to work. This is a crucial step in preparing your own professional development environment, getting you ready to start building your journalism blog.
1. Installing Visual Studio Code
First things first, let's get the software on your computer. Visual Studio Code (or VS Code for short) is a free, powerful, and very popular code editor created by Microsoft. It's available for Windows, macOS, and Linux.
For detailed, step-by-step written instructions on how to download and install VS Code for your specific operating system, the following guide from Codecademy is an excellent resource.
Visual Studio Code: How to Use
This article, 'Getting Started with Visual Studio Code', provides clear, written instructions for installation. It's a great reference to follow along with at your own pace.
Please read the section titled 'II. Installing Visual Studio Code'. Follow the steps carefully for your operating system (Windows, Mac, or Linux).
If you prefer a video walkthrough, the first minute of this video by Kevin Powell (whom we met in the last lesson) will guide you through the process. He makes an important point about choosing the right software.
How to get started with VS Code
Watch this short clip to see the download and installation process. Pay close attention to his advice on picking 'Visual Studio Code' (with the blue logo), not 'Visual Studio' (with the purple logo).
Watch from 0:32 to 1:06.
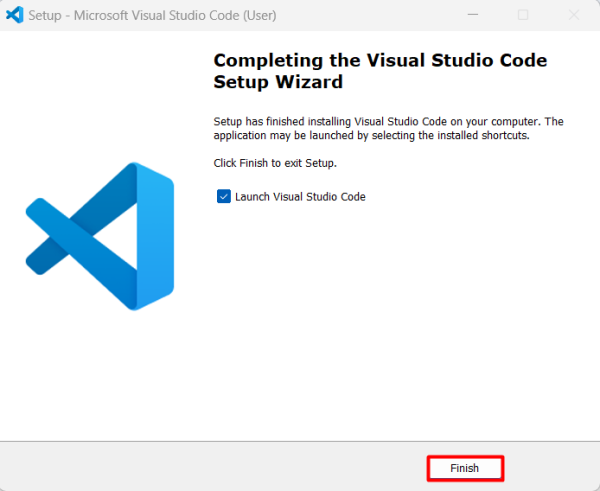
Once the installation is complete, you should see a final screen confirming its success. For Windows users, it will look something like this:
2. Your First Look and Essential Configuration
When you open VS Code for the first time, you'll be greeted by a Welcome screen. It can feel like there's a lot going on, but we'll focus on just a few things to get you started.
A Quick Tour and Basic Settings
A few small adjustments can make a big difference in your day-to-day coding experience. Let's change a few settings to make the editor more comfortable. The settings can be accessed from the menu (File > Preferences > Settings on Windows/Linux or Code > Preferences > Settings on Mac) or by using the keyboard shortcut Ctrl+, (Windows/Linux) or Cmd+, (Mac).
This video provides a great tour of the settings you might want to tweak.
Visual Studio Code Web Dev Setup In 6 Minutes
In this video, 'Visual Studio Code Web Dev Setup In 6 Minutes', the presenter quickly walks through the user interface and some highly recommended initial settings.
Watch from 1:29 to 3:20. Pay attention to how he accesses the settings and which ones he recommends changing: 'Font Size', 'Tab Size', and 'Word Wrap'.
Based on the video, here are the three settings I recommend you adjust now:
- Font Size: In the settings search bar, type
font sizeand change the number to something comfortable for your eyes. You'll be spending a lot of time reading code, so don't strain your eyes! Something between 18 and 22 is often a good starting point. - Tab Size: Search for
tab size. The default is 4, but many web developers prefer 2. This controls how much space is created when you press the Tab key. A smaller size helps keep your code from shifting too far to the right as you nest elements. - Word Wrap: Search for
word wrapand set it toon. By default, a long line of text will continue off the side of the screen, forcing you to scroll horizontally. Turning word wrap on makes the line break and wrap to the next line, so all your code is always visible.
Test your understanding!
Open the settings in your newly installed VS Code. Find the setting that controls the color theme of the editor and try changing it to the "Light (Visual Studio)" theme. (Don't worry, you can change it back!).
Show answer
You can do this in a couple of ways. One way is to open the Command Palette (Ctrl+Shift+P or Cmd+Shift+P), type "theme", and select "Preferences: Color Theme". From there, you can browse and select different themes. You can also find it in the settings by searching for "Color Theme".
3. Personalizing Your Editor with Themes
As you just saw, you can change the entire look of VS Code with themes. This is more than just a fun feature; choosing a color scheme you like can make coding more enjoyable and less fatiguing. Your interest in art and design might make this a particularly appealing part of setting up your workspace.
Themes are a type of extension—small add-ons that customize or add new functionality to VS Code. There are thousands of themes available to install for free.
Let's watch how to find and install a new theme.
How to get started with VS Code
Kevin Powell's video provides a clear guide on how to browse, install, and apply new themes from the Extensions marketplace within VS Code.
Watch from 10:18 to 12:46. Follow along as he opens the Extensions view, searches for 'theme', and installs a new one. Feel free to browse and find one you like!
Go ahead and explore! Find a theme that you find visually appealing. Some popular ones are "Atom One Dark" (the one Kevin uses), "Cobalt2", "Night Owl", and "Dracula". Don't worry about finding the "perfect" one now; you can easily change it at any time.
We will install other, more functional extensions later in the course as we need them. For now, just knowing how to find and install them is enough.
Conclusion
Great work! You've successfully set up your professional coding environment. You have moved from understanding the concept of a code editor to having a fully functional one on your own computer.
Let's recap what you accomplished:
- You downloaded and installed Visual Studio Code.
- You took a tour of the interface and learned how to access and change settings.
- You personalized your editor by adjusting the font size, word wrap, and color theme.
- You were introduced to the concept of extensions as a way to add features to VS Code.
Your digital workshop is now ready. In our next lesson, we will start organizing your project. You'll learn how to create a dedicated folder for your blog and, most excitingly, create your very first HTML file.