Introduction
In the last lesson, you built the critical entry point for the client onboarding system. By implementing a form-based intake with conditional routing, you translated a key part of your architectural diagram into a functioning workflow that segments clients by service tier. This design-first, modular approach is fundamental to engineering robust systems.
Today, we address the next stage: nurturing the client relationship automatically. Your objective is to implement a personalized, multi-step welcome email sequence with state tracking to manage progress.
A simple sequence using Wait nodes is brittle and opaque. If the workflow fails midway, the client is lost in limbo with no recovery path. A production-grade system requires a more resilient architecture. We will implement this using a Finite State Machine (FSM), a core computer science pattern that will be familiar from your engineering studies. By externalizing the client's state into a persistent datastore, we create a system that is trackable, recoverable, and scalable—the clear differentiator between an amateur and a professional automation engineer.
1. The State Machine: Architecting for Resilience
Stateless workflows, like the ones triggered by webhooks, have no memory of past executions. This is a problem for sequences that unfold over time. The solution is to create a "memory" for your system using an external database. For our purposes, a Google Sheet will serve as a robust and free persistence layer.
This architecture, known as a Finite State Machine, involves two key components:
- A State Store: A single source of truth (our Google Sheet) that tracks each client's unique ID, contact info, and their current
statein the onboarding sequence (e.g.,WELCOME_EMAIL_SENT). - A State Processor: A scheduled workflow that reads the state store, identifies which clients are due for the next action, executes that action (sends an email), and—most importantly—updates the client's state in the store.
This model moves logic from a fragile, time-based series of Wait nodes to a resilient, query-based system.
How to build deterministic agentic AI with state machines in n8n
This article, while discussing an AI agent, provides the exact architectural blueprint we will use. It introduces the Finite State Machine (FSM) as a pattern to move beyond stateless webhooks by using a persistent data layer and a 'Router' (a Switch node) to control the application logic deterministically. This is the core theory for today's task.
Read the introduction and the first two steps: 'The architecture: Why state machines?' and 'Step 1: Designing the persistence layer' and 'Step 2: The router (Switch Node)'. Focus on how an external data store (in their case, n8n data tables; in ours, Google Sheets) is used to track state, and how a Switch node acts as a router to direct the flow based on that state. This is the exact pattern we are building.
The article from LogRocket establishes the "why" and "how" of FSMs. It's a professional pattern for any process with defined stages, from AI agents to the client onboarding you're building.
2. The Implementation: Enqueuer and Processor
Our FSM will be implemented across two distinct workflows:
- The
Enqueuer(Modification of your existing workflow): When a client for "Tier 1: SEO Audit" is onboarded, instead of hitting aNoOpnode, the workflow will now add a new row to our Google Sheet state tracker, setting their initial state toQUEUED. - The
Processor(New workflow): A separate, scheduled workflow will run periodically (e.g., once per day). It will get all rows from the sheet, find clients in a pending state, send the appropriate email for that state, and update the row with the new state (e.g., fromEMAIL_1_SENTtoEMAIL_2_SENT) and a timestamp.
This separation of concerns is a critical design principle. The intake workflow's only job is to add clients to the queue. The processor's only job is to process the queue.
For the practical implementation of sending dynamic emails and handling data, this video provides a concise reference.
Master 80% of n8n in 36 Minutes
This video covers the fundamentals of manipulating data and sending personalized emails. It will be a useful practical guide as you build the processor workflow.
Review these three clips. First, watch 06:08-07:37 to refresh on inserting dynamic data into an email body. Second, watch 11:53-18:35 for the pattern of using a Switch node for conditional logic. Finally, review 20:18-22:15, which explains how to read JSON paths and use expressions, which you'll need for our time-based checks.
Practical Task: Build the Stateful Welcome Sequence
Your task is to implement the FSM for the "Tier 1: SEO Audit" client welcome sequence.
Scenario: A Tier 1 client has just been registered via your Tally form. They should now enter a 3-step personalized email sequence spread over several days. The system must track their progress and be resilient to failure.
Phase 1: Design the State Store
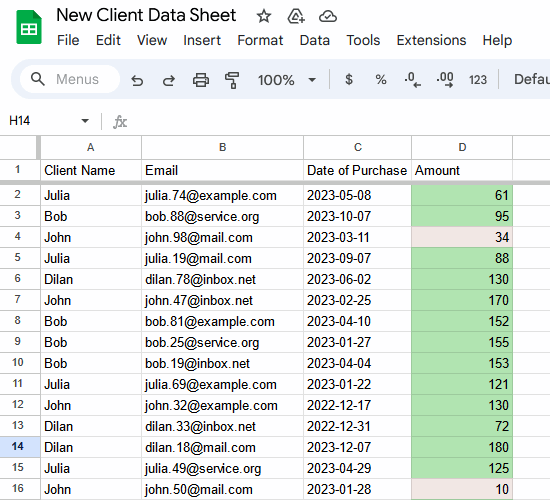
- Create a new Google Sheet named
Onboarding State Tracker. - Set up the following columns in the first row:
ClientID(We will generate this)ClientNameClientEmailServicePackageCurrentStateLastActionTimestampRowNumber(This will be crucial for updating the correct row)
Phase 2: Implement the Enqueuer
- Open the conditional intake workflow you built in the previous lesson.
- Navigate to the branch for
Tier 1: SEO Audit. Delete theNoOpnode. - Generate a Client ID: Add a
Setnode. Create a new valueClientIDand use the expression{{ 'CL' + Date.now() }}to generate a simple, unique ID. - Add to State Tracker: Connect a
Google Sheetsnode.- Authentication: Connect your Google account.
- Operation:
Append or Update Row(this will append by default if no matching key is found). - Sheet ID: Select your
Onboarding State Trackersheet. - Map the columns:
ClientID:{{ $json.ClientID }}ClientName: Map from the Tally trigger data.ClientEmail: Map from yourNormalize Datanode.ServicePackage: Map from the Tally trigger data.CurrentState: Set the string value toQUEUED.LastActionTimestamp:{{ new Date().toISOString() }}
- The
RowNumbercolumn can be left blank for now on append.
Phase 3: Build the Processor Workflow
Create a new workflow named Onboarding Sequence Processor.
-
Trigger: Use a
Scheduletrigger. Set it to run once every day. For testing, you can run it manually. -
Get Clients: Add a
Google Sheetsnode.- Operation:
Get All Rows. - Sheet ID: Select your
Onboarding State Tracker. - Options: Enable
Include Row Number. This is critical.
- Operation:
-
Process One-by-One: Add a
Split In Batchesnode. Leave the batch size at1to process each client's state individually. -
The Router: Add a
Switchnode.- Input Data:
{{ $json.CurrentState }} - Data Type:
String - Create three outputs for the states:
QUEUED,WELCOME_1_SENT,TIP_2_SENT.
- Input Data:
-
Implement State Logic:
-
Path 0 (
QUEUED):- Connect a
Send Emailnode. Send a personalized "Welcome" email. - Connect a
Google Sheetsnode after the email.- Operation:
Update Row. - Sheet ID:
Onboarding State Tracker. - Row Number:
{{ $json.RowNumber }}. - Columns to Update:
CurrentState:WELCOME_1_SENTLastActionTimestamp:{{ new Date().toISOString() }}
- Operation:
- Connect a
-
Path 1 (
WELCOME_1_SENT):- Connect an
Ifnode to check if enough time has passed.- Value 1:
{{ new Date($json.LastActionTimestamp) }} - Operation:
Older Than - Value 2 (Expression):
{{ new Date(new Date().setDate(new Date().getDate() - 2)) }}(This checks if the timestamp is older than 2 days ago).
- Value 1:
- On the
trueoutput of theIfnode, add aSend Emailnode to send "Pro Tip #1". - After the email, add a
Google Sheetsnode to update the row (similar to theQUEUEDpath), settingCurrentStatetoTIP_2_SENTand updating the timestamp.
- Connect an
-
Path 2 (
TIP_2_SENT):- Connect an
Ifnode with similar logic to check ifLastActionTimestampis older than 4 days ago. - On the
trueoutput, add aSend Emailnode to send a "Checking In" email. - After the email, add a
Google Sheetsnode to update the row, settingCurrentStatetoCOMPLETED.
- Connect an
-
Deliverables
- The complete JSON of your modified
Enqueuerworkflow. - The complete JSON of your new
Processorworkflow.
Evaluation Criteria
- Stateful Architecture: The solution correctly uses a Google Sheet as an external state store and separates logic into
EnqueuerandProcessorworkflows. - Correct State Transitions: Manually running the processor workflow correctly moves a client from
QUEUED->WELCOME_1_SENT->TIP_2_SENT->COMPLETEDbased on the defined states and time delays. - Idempotency: Running the
Processormultiple times in a day does not re-send emails because the state and time-check conditions are not met. - Data Integrity: The Google Sheet is accurately updated with the new state and timestamp after each successful action.
Conclusion
You have now moved beyond simple automation and into the realm of systems architecture. By implementing a Finite State Machine with an external state store, you have built a welcome sequence that is not only personalized but also robust, observable, and maintainable—all hallmarks of a production-ready system. This pattern of a queue processed by a scheduled, state-aware worker is one of the most powerful and reusable in your arsenal.
Key Takeaways:
- Finite State Machines (FSMs) are the professional standard for managing multi-step processes over time.
- External State Stores (like Google Sheets or databases) are essential for building stateful, resilient automations in a stateless environment like n8n.
- The
Enqueuer/Processorarchitecture decouples intake from processing, creating a more scalable and manageable system. - Time-based logic should be implemented with explicit timestamp comparisons, not fragile
Waitnodes.
Preview of the Next Lesson:
With the client successfully welcomed and their state being tracked, the next step is to begin the actual project work. In the next lesson, you will "Generate and assign dynamic onboarding tasks in a Google Sheet acting as a project tracker." This will extend our state machine, triggering task creation as a new state in the client's onboarding journey.