Introduction
In the previous lesson, you architected the blueprint for the entire client onboarding system by creating a detailed conditional workflow map. This design-first approach is the hallmark of a systems engineer, ensuring logical soundness before a single node is placed on the canvas. Your map defined the states, actions, and critical decision points for three distinct client tiers.
Today, we move from architecture to implementation. Your objective is to build a form-based intake that triggers conditional document and information requests. You will translate the initial "Intake" and "Routing" stages of your diagram into a functioning n8n workflow, laying the foundation for the entire client onboarding system. This is where the abstract logic of your flowchart meets the concrete execution of n8n.
1. Architecting the Intake Mechanism
A professional automation system requires a robust and user-friendly entry point. While a webhook is a common trigger, for client-facing processes like onboarding, a well-designed form is superior. It provides a structured interface, enforces data validation at the source, and improves the client experience.
We will use Tally.so, a powerful and free form builder that integrates seamlessly with n8n.
n8n integration | Free Form builder for n8n - Tally
This guide from Tally explains the n8n integration. We will use this to establish the entry point for our onboarding workflow.
Read the sections 'How to connect Tally to n8n' and 'Why Tally is the best form builder for n8n?'. Focus on the steps to create a new workflow with a Tally trigger. You don't need to build anything yet, just understand the process and why Tally's features, like conditional logic and unlimited submissions, make it a production-ready choice.
The core principle here is to create an intake mechanism that captures not only client data but also the specific context required for routing—in this case, the service package they have purchased.
2. Implementing Conditional Routing in n8n
Your workflow map contains diamond-shaped decision nodes. In n8n, the Switch node is the most direct and scalable implementation of a multi-path decision point. It evaluates an input field and directs the workflow down one of several predefined paths.
This mirrors the logic in your own engineering background, where a switch statement in code routes execution based on a variable's value. Here, the "variable" is the service tier selected in the intake form.
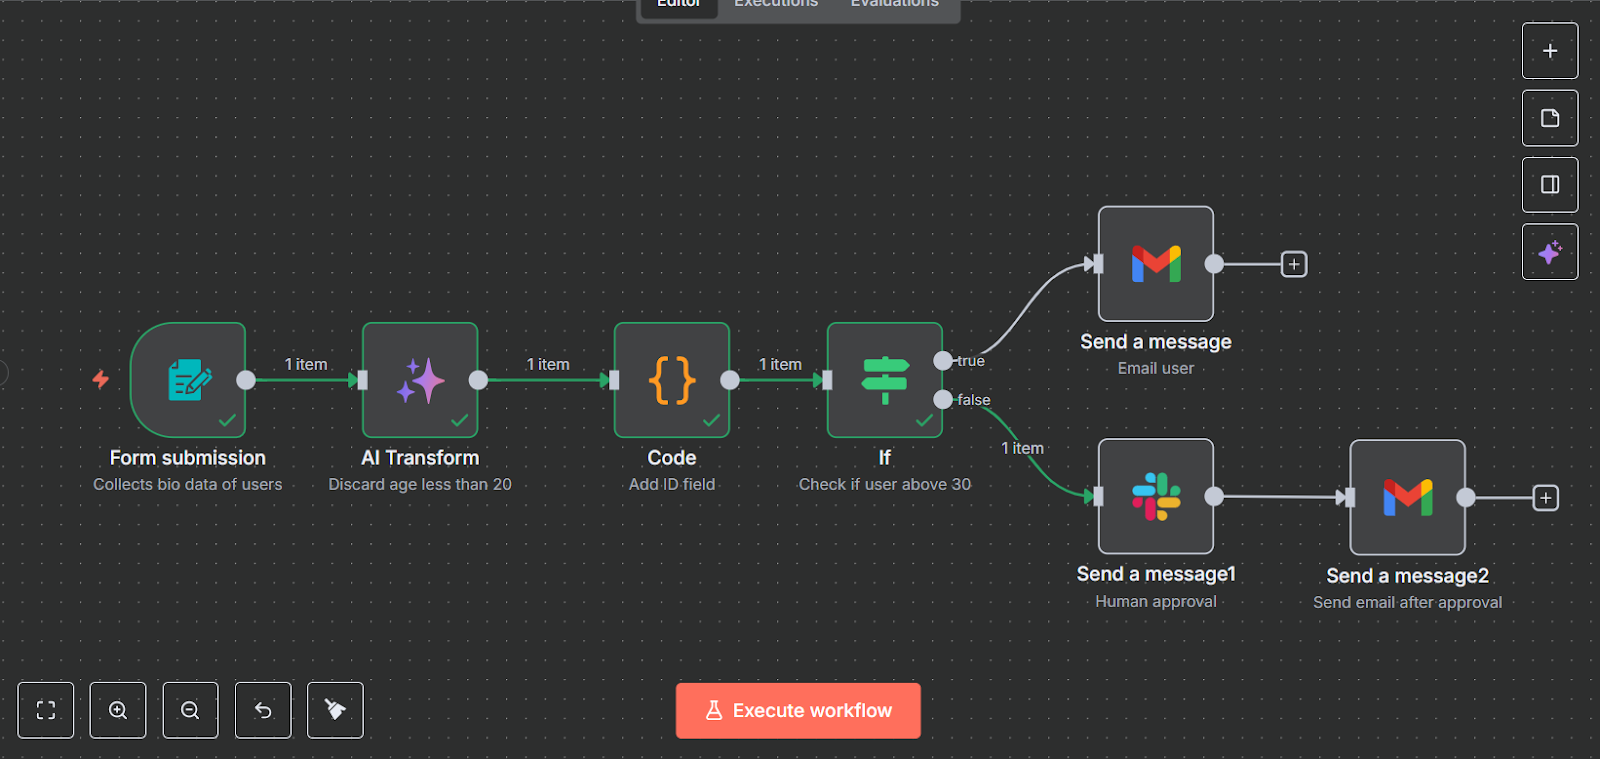
The goal is to create a clear, 1-to-1 mapping from the branches in your architectural diagram to the output paths of the Switch node.
3. Executing Conditional Requests
Once the workflow is routed, each path must trigger its unique, context-specific request. This is the "dynamic" part of the process.
- Information Request: For a tier that requires collecting client assets (e.g., logos, account credentials), the most effective method is to direct them to another dedicated form. This is a modular approach: the main onboarding workflow's job is to initiate the request, not to handle the data collection itself. This separates concerns and creates reusable components.
- Document Request: For tiers requiring a contract, the workflow's job is to generate and dispatch the document for signature. While a full e-signature integration (like DocuSign) is beyond the scope of our free-tier tooling, we will simulate this by sending a professional email that would contain the contract, proving the conditional logic works.
The concept of a primary workflow initiating other processes or requests is a powerful architectural pattern. It's analogous to an orchestrator service calling microservices.
Multi-Agent Systems Have NEVER Been EASIER to Build (n8n, no code)
This video on multi-agent systems, while focused on AI, demonstrates a relevant architectural concept: an orchestrator calling a sub-workflow as a 'tool'. Think of our main workflow as the orchestrator and the 'asset collection' form as the entry point to a separate tool or process.
Watch from 06:55-08:18 and 17:39-19:41. Pay attention to how the main agent uses a 'tool' to call another workflow or a database to get information. In our case, sending an email with a link to a second form is conceptually similar: we are delegating a specific task (information gathering) to another system.
This approach keeps your main workflow clean and focused on orchestration.
Practical Task: Build the Conditional Intake Workflow
Your task is to implement the initial stages of the workflow map you designed in the previous lesson.
Scenario: You are building the intake system for the digital marketing agency. The workflow must trigger when a new client is registered via a form and then immediately initiate the correct onboarding sequence based on their purchased service package.
Phase 1: Create the Intake Forms (Tally)
-
"New Client Intake" Form:
- Go to Tally.so and create a new form.
- Add the following fields:
Client Name(Short text)Client Email(Email)Service Package(Dropdown) with the exact options:Tier 1: SEO AuditTier 2: Monthly RetainerTier 3: Full-Service Partnership
- This form simulates a deal being marked "Won" and the client's basic information being registered.
-
"Brand Asset Collection" Form:
- Create a second, separate Tally form.
- Add fields appropriate for collecting brand information, such as:
Company Website(URL)Logo Files(File Upload)Social Media Handles(Short text)
- This form will be the destination for the "information request" sent to Tier 2 clients.
Phase 2: Build the n8n Workflow
-
Trigger:
- In a new n8n workflow, add the
Tally Triggernode. - Connect your Tally account using your API key.
- Select the "New Client Intake" form you created.
- Fetch test data by submitting the Tally form once. You should see the form submission data in the n8n node output.
- In a new n8n workflow, add the
-
Validation & Normalization (Blueprint Reference):
- Referencing the blueprint from the previous lesson (
From Manual Chaos to Seamless Systems), the first step after intake is validation. - Add a
Setnode after the trigger. Name itNormalize Data. - Set the
Client Emailvalue to{{ $json.body.fields.find(field => field.key === 'email_XXXXXXXX').value.toLowerCase().trim() }}. (You will need to replaceemail_XXXXXXXXwith the actual key for the email field from your Tally form's test data). This enforces a critical best practice.
- Referencing the blueprint from the previous lesson (
-
Conditional Routing:
- Add a
Switchnode after theSetnode. - Configure it to route based on the
Service Packagefield from the Tally data ({{ $('Normalize Data').item.json.body.fields.find(field => field.key === 'dropdown_XXXXXXXX').value }}). - Set the Data Type to
String. - Create three outputs, one for each service tier, matching the exact text from your dropdown options.
- Add a
-
Implement Conditional Requests:
- Output 0 (
Tier 1: SEO Audit): Connect aNoOpnode. Name itPLACEHOLDER: Send 'Getting Started' Guide. This serves as a placeholder for the action to be built in the next lesson. - Output 1 (
Tier 2: Monthly Retainer): Connect aSend Emailnode.- To:
{{ $('Normalize Data').item.json.body.fields.find(field => field.key === 'email_XXXXXXXX').value }} - Subject:
Action Required: Please Provide Your Brand Assets - Body (HTML): Write a professional email requesting the client to fill out the asset collection form. Include the public link to your "Brand Asset Collection" Tally form.
- To:
- Output 2 (
Tier 3: Full-Service Partnership): Connect anotherSend Emailnode.- To: Use the same expression as the Tier 2 email.
- Subject:
Your Partnership Agreement is Ready for Review - Body (HTML): Write an email simulating a contract being sent for e-signature. For example: "Hello {{ $('Normalize Data').item.json.body.fields.find(field => field.key === 'input_XXXXXXXX').value }},
Welcome aboard! Please find your Full-Service Partnership agreement ready for your review and signature. You can access it via the secure link below.
[This is a simulated contract link]"
- Output 0 (
Deliverables
- Public URL of your "New Client Intake" Tally form.
- The complete JSON code of your finished n8n workflow. Copy this from
Workflow > Download.
Evaluation Criteria
- Functionality: The workflow must execute without errors when the Tally form is submitted.
- Correct Routing: Submitting the form with each of the three service tiers selected must trigger the correct path in the
Switchnode. - Conditional Action: The correct email (or
NoOpnode) must be executed for each tier. The Tier 2 email must contain a valid link to the second Tally form. - Best Practices: The workflow includes the data normalization step, demonstrating an understanding of production-ready data handling.
Conclusion
You have successfully translated a key part of your architectural diagram into a functioning, dynamic system. You built a professional intake mechanism and implemented the core conditional logic that routes clients based on their value tier. By using a separate form for information requests, you've also applied the principle of modular design, creating a system that is more scalable and easier to maintain.
Key Takeaways:
- Form-Based Intake: A dedicated form builder like Tally provides a superior client experience and robust data collection compared to raw webhooks for many use cases.
Switchfor Routing: TheSwitchnode is the clean, scalable tool for implementing multi-path conditional logic from a design diagram.- Modular Requests: Delegating specific tasks, like information gathering, to separate, dedicated tools (like another form) is a sound architectural pattern that keeps workflows focused.
Preview of the Next Lesson:
With the intake and initial requests in place, the next step is to manage the client's journey. In the next lesson, "Implement a personalized, multi-step welcome email sequence with state tracking to manage progress," you will build out the timed actions and status updates that follow these initial requests, bringing your onboarding sequences to life.