Recommended resources
The freely available resources this lesson will direct you to.
- How to Generate a Signed AAB File in Android Studio | Step-by-Step Guidewww.youtube.com
- Generate an Android Bundle Build with Ionicwww.youtube.com
- Building And Releasing Your Capacitor Android App - Ionic Blogionic.io
- Complete Guide to Capacitor Android App Development and Deployment | Oflight Inc.www.oflight.co.jp
Welcome to the next lesson in our journey to publish your Capacitor-wrapped application. In our previous session, we completed the necessary administrative setup in the Google Play Console, creating the app record and filling out the required policy and store listing information. With the "digital storefront" prepared, we now need to produce the actual product to place on the shelf. That product is a final, signed application package.
This lesson focuses on configuring your Android project to generate that package. We'll delve into the concepts of cryptographic signing on Android and the modern Android App Bundle (AAB) format. By the end of this lesson, you will have configured your project's Gradle build system to use a private signing key and will be able to generate a release-ready AAB file from the command line.
1. Understanding App Signing and the App Bundle
Before we can publish to the Google Play Store, we must digitally sign our application. This signature serves two primary purposes:
- Authenticity: It proves that you are the legitimate author of the app. Google Play uses this signature to verify that any future updates are from the same developer, preventing others from distributing malicious updates to your app.
- Integrity: It guarantees that the application's code has not been tampered with since it was signed.
The package we will create is an Android App Bundle (AAB). This is not an installable file itself, but rather a publishing format that contains all your app's compiled code and resources. When you upload an AAB to Google Play, the store uses a service called Dynamic Delivery to build and serve optimized APKs tailored to each user's device, reducing download size and saving bandwidth.
Generate an Android Bundle Build with Ionic
To get a quick overview of the Android App Bundle, watch this brief introduction from Simon Grimm.
Watch the section from the beginning, which explains what an AAB is and how Google Play uses it to deliver optimized APKs.
2. Step 1: Generating a Private Signing Key
To sign our app, we first need a cryptographic key. On Android, this private key is stored in a container file called a keystore.
This is arguably the most critical asset in your entire Android project. You will use the same keystore to sign every future update of your application. If you lose it, you will lose the ability to update your app on the Play Store and will have to publish a new one with a new package name. You must back up this file and its passwords in a secure location.
We will use the standard Java keytool command-line utility to generate our keystore. This tool is part of the Java Development Kit (JDK) you installed with Android Studio.
Generate an Android Bundle Build with Ionic
The same video also provides a clear walkthrough of using the keytool command.
Watch the segment from generating a signing key. The presenter demonstrates the command and emphasizes the importance of storing the resulting keystore file and its passwords securely.
Open your terminal and run the following command, customizing the details for your application. Place the generated keystore file in a secure directory outside of your project's version-controlled files for now.
keytool -genkey -v -keystore my-release-key.keystore -alias myapp -keyalg RSA -keysize 2048 -validity 10000
Let's break down this command:
-keystore my-release-key.keystore: The name of the file to be created.-alias myapp: An alias, or nickname, for the key within the keystore. You can have multiple keys, each with a unique alias.-keyalg RSA -keysize 2048: Specifies the cryptographic algorithm and key size. These are standard, secure defaults.-validity 10000: The validity of the key in days. 10,000 days is about 27 years, which is a recommended value for app signing keys.
The tool will prompt you to create a password for the keystore and a password for the key itself (it's common practice to use the same password for both). It will also ask for certificate information, such as your name, organization, and location. This information is embedded in the app's signature.
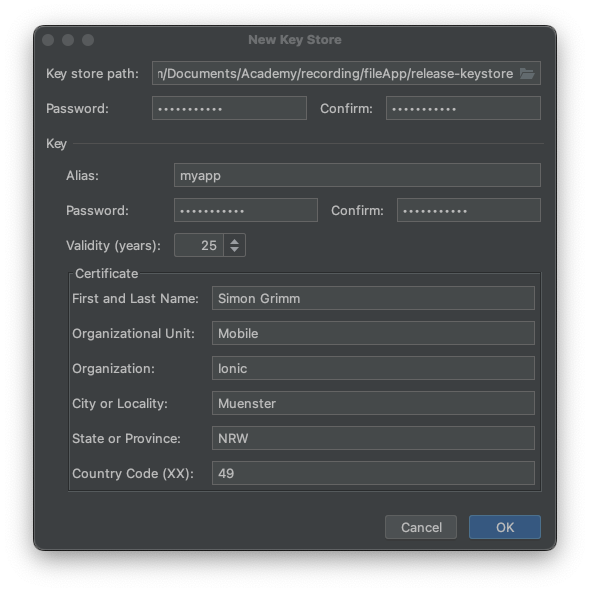
3. Step 2: Configuring Gradle for Automated Signing
Now that we have our key, we need to instruct Gradle—the build system used by Android projects—to use it when creating a release build. We want to do this in a way that doesn't involve hardcoding our secret passwords into the main build.gradle file, which is typically committed to your Git repository.
The standard practice is to store the credentials in a separate properties file and tell Gradle to read from it.
1. Create a keystore.properties file:
Inside your project's android directory, create a new file named keystore.properties. Crucially, add keystore.properties to your .gitignore file immediately.
2. Add your credentials to the file:
Populate the keystore.properties file with the following content, replacing the placeholder values with your actual credentials and the path to your keystore file. The path should be relative to the android/app directory where the build script runs.
storePassword=YOUR_KEYSTORE_PASSWORD
keyPassword=YOUR_KEY_PASSWORD
keyAlias=myapp
storeFile=../../my-release-key.keystore
Note the path ../../my-release-key.keystore. This assumes you have placed your keystore file in the root of your monorepo, two levels up from the android/app directory.
3. Modify the build.gradle file:
Open the file at android/app/build.gradle. We need to add logic to load the properties file and configure the signing process.
Building And Releasing Your Capacitor Android App - Ionic Blog
The Ionic Blog provides a perfect template for modifying the build.gradle file. This is a standard and robust way to configure signing for release builds.
Locate the section "Generating a Bundle through the Terminal". You will need to apply the changes shown in the large code block. Specifically: Add the def keystorePropertiesFile... lines at the top, right after apply plugin: 'com.android.application'. Add the entire signingConfigs block inside the android { ... } block. Add the line signingConfig signingConfigs.release inside the release block under buildTypes.
After applying these changes, your android/app/build.gradle file will be configured to automatically locate your keystore and use its credentials whenever it builds the release variant of your app.
4. Step 3: Generating the Signed Android App Bundle
With the configuration complete, generating the signed AAB is a single command. From your project's root, navigate into the android directory and execute the Gradle wrapper script, asking it to run the bundleRelease task.
cd android
./gradlew bundleRelease
Gradle will now compile your application, package all the web assets from your bunx cap sync command, and then sign the resulting bundle using the credentials from your keystore.properties file.
If the build is successful, you will find the signed AAB file at:android/app/build/outputs/bundle/release/app-release.aab
This app-release.aab file is the final artifact you will upload to the Google Play Console.
Conclusion
In this lesson, you've mastered a critical part of the Android release process. You've moved from the administrative setup in the cloud to the technical configuration on your local machine, bridging the gap between your code and the Google Play Store.
Here are the key takeaways:
- Every release build for Android must be signed with a private key stored in a keystore file.
- The keystore file is a highly sensitive asset that must be securely backed up and its credentials protected.
- The modern publishing format for Google Play is the Android App Bundle (AAB), which enables optimized app delivery.
- By using a
keystore.propertiesfile (excluded from Git) and modifyingbuild.gradle, you can configure Gradle to automate the signing process for release builds. - The
./gradlew bundleReleasecommand is your tool for generating the final, signed AAB ready for upload.
You now have the signed Android package. In our next lesson, we will parallel this effort on the Apple side by configuring Xcode to archive a final, signed release build of the iOS app, preparing it for submission to App Store Connect.