Recommended resources
The freely available resources this lesson will direct you to.
Hello! Welcome to the final lesson of our module on "Planning a Learning Project."
In our previous lesson, you learned how to design feedback loops to create an adaptive plan that improves with use. This ensures your learning is constantly being tested and refined. Now, we'll address the final, crucial element of robust planning: preparing for when things go wrong.
Today's learning outcome is to plan for common roadblocks and challenges you might face during the project. A great plan doesn't just chart a "happy path" to success; it anticipates diversions, obstacles, and moments of failure. In your work as a designer, this is akin to conducting a pre-mortem or designing for edge cases—you identify potential points of failure before they happen to make the final product more resilient. We will apply that same proactive, problem-solving mindset to your learning plan.
1. The Mindset: From Willpower to Systems
Most plans fail not because the goal was wrong, but because they rely too heavily on finite resources like motivation and willpower. A more robust approach is to think in systems—to design a process that accounts for human realities like fatigue, distraction, and unexpected events.
Let's start with a short video that introduces this concept.
How to Build Systems to Actually Achieve Your Goals
In this clip from his video 'How to Build Systems to Actually Achieve Your Goals,' Justin Sung explains the core principles of systems thinking. Pay close attention to his ideas about proactively expecting failure and designing for your 'worst day.'
Please watch from 02:43 to 04:42. Notice how he shifts the focus from 'trying harder' to changing the system itself to make success easier.
As Sung explains, the key is to build a system that is repeatable even on a bad day. This requires us to stop hoping for the best and start planning for the worst. The most effective way to do this is with a technique used in project management called a Pre-Mortem Analysis.

2. The Pre-Mortem: Imagining Failure to Prevent It
A pre-mortem flips the script on traditional planning. Instead of asking, "What do we need to do to succeed?", you ask, "Imagine we've failed. What went wrong?" This liberates you to identify potential threats without feeling pessimistic.
Let's walk through the three steps:
- Imagine Catastrophic Failure: Pick a point in the future (e.g., three months from now) and imagine your learning project has completely failed. You wanted to learn React to build a portfolio piece, but you've barely made any progress.
- Brainstorm the "Causes" of Failure: Working backward from that imagined failure, list every possible reason, big or small, that could have led to it. Don't filter yourself.
- Internal Obstacles: "I lost motivation after the first week," "I felt overwhelmed by the complexity," "I kept procrastinating on my study sessions," "I didn't feel like I was making progress, so I gave up."
- External Obstacles: "A huge project came up at work and absorbed all my time," "I got sick for two weeks," "The online course I chose was terrible," "My family needed more of my attention."
- Create a Prevention Plan: Go through your list of potential causes and brainstorm ways to mitigate or prevent them. For the most likely or most damaging risks, you'll want to create a specific plan of action.
This process transforms vague anxieties into a concrete list of problems you can solve.
Test your understanding!
Let's say your learning project is to "Master Figma's advanced prototyping features." Perform a quick, informal pre-mortem. What are 2-3 potential reasons this project might fail in a month?
Show answer
Here are some possible reasons you might come up with:
- Internal: "I found the initial learning curve too steep and got discouraged."
- Internal: "I kept defaulting to familiar, basic prototyping tools in my day-to-day work instead of forcing myself to use the advanced ones."
- External: "I couldn't find good, real-world project examples to practice on, so the learning felt too abstract."
- External: "I didn't have anyone to ask when I got stuck on a specific feature like interactive components."
3. A Structured Framework: WOOP
The pre-mortem is great for identifying a broad range of risks. For turning those risks into a personal action plan, we can use a scientifically-validated framework called WOOP. WOOP stands for Wish, Outcome, Obstacle, Plan. It elegantly combines goal-setting with the practical reality of overcoming challenges.
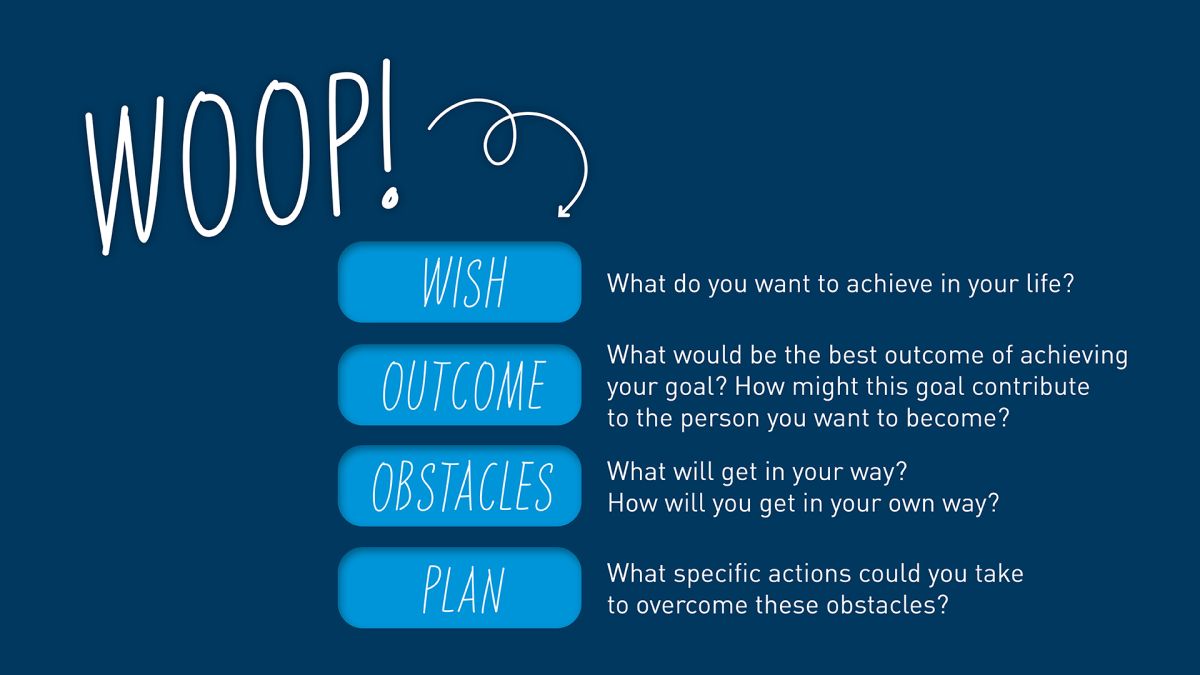
The power of WOOP comes from two key psychological concepts: Mental Contrasting and Implementation Intentions.
WOOP: Gabriele Oettingen's Scientifically Validated Dream ...
This article from Mindful Ambition, 'WOOP: Gabriele Oettingen's Scientifically Validated Dream-Realization Exercise,' explains the science behind the framework. It will clarify why simply visualizing success isn't enough and how to create effective plans.
Please read the sections 'Mental Contrasting: Moving From Dreams to Action' and 'Implementation Intentions: Planning for Inevitable Obstacles.' These two concepts are the engine that makes WOOP work.
In short:
- Mental Contrasting (Wish, Outcome, Obstacle): You first fantasize about your desired future (the Outcome of your Wish). Then, you immediately contrast it with the main internal obstacle in your way. This contrast creates psychological energy and a perceived need for action.
- Implementation Intentions (Plan): You then create a specific if-then plan to deal with that obstacle.
To see how this works as a guided exercise, you can watch the following short video.
This official video from the creators of WOOP walks you through the mental exercise step-by-step. It's a great way to feel the flow of the process.
Watch the video from the beginning until 04:52. You don't have to do the full exercise right now, but pay attention to how it guides you from a high-level wish to a concrete plan for a specific obstacle.
4. The Actionable Tool: "If-Then" Planning
The most powerful and practical component of WOOP is the Plan step, which creates an Implementation Intention. These simple "if-then" statements are one of the most well-researched and effective tools for achieving goals and overcoming challenges like procrastination.
An "if-then" plan links a situational cue (the "if") with a pre-decided behavior (the "then"). This automates your response, removing the need for in-the-moment decision-making and willpower.
Unlock Your Potential: The Power of Implementation Intentions
The article 'Unlock Your Potential: The Power of Implementation Intentions' provides a deep dive into why and how this technique is so effective.
Please read the sections 'What Are the Steps of Implementation Intentions?' and 'Overcoming Procrastination with Implementation Intentions.' This will give you a clear guide on how to formulate and use these plans.
Let's translate this into your learning projects. Using the roadblocks we brainstormed earlier:
-
Roadblock: Feeling too tired after work to study.
- Weak Plan: "I'll try to study after work."
- If-Then Plan: "IF it's 7 PM and I feel too tired to open my laptop, THEN I will spend just 10 minutes reviewing key concepts on my phone while sitting on the sofa."
-
Roadblock: Getting stuck on a coding problem and feeling frustrated.
- Weak Plan: "I'll try not to get frustrated."
- If-Then Plan: "IF I am stuck on a single bug for more than 20 minutes, THEN I will write down my specific question and post it to our team's Slack channel, and then move on to the next exercise."
-
Roadblock: Procrastinating on a challenging design task.
- Weak Plan: "I need to start the user flow diagram today."
- If-Then Plan: "IF it is 9 AM and I have just sat down at my desk, THEN I will open Figma and draw just the first box of the user flow before checking my email." (This leverages a strategy we'll cover later called the 'two-minute rule').
The specificity of the cue (time, place, feeling) and the action is what makes this so effective.
5. Conclusion: Building a Resilient Plan
You have now reached the end of the module on planning a learning project. You started by defining a clear goal and have now finished by creating a plan for failure. By anticipating roadblocks and pre-deciding how you'll respond, you build resilience into your learning system, making it far more likely to withstand the pressures of real life.
Key Takeaways:
- Plan for Failure, Not Just Success: A robust plan anticipates challenges. Use a Pre-Mortem Analysis to identify potential roadblocks before they occur.
- Identify Your Obstacles: Use the WOOP framework (Wish, Outcome, Obstacle, Plan) to connect your goals to a realistic assessment of the internal challenges you face.
- Automate Your Response: Create specific Implementation Intentions ("if-then" plans) to pre-decide how you will react when a known obstacle appears. This reduces your reliance on willpower and makes follow-through more likely.
What's Next?
Congratulations on building a complete blueprint for a learning project! You have the tools to define, scope, resource, schedule, and de-risk a focused learning endeavor.
In our next module, "Designing Your Personal Learning System," we will zoom out from the level of a single project. We'll begin constructing the durable, overarching infrastructure that will support all your learning goals. The first lesson will focus on a cornerstone of effective learning: selecting a primary note-taking method that aligns with the principles of retrieval and elaboration.