Recommended resources
The freely available resources this lesson will direct you to.
Welcome back. In our previous lesson, you mastered scheduling local notifications, giving your app a voice that can reach users even when offline. Now, we'll teach the app how to listen. Simply displaying a notification is only half the story; the real power comes from what happens next.
This lesson focuses on handling user interactions with those notifications. You'll learn how to detect when a user taps a notification or one of its action buttons, and then use that event to navigate them to specific content within your React application. This capability is fundamental for creating engaging experiences, such as directing a user from a reminder to the relevant task, or from a message alert to the chat conversation.
1. Listening for Notification Interactions
In the last lesson, you used LocalNotifications.schedule() to create notifications. Now, we'll use LocalNotifications.addListener() to subscribe to events that occur when a user interacts with them. The key event for our purpose is localNotificationActionPerformed. This event fires whenever a user taps the notification body itself or any action button associated with it.
To start listening, you'll add the event listener within your main application component, typically inside a useEffect hook to ensure it's set up once when the app loads.
import { useEffect } from 'react';
import { useHistory } from 'react-router-dom'; // Or useNavigate in react-router v6
import { LocalNotifications, ActionPerformed } from '@capacitor/local-notifications';

const App: React.FC = () => {
  const history = useHistory();

  useEffect(() => {
    // This listener is fired when a user taps a notification.
    const notificationListener = LocalNotifications.addListener(
      'localNotificationActionPerformed',
      (notificationAction: ActionPerformed) => {
        console.log('Notification action performed', notificationAction);

        // We'll add navigation logic here soon.
      }
    );

    // Clean up the listener when the component unmounts
    return () => {
      notificationListener.then(listener => listener.remove());
    };
  }, [history]);

  // ... rest of your App component
};
The callback function receives an ActionPerformed object. This object is your key to understanding what the user did. Let's examine its structure in the official documentation.
Local Notifications Capacitor Plugin API
The documentation details the event listeners and the data they provide.
First, find the localNotificationActionPerformed listener to confirm the event we are using. Then, scroll down to the "Interfaces" section and inspect the ActionPerformed interface. Pay close attention to its three properties: actionId, inputValue, and notification. We will use all of these.
As you saw, the ActionPerformed payload contains:
actionId: A string identifying the action taken. If the user just taps the main body of the notification, this will be'tap'. If they tap a custom button, it will be the ID you defined for that button.inputValue: A string containing user input, only relevant for notifications that include a text input field.notification: The originalLocalNotificationSchemaobject that you used to schedule the notification. This is crucial because it contains theextradata we'll use for routing.
2. Navigating on Notification Tap
Let's implement the most common use case: navigating to a specific view when the user taps a notification. In the previous lesson, you learned to attach arbitrary data to a notification using the extra property. Now, we'll retrieve that data to drive navigation.
Imagine you schedule a notification and include a target path in its extra data:
import { LocalNotifications } from '@capacitor/local-notifications';

const scheduleItemNotification = async (itemId: string) => {
  await LocalNotifications.schedule({
    notifications: [
      {
        id: 10,
        title: "New Update on Item",
        body: `Check out the latest on item ${itemId}.`,
        extra: {
          // Pass the route you want to navigate to
          path: `/items/${itemId}`
        }
      }
    ]
  });
};
Now, you can update your localNotificationActionPerformed listener to use this data. We'll check if the action was a simple tap and if the notification's extra data contains a path.
useEffect(() => {
  const notificationListener = LocalNotifications.addListener(
    'localNotificationActionPerformed',
    (action: ActionPerformed) => {
      const { actionId, notification } = action;

      if (actionId === 'tap' && notification.extra?.path) {
        // Use your React router to navigate
        history.push(notification.extra.path);
      }
    }
  );

  return () => {
    notificationListener.then(l => l.remove());
  };
}, [history]);
This pattern is powerful and flexible. By embedding a route or identifier in the extra payload, you create a direct link from the notification back to the relevant content in your SPA.
The video below demonstrates attaching extra data to a notification, which is the foundation for this navigation technique.
Creating Capacitor Local Notifications with Sound, Icons & Action Buttons
This segment from Simon Grimm's tutorial shows how to embed custom data in a notification. Although the framework is Angular, the Capacitor API call is identical.
Watch the section from adding extra data. Note how an extra object is added to the notification payload. This is precisely what we are leveraging for our navigation logic.
3. Adding Interactive Buttons (Actions)
Beyond a simple tap, you can offer users a set of predefined actions directly within the notification. These appear as buttons on both iOS and Android, allowing for more nuanced interactions like "Reply," "Snooze," or "Delete."
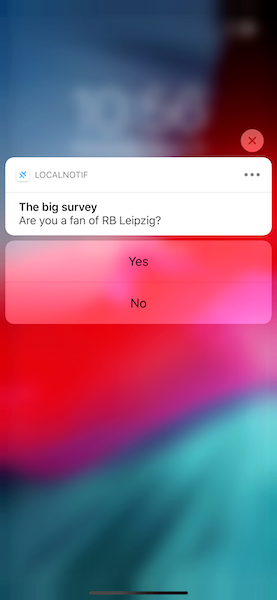
To use actions, you must first register "action types." An action type is a group of actions (buttons) that can be attached to a notification. You should register these types when your app initializes.
import { LocalNotifications } from '@capacitor/local-notifications';

const registerNotificationActions = async () => {
  await LocalNotifications.registerActionTypes({
    types: [
      {
        id: 'SURVEY_ACTIONS', // The unique ID for this group of actions
        actions: [
          {
            id: 'answer_yes', // The ID for this specific button
            title: 'Yes',
          },
          {
            id: 'answer_no',
            title: 'No',
            destructive: true // Marks the action as destructive (e.g., red text on iOS)
          }
        ]
      }
    ]
  });
};

// Call registerNotificationActions() in your app's main entry point.
Once registered, you can associate this action type with any notification by setting its actionTypeId property.
await LocalNotifications.schedule({
  notifications: [
    {
      id: 11,
      title: "Quick Survey",
      body: "Are you enjoying the app?",
      actionTypeId: 'SURVEY_ACTIONS', // Links to the group registered above
      extra: { surveyId: 'feedback_q1' }
    }
  ]
});
The following animation shows notifications with both action buttons and a text input field, illustrating the possibilities.
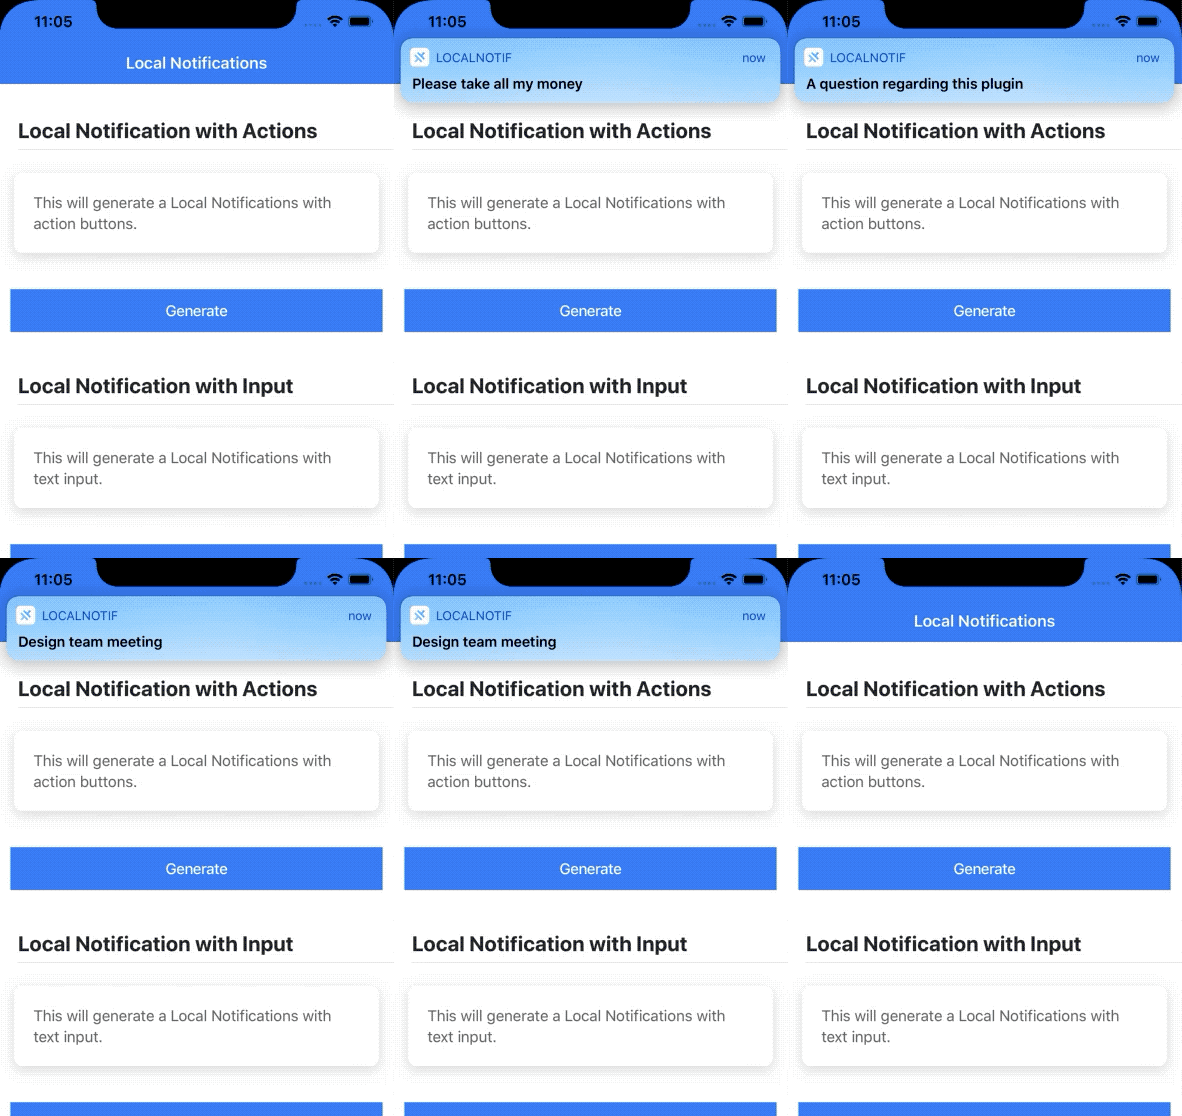
When the user taps "Yes" or "No", the localNotificationActionPerformed event fires as before. However, the actionId in the payload will now be 'answer_yes' or 'answer_no', not 'tap'. This allows you to create specific logic for each button.
// Inside your useEffect listener
LocalNotifications.addListener(
  'localNotificationActionPerformed',
  (action: ActionPerformed) => {
    const { actionId, notification } = action;

    if (notification.extra?.surveyId === 'feedback_q1') {
      if (actionId === 'answer_yes') {
        console.log('User answered YES to the survey!');
        // You could send an analytics event here
      } else if (actionId === 'answer_no') {
        console.log('User answered NO to the survey.');
      }
    }
    // ... other navigation logic
  }
);
The video below provides a complete walkthrough of registering action types, attaching them to notifications, and, most importantly, listening for the resulting actions.
Creating Capacitor Local Notifications with Sound, Icons & Action Buttons
This tutorial provides a clear visual guide to implementing and handling notification actions.
First, watch how to register action types and associate them with a notification. Then, focus on the critical part where the code listens for the performed action. You'll see how the actionId and inputValue are extracted from the event payload, which is exactly the logic we're implementing in React.
A Note on Deep Linking
The mechanism you've just implemented—handling a notification tap to navigate within your app—is a specific form of deep linking. In this case, the "link" originates from a notification generated by your own app.
A related, broader concept is handling deep links that originate from outside your app, such as a user clicking a URL like yourapp://profile/123 or a Universal Link/App Link like https://yourdomain.com/profile/123. While the implementation differs slightly (it uses the @capacitor/app plugin and its appUrlOpen event), the principle is the same: listening for an event and using its payload to navigate.
Understanding today's lesson provides a strong foundation for implementing external deep linking later on. If you're interested in that topic, the Capacitor documentation has an excellent guide.
Deep Links | Capacitor Documentation
This guide explains how to handle deep links from external sources (like websites) using the Capacitor App API. It is not required for this lesson but provides valuable context on the broader topic of in-app navigation from external triggers.
Read the introduction and the section Deep Link Routing to understand the concept. Note the use of the appUrlOpen listener, which is analogous to the localNotificationActionPerformed listener we used today.
Conclusion
You have now closed the loop on local notifications. Your app can not only schedule alerts but also intelligently respond when users interact with them. This is a key piece of functionality for building an engaging and interactive mobile application.
Key takeaways from this lesson:
- The
localNotificationActionPerformedevent is the central mechanism for handling user interactions with local notifications. - You should register a listener for this event in a top-level React component using
useEffect. - The
actionIdproperty of the event payload tells you which action the user took ('tap'for the body, or a custom ID for a button). - The
notification.extraproperty is the ideal place to store data, like a route path or an item ID, to facilitate navigation. - You can create rich interactions with custom buttons by registering action types with
registerActionTypesand assigning them viaactionTypeId.
With notifications fully covered, our next lesson will venture into another core aspect of native functionality: accessing the device's storage. We will start by installing and using the @capacitor/filesystem plugin to manage files in different sandboxed directories.