Recommended resources
The freely available resources this lesson will direct you to.
Hello! In our previous lesson, we established the fundamental pattern of replacing React's client-side data fetching with HTMX's hx-get attribute, powered by server-side fragment endpoints. This shifted the rendering responsibility from the client to the server, simplifying your frontend code significantly.
Today, we'll tackle another cornerstone of web applications: forms. Your goal is to learn how to translate a typical React controlled form, with its intricate client-side validation, into a robust HTMX-powered form. We'll focus on leveraging server-side validation to provide real-time user feedback, all while ensuring the form works even if JavaScript fails—a principle known as progressive enhancement. This is a critical skill for migrating your CRUD applications.
The React vs. HTMX Form Philosophy
In React, you're accustomed to building controlled components. For a form, this means:
- Storing the value of each input in component state (e.g., using
useState). - Capturing every keystroke with an
onChangehandler to update that state. - Running client-side validation logic (often with libraries like Formik or Yup) against the state.
- Conditionally rendering error messages based on the validation result.
This approach provides instant feedback but centralizes a large amount of logic and state management on the client.
The HTMX approach turns this inside out. It treats the server as the single source of truth for validation logic. This not only simplifies the client but also enhances security, as client-side validation can always be bypassed. Our goal is to achieve the same slick, real-time user experience you get with React, but by using small, targeted requests to the server.
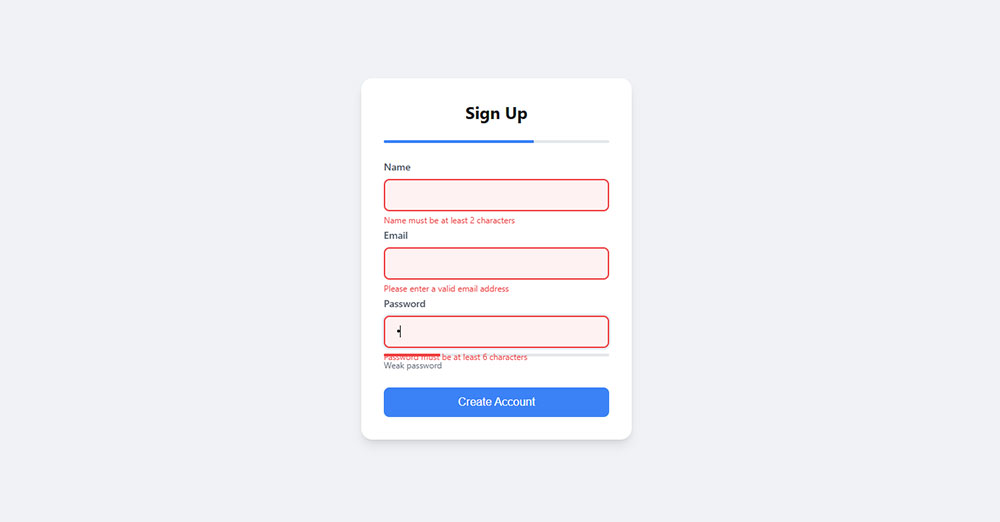
Step 1: Start with a Progressively Enhanced Foundation
The first principle in the HTMX philosophy is progressive enhancement. We begin by building a standard HTML form that works perfectly without any JavaScript. It uses the action and method attributes for a full-page submission and reload.
<!-- A standard HTML form is our baseline -->
<form action="/register" method="POST">
    <label for="email">Email</label>
    <input type="email" id="email" name="email">
    <!-- Server will render errors here on full page reload -->

    <button type="submit">Register</button>
</form>
When this form is submitted, the browser sends a standard POST request. The server validates the data. If there are errors, it re-renders the entire page, including the form with error messages. If successful, it redirects to a success page.
This flowchart illustrates the classic server-side validation loop:

We then "enhance" this form with HTMX. By adding hx-post, we instruct HTMX to intercept the submission and send it via AJAX instead. The server can detect this AJAX request by checking for the HX-Request: true header and return just the form fragment instead of the whole page.
The article "Building Modern UIs with HTMX" provides a perfect example of this dual-mode server setup.
Building Modern UIs with HTMX—Essential Implementation Patterns
This article explains the core principle of progressive enhancement with HTMX. We will focus on the example of a search form that works with or without JavaScript.
Read the section under the heading "How Do You Implement Progressive Enhancement with HTMX?". Pay close attention to the <form> element, which includes both standard action/method attributes and HTMX hx- attributes. Then, examine the server-side code snippet (it's in Django/Python, but the logic is universal) that checks for the HX-Request header to decide whether to return a partial fragment or a full page.
Step 2: Implement Real-Time, Inline Validation
The true power of this pattern comes from providing inline validation on a per-field basis. Instead of waiting for the user to submit the entire form, we can validate each field as they leave it.
This is achieved by adding HTMX attributes directly to the <input> elements. We'll use hx-post to send the field's value to a dedicated validation endpoint, triggered by an event like blur (when the user leaves the input) or keyup changed. The server validates the single piece of data and returns a tiny HTML fragment containing either an error message or a success indicator.
The "HTMX Crash Course" video from Traversy Media provides an excellent walkthrough of this exact pattern using the Node.js/Express stack you prefer.
HTMX Crash Course | Dynamic Pages Without Writing Any JavaScript
This video segment provides a step-by-step demonstration of building an inline email validation feature with Express and HTMX.
Watch the section from titled "Inline Validation". Observe how Brad Traversy: Adds hx-post to an individual email <input> field. Sets up an Express route (/contact/email) to handle the validation for just that field. The server logic checks the email format and returns an entire div containing the label, input (with the value preserved), and a new div for the error/success message. Uses hx-target and hx-swap="outerHTML" to replace the field's container with the new HTML returned from the server.
This demonstrates the core translation: a React onChange handler that triggers local state updates and re-renders is replaced by an hx-trigger that fires a request to the server, which then returns the updated HTML.
Step 3: A More Advanced Pattern: A Single Validation Endpoint
While creating an endpoint for each field works, a more scalable approach is to have a single validation endpoint for the entire form. Each input can post the entire form's current state to this endpoint on every change. The server then validates all fields and can return multiple feedback fragments simultaneously using out-of-band (OOB) swaps.
This prevents you from having to create many small, single-purpose endpoints. The hypermedia-tv channel has a fantastic deep-dive on this very topic.
This video details a robust form validation strategy using a single endpoint, out-of-band swaps, and handling potential race conditions.
First, watch the section on creating a new validation route. The key idea is to have one route (/validate) that receives the entire form data on every input change. Next, see how out-of-band swaps are used. The server response contains multiple small HTML snippets, each with an id and hx-swap-oob="true". HTMX finds the corresponding elements in the DOM and swaps them. Watch from to see this in action. Finally, a critical point for a senior developer: handling race conditions. When requests fire on every keystroke, they might return out of order. The video explains how to use hx-sync to solve this elegantly. Watch the segment from to understand this crucial detail.
This pattern of using a single validation endpoint with OOB swaps is powerful because it relies on the exact same validation logic that runs when the form is fully submitted. This adheres to the Don't Repeat Yourself (DRY) principle and ensures consistency. As the video emphasizes, front-end validation is for UX; the server is the ultimate authority.
The React-to-HTMX Translation Summary
Let's consolidate the mental model shift with a direct comparison:
| React Controlled Form Pattern | HTMX & Server-Side Validation Pattern |
|---|---|
useState holds the input's value. |
The browser holds the input's value in the DOM element itself. |
onChange handler updates the state on every keystroke. |
hx-trigger on the input field initiates a server request on events like blur or keyup. |
| Validation logic runs in JavaScript on the client. | Validation logic runs in your Express controller on the server. Single source of truth. |
Error messages are conditionally rendered via JSX ({error && <p>{error}</p>}). |
The server renders an HTML fragment with the error message; hx-target and hx-swap place it in the DOM. |
onSubmit handler prevents default and sends a fetch request. |
<form hx-post="..."> intercepts the submit event and sends an AJAX request. |
| The form works only if the JS bundle loads successfully. | The form works as a basic HTML form even if JS fails (Progressive Enhancement). |
Conclusion
In this lesson, you've learned how to migrate one of the most complex client-side patterns—the controlled form with validation—to the hypermedia model. You've seen how to build robust, interactive, and resilient forms by embracing progressive enhancement and making the server the single source of truth for validation logic.
Key Takeaways:
- Progressive Enhancement is Key: Always start with a functional HTML form. HTMX layers on top to provide a modern UX without breaking the baseline functionality.
- Server is the Source of Truth: All validation logic resides on the server. This is more secure and avoids duplicating logic on the client.
- Inline Validation via Fragments: You can replicate the "real-time" feel of client-side validation by having inputs
POSTto server endpoints that return small HTML fragments with error messages. - Robust Patterns: For complex forms, use a single validation endpoint with out-of-band swaps to update multiple parts of the UI, and use
hx-syncto prevent race conditions.
You now have the tools to handle both reading (GET) and writing (POST/PUT) data in your HTMX applications. In the next module, we will shift our focus from component-level interactions to application-level state, starting with how to replace read-only global state from React Context.