Recommended resources
The freely available resources this lesson will direct you to.
Hello Alex,
Welcome to your eighth lesson in our series on building a secure ThinkPad. In our last session, you accomplished a critical and often overlooked task: you cryptographically verified the authenticity and integrity of your Qubes OS installation media. You now possess a bootable USB drive that you can trust completely.
Today, we move from the digital realm to the physical hardware. This lesson's learning outcome is to install Qubes OS on the x230, configuring LUKS-based Full Disk Encryption (FDE) with a strong passphrase. This is the moment where your Coreboot-flashed x230 is transformed into a high-security operating environment. We will focus not just on the "how" but also the "why," particularly regarding the encryption that protects your data when the machine is powered off.
Estimated time to complete: 60 minutes.
Recap from the Previous Lesson
- You successfully navigated the GPG "chain of trust," from the Qubes Master Signing Key down to the specific ISO file.
- You used
gpg --verifyto confirm that your Qubes ISO was authentic and had not been tampered with. - You now have a trusted, bootable USB drive ready for installation.
1. The Theory: Protecting Data "At Rest" with LUKS
Before we power on the x230, let's establish the theoretical foundation for this lesson's central task: Full Disk Encryption (FDE). Your threat model includes the possibility of your laptop being lost, stolen, or physically seized. FDE is the primary countermeasure against this risk. It ensures that without the correct passphrase, the data on your SSD is nothing more than unintelligible noise.
Qubes OS uses a standard and well-audited system called LUKS (Linux Unified Key Setup) to achieve this. To understand what LUKS is and the protection it offers, please watch the beginning of the following video. It provides an excellent conceptual overview of encrypting data "at rest" and the critical role of the passphrase.
Watch time: ~3 minutes.
As the video explains, the security of this entire system hinges on the strength of your passphrase. We will return to this point when it's time to create one.
2. Pre-Flight Checklist: Firmware Configuration
With your trusted USB drive in hand, it's time to prepare the x230.
- Ensure the laptop is connected to power.
- For the initial installation, it is highly recommended to have a wired ethernet connection.
- Insert the Qubes OS installation USB drive.
- Power on the x230.
You will need to tell the machine to boot from the USB drive instead of its internal disk. Since you have Coreboot with a SeaBIOS payload, you will see a simple text menu on boot.
- Press the
Esckey to see the full boot menu. - Select the option corresponding to your USB drive.
Before we proceed with the OS installation, it's good practice to review firmware settings to ensure they are optimized for security and compatibility. The SecureDrop Workstation guide provides an excellent checklist.
Reading time: ~5 minutes.
SecureDrop Workstation Documentation (Pre-install Tasks: Apply BIOS updates and check settings)
Focus on these key principles from the reading:
- Enable Virtualization: For Qubes OS, it is absolutely essential that Intel VT-x and Intel VT-d are enabled. Your Coreboot configuration should have already enabled these, but it's a crucial prerequisite.
- Disable Unnecessary Devices: Your Coreboot build has likely already removed unnecessary components, but the principle of disabling unused hardware (like Bluetooth or a WWAN card if you don't use them) is a core tenet of reducing the attack surface.
- Disable Secure Boot: This is a UEFI feature. By installing Coreboot, you have already replaced UEFI entirely, so this is not a concern for you.
3. The Installation: A Step-by-Step Guide
We will now walk through the Qubes OS installer. The official installation guide is our primary reference, and the video provides a helpful visual walkthrough of the process.
Action: Follow the steps below, referencing the documentation and video as needed.
Step 1: Booting and Language Selection
After booting from the USB, the Qubes installer will load. You'll be presented with a welcome screen to select your language. Choose your preferred language and continue.
Step 2: Installation Summary & Destination
You'll now see the "Installation Summary" screen. Several items may be marked with a warning icon, indicating they require configuration.
-
Click on "Installation Destination" under the "System" heading.
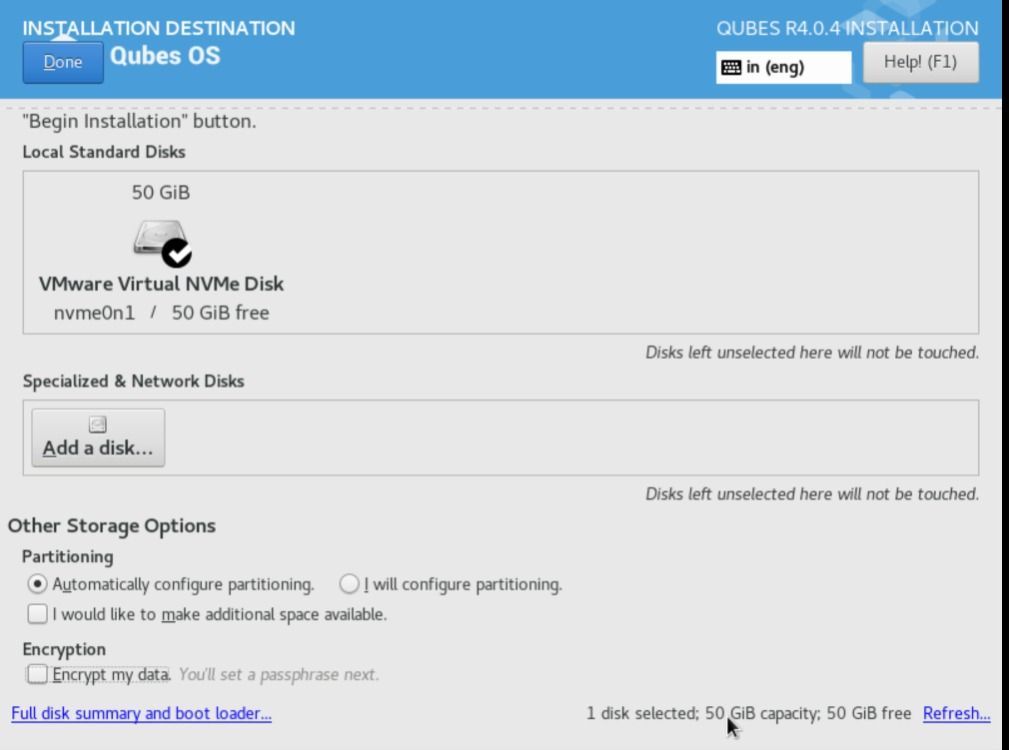
This image shows the screen where you will select the target drive for the Qubes OS installation. Note the "Encrypt my data" checkbox, which is the focus of our next step. -
Select the internal SSD of your x230.
-
Crucially, ensure the "Encrypt my data" checkbox is ticked. This enables LUKS FDE.
-
Click "Done" in the top-left corner.
Step 3: Creating a Strong FDE Passphrase
Immediately after clicking "Done," you will be prompted to create the disk encryption passphrase. This is the most security-critical decision you will make during installation.
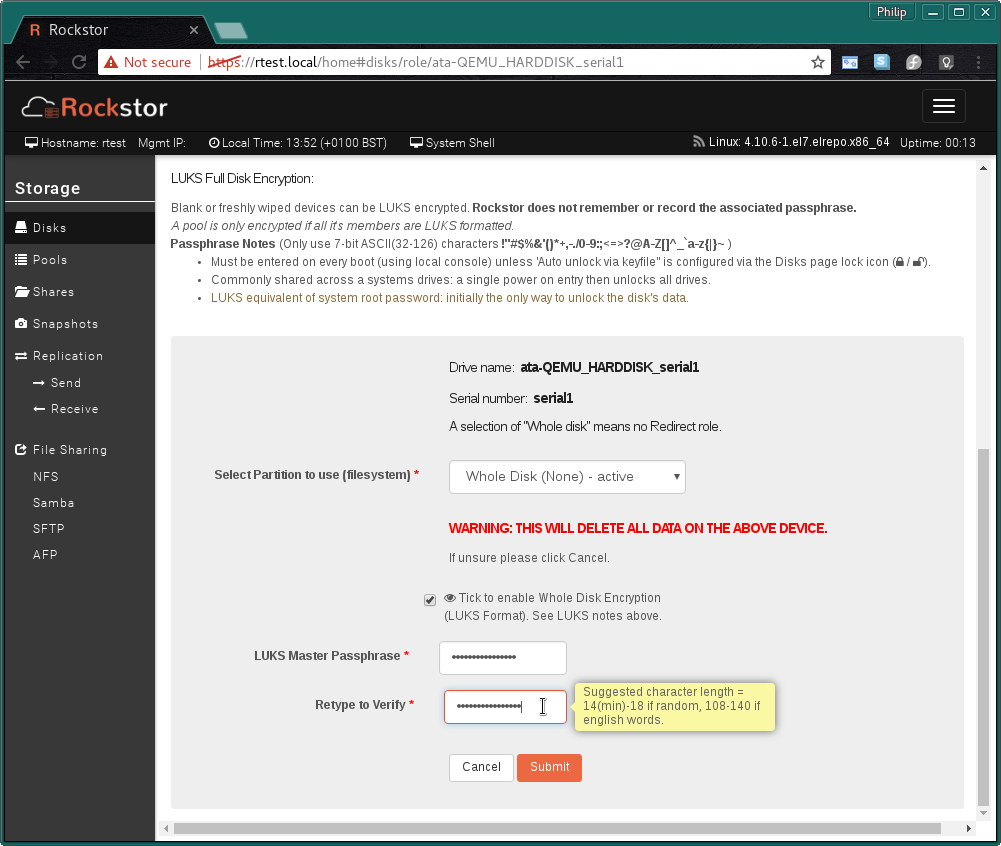
This image, from a different OS, illustrates a typical LUKS passphrase entry screen. The principles of requiring a strong passphrase and warning about data loss are universal.
A weak passphrase renders FDE useless against a determined attacker. As a security-conscious user, you should avoid common password creation anti-patterns. The recommended best practice is to use a Diceware passphrase.
Action: Please read the following sections from the SecureDrop documentation, which advocate for this method.
Reading time: ~2 minutes.
SecureDrop Workstation Documentation (Pre-install Tasks: Install Qubes OS; Use strong passphrases)
A Diceware passphrase consists of several random, common words (e.g., correct horse battery staple). This method generates passphrases with very high entropy, making them resistant to brute-force attacks, while also being more memorable than a random string of characters.
- Generate a strong Diceware passphrase of at least 6 words. You can use an offline generator or even physical dice and a wordlist for maximum security.
- Enter and confirm your chosen passphrase.
- Warning: There is no recovery mechanism for this passphrase. If you forget it, your data is irrecoverably lost. Store it securely.
- Click "Save Passphrase."
You will be returned to the Installation Summary. Click "Done" again to accept the disk partitioning changes.
Step 4: User Creation and Finalization
- Back on the summary screen, click "User Creation."
- Create your user account. As recommended by security professionals, avoid using your real name or any identifying information.
- Set a strong password for this user account. This password is used to log in and unlock the screen, while the FDE passphrase is used only at boot.
- Once all warnings on the summary screen are gone, click "Begin Installation."
The installation will now proceed. This may take 30-45 minutes. Once complete, click "Reboot System" and be sure to remove the USB drive.
4. First Boot and Initial Setup
The system will restart, and you will begin the final configuration phase.
Action: Follow the post-installation steps described in the guide and shown in the video.
Installation guide (Post-installation: First boot and Initial Setup)
- LUKS Decryption: The very first thing you will see after the initial boot messages is a simple text prompt:
Please enter passphrase for disk .... This is LUKS asking for the FDE passphrase you just created. Enter it to decrypt the drive and allow the OS to load. - Initial Setup Screen: After the disk is unlocked, Qubes will start and present a final configuration screen. For now, you can accept the default settings, which will create standard system qubes (
sys-net,sys-firewall) and some default AppVMs. We will customize this environment extensively in later lessons. Click "Finish Configuration." - Login: After the initial qubes are created, you will be greeted by the graphical login screen. Enter the username and password you created in Step 4.
Congratulations! You have successfully installed Qubes OS with Full Disk Encryption on your secure hardware platform.
Optional Deep Dive: LUKS Internals
Your background suggests you might be curious about the mechanics of LUKS. The system is not magic; it relies on a small, unencrypted header at the beginning of the disk that stores "key slots." Your passphrase unlocks a key slot, which in turn contains the master key used to decrypt the rest of the drive. Understanding this architecture reveals both its robustness and its critical point of failure (a corrupted header).
For a fascinating look at this, I recommend the following segment of the video we watched earlier.
Watch time: ~4.5 minutes.
Conclusion
In this lesson, you bridged the gap between theory and practice, installing the cornerstone of our secure system. You booted from your trusted media, partitioned and encrypted the system drive, and completed the Qubes OS installation.
Key Takeaways:
- Full Disk Encryption (FDE) is your primary defense against physical compromise, protecting your data "at rest."
- Qubes OS uses the industry-standard LUKS for FDE.
- The security of LUKS is entirely dependent on the strength of your passphrase. Diceware is the recommended method for generating strong, high-entropy passphrases.
- The boot process for an FDE system involves two authentication steps: the LUKS passphrase to decrypt the disk, followed by the user password to log in.
Preview of the Next Lesson
You now have a secure, installed operating system. But the true power of Qubes OS lies not in its installation, but in its use. In our next lesson, "Manage the AppVM lifecycle by creating, starting, stopping, and deleting an AppVM," we will begin to explore the principle of "security by compartmentalization." You will learn how to create and manage the isolated virtual machines that form the basis of your daily workflow in Qubes.