Recommended resources
The freely available resources this lesson will direct you to.
Hello! In the previous lesson, you built gis-shell-lab and used PowerShell to manage its folders and files. Today you’ll open that workspace in Visual Studio Code (VS Code), create code files, and run them. You’ll use the built-in terminal you already know, while the Python extension helps VS Code recognise and run Python code.
The aim is a repeatable workflow: open a project folder, edit a file, save it, run it, and check the result. The GIS application itself will come later.
Set up the editor and Python
Three separate tools have different jobs. VS Code is where you edit files; its Python extension adds editor features and run commands; the Python interpreter is the program that executes Python code. Installing the extension does not install Python.
Getting Started with Python in VS Code
Read Microsoft's VS Code guide to distinguish the editor, extension, and interpreter, then find its Windows installation and verification instructions.
In “Prerequisites” and “Understand the Python setup,” read the three-tool explanation. In “Install a Python interpreter,” focus on the “Windows” subsection, from installation guidance. For the version check, find the Windows command immediately above “Start VS Code in a workspace folder”; read that check. Stop before “Create a virtual environment”; that is for a later lesson.
If either VS Code or Python is missing, install it using the official sites linked in the guide. On Windows, use a per-user installation if you do not have administrator access. If the Python installer offers Add Python to PATH, select it. Restart VS Code after installing Python so a new terminal can detect it.
Open VS Code and select the Extensions icon in the left Activity Bar. Search for Python, check that the publisher is Microsoft, and select Install. Related Python support extensions may install automatically; you do not need a collection of other extensions yet.
Open the workspace, not just a file
In VS Code, choose File > Open Folder, then select the gis-shell-lab folder you kept from the previous lesson. If you used gis-shell-lab-2 instead, open that folder throughout this lesson. Only choose Trust if this is the folder you created yourself.
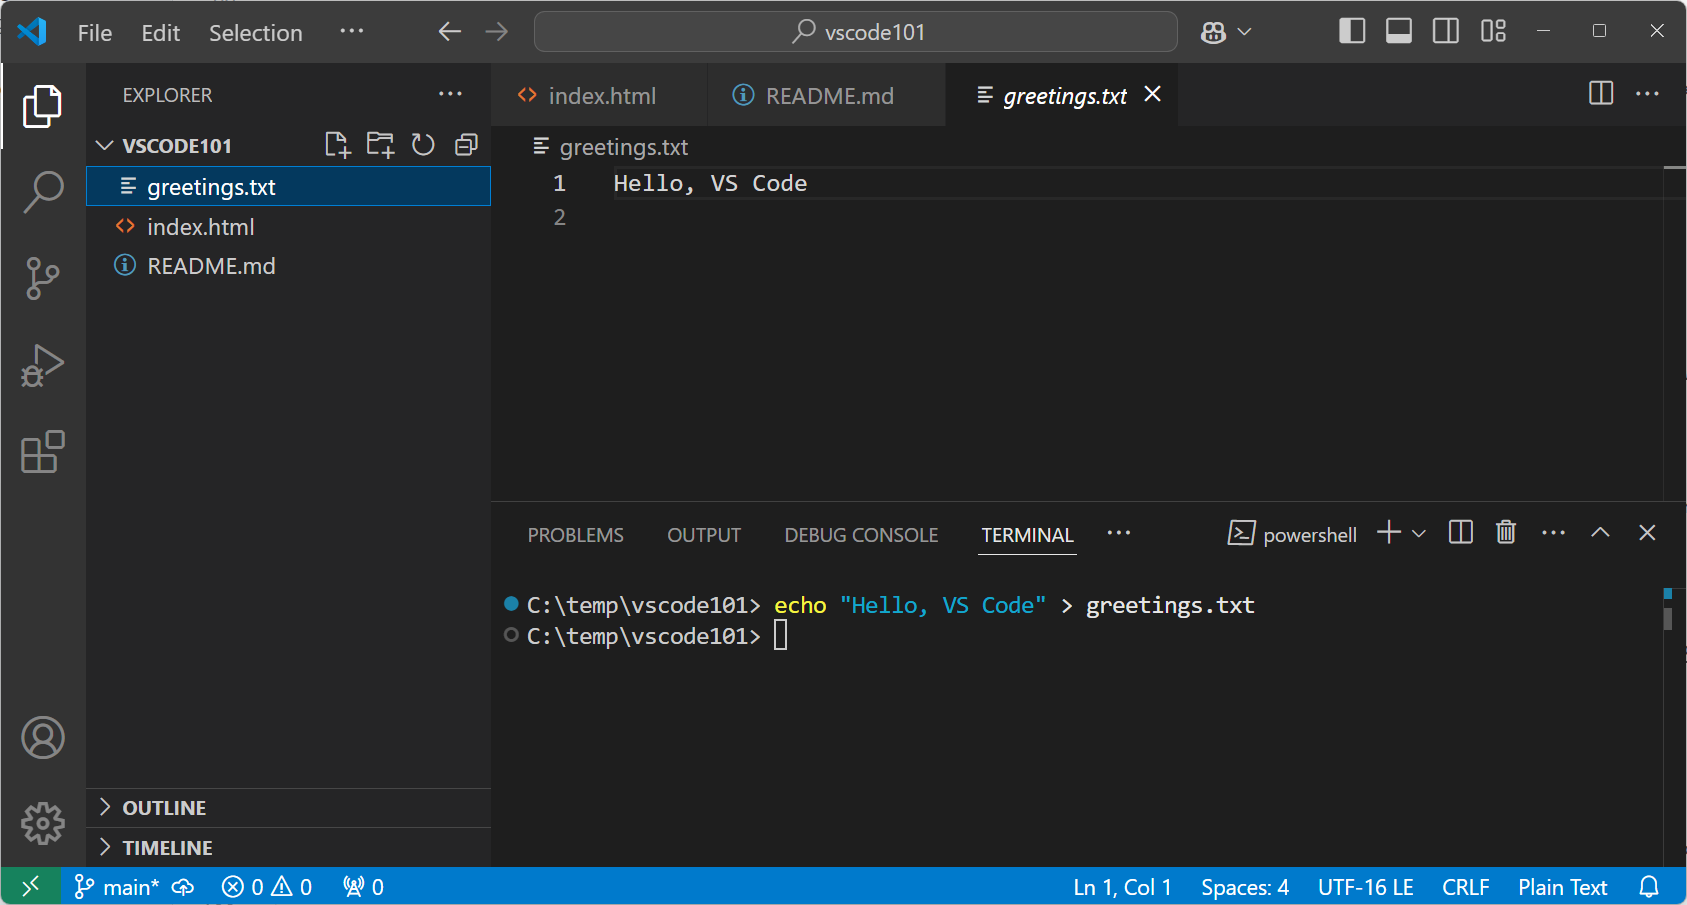
Opening the folder makes it your workspace. The Explorer on the left should show its data, backups, and archive folders. When you add a code file, you’ll see it alongside them. Watch these two short portions of VS Code for Absolute Beginners by Coder Coder for the Explorer and integrated terminal.
VS Code for Absolute Beginners
See how opening a folder connects the Explorer, editor, and terminal. The video uses different example files, so keep working in your own GIS workspace.
Watch folders and files for opening a workspace and creating a file in the Explorer. Then skip to the terminal; notice that its PowerShell prompt works much like the separate window you used last lesson.
Open the terminal with View > Terminal or Ctrl+` (the backtick key). If its shell is not PowerShell, use the dropdown beside the terminal’s + button to select PowerShell. Run:
Get-Location
Get-ChildItem
Check that the location ends in your workspace folder and that the listing includes data. If not, use File > Open Folder to open the correct folder, or navigate to it in the terminal before running project commands. The editor and terminal share a window, but the terminal still has its own current location—always check the prompt.
Verify Python in that terminal:
py -3 --version
You should see a Python 3 version. If py is not recognised, try python --version instead. If neither works, reopen VS Code after the installation and check that Python was installed successfully before continuing.
Create, save, and run a Python file
In the Explorer, select the New File button beside your workspace folder name. Name the file clinic_preview.py. The .py ending tells VS Code it is a Python source file. Type this code into the editor:
print("Clinic locations: Pune")
print("Workspace ready for a future web map.")
For now, print simply displays the text between quotation marks. You are checking your tools, not building the map yet. Press Ctrl+S to save. An unsaved-change dot on the editor tab should disappear.
Next, open the Command Palette with Ctrl+Shift+P, search for Python: Select Interpreter, and select the Python 3 installation you just verified. This selection tells the VS Code Python extension which interpreter to use for its run commands.
Read the file-creation and run sections of the official guide before trying both run methods.
Getting Started with Python in VS Code
Use the guide's “Create a Python source code file” and “Run Python code” sections to identify what saving does, where output appears, and how to run a whole file.
In “Create a Python source code file,” read from creating and saving. Continue into “Run Python code” for the play-button demonstration. In that section, read the alternative commands. You can skip the REPL and debugger sections for now.
With clinic_preview.py open, click Run Python File near the top-right of the editor. Its output should appear in a Terminal panel:
Clinic locations: Pune
Workspace ready for a future web map.
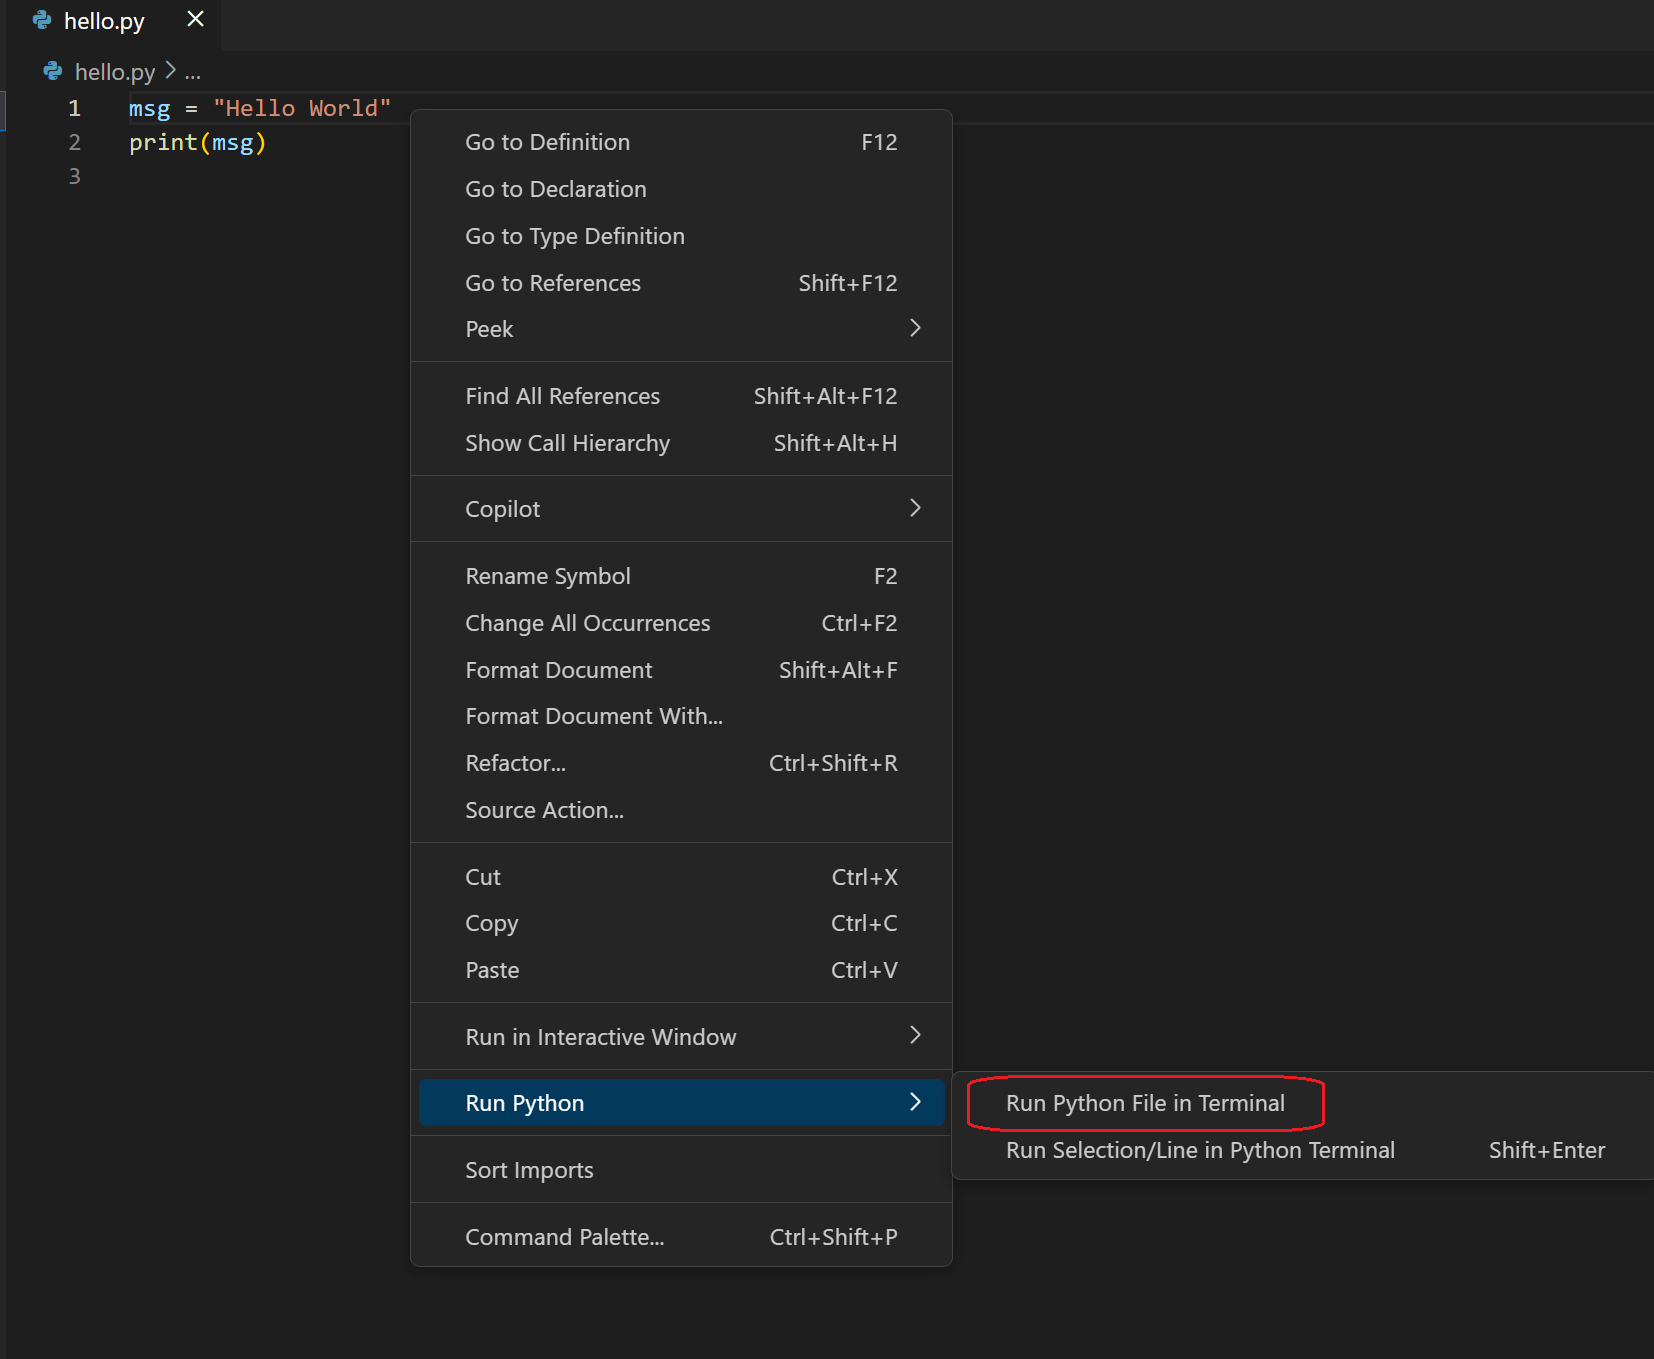
Another way is to right-click inside the editor and choose Run Python > Run Python File in Terminal. The pictured menu shows where to find it; menu placement may differ slightly by VS Code version.
Now make the save-and-run connection visible. Change Pune to another city, press Ctrl+S, and run the file again. The terminal should show the new city. If it still shows Pune, confirm you saved the file and are running the tab you edited.
You can also run the saved file directly from PowerShell in the workspace:
py -3 .\clinic_preview.py
If python --version worked earlier but py did not, use:
python .\clinic_preview.py
The play button and terminal command both execute a Python file. The difference is who starts it: the VS Code extension or your PowerShell command.
Create a file intended for a browser
A full-stack GIS project will eventually contain files for more than one runtime. Python code runs in a Python interpreter; an HTML page is displayed by a browser. You do not need to learn HTML syntax in depth today.
Create another file at the workspace root named map_preview.html, paste the following, and save it:
<!doctype html>
<html lang="en">
<head>
  <meta charset="utf-8">
  <title>Clinic map preview</title>
</head>
<body>
  <h1>Clinics in Pune</h1>
  <p>A map will appear here later.</p>
</body>
</html>
From the VS Code PowerShell terminal, open the file with its Windows-associated application:
Invoke-Item .\map_preview.html
If it does not open in a browser, find the file in Windows File Explorer and choose Open with a browser. You should see a heading and a sentence, not a map. The terminal command opened the HTML file; it did not execute HTML with Python. No additional VS Code extension is needed for this basic check.
If the result is not what you expected
Check the failing link in the workflow rather than reinstalling everything at once:
- The file is not in the Explorer: confirm you opened
gis-shell-labas a folder and created the file inside it. - The terminal says it cannot find the file: run
Get-LocationandGet-ChildItem. The prompt should point to the workspace, and the file name must match exactly. - Python is not found: open a fresh terminal after installation, rerun the version check, and confirm that Python: Select Interpreter points to a Python 3 installation.
- The output has not changed: save with Ctrl+S, then run the whole file again. Running a selected line is different from running the entire file.
What to carry forward
You now have a workspace containing a Python script and an HTML page. You can use the Explorer to create code files, the Python extension to select an interpreter and run a script, and the integrated PowerShell terminal to inspect and run files yourself. The key habit is to check the workspace location, save, run, and inspect the output.
Keep this folder. In the next lesson, you’ll begin tracking project changes with Git, using init, status, and diff to see what has changed without yet saving a checkpoint.