Recommended resources
The freely available resources this lesson will direct you to.
Welcome to the third lesson in our module on expressive performance. Having covered portamento for fluid note transitions and vibrato for adding life to sustained notes, we'll now focus on a more dramatic tool for melodic expression: pitch bending.
This lesson addresses how to perform or automate pitch bends to create the powerful rises and falls that inject massive energy into a lead melody. This technique is a signature element in the work of expressive artists like Fox Stevenson and is fundamental to creating tension and release in high-energy DnB. We will explore how to configure Serum for effective pitch bending and how to apply this technique both in real-time performance and through precise DAW automation.
1. Configuring the Pitch Bend Range in Serum
Before you can use pitch bend effectively, you must define its range. This setting tells Serum the maximum interval the pitch will shift up or down when the pitch bend control is pushed to its limit.
The pitch bend wheel is located to the left of the virtual keyboard in Serum.
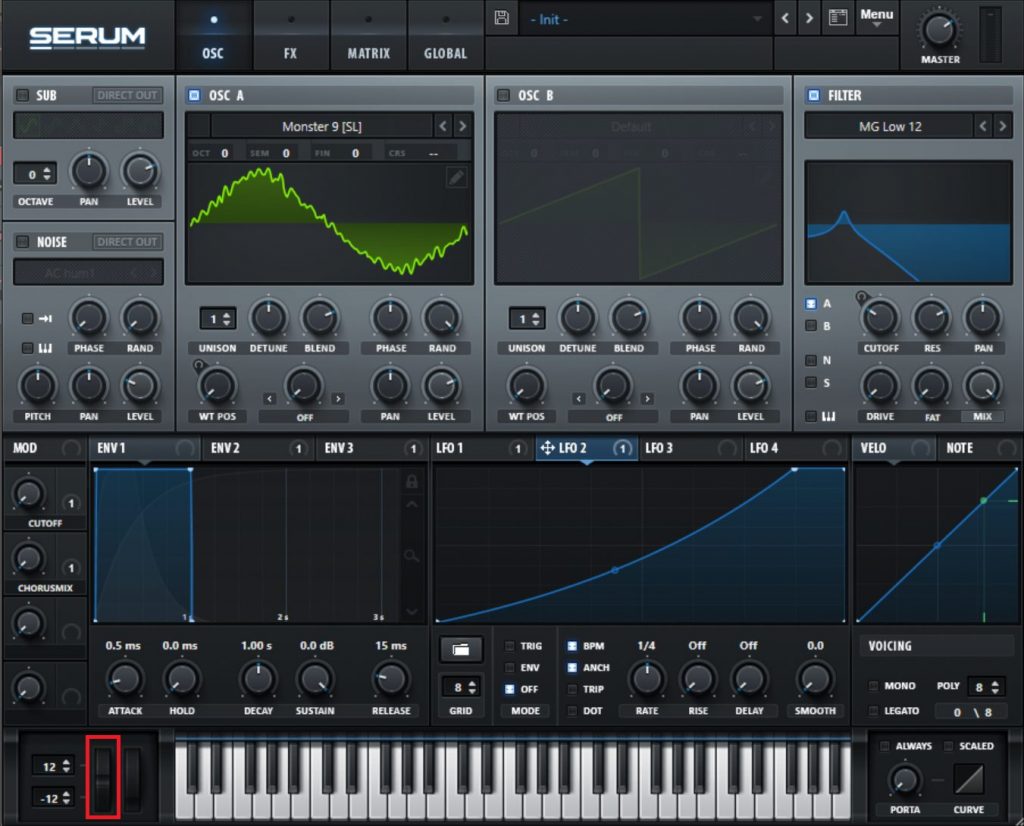
The default range of +/- 12 semitones (one full octave up or down) is a great starting point for the dramatic effects used in DnB. However, you have full control over this.
You can adjust the pitch bend range in the bottom-right corner of the Serum interface.
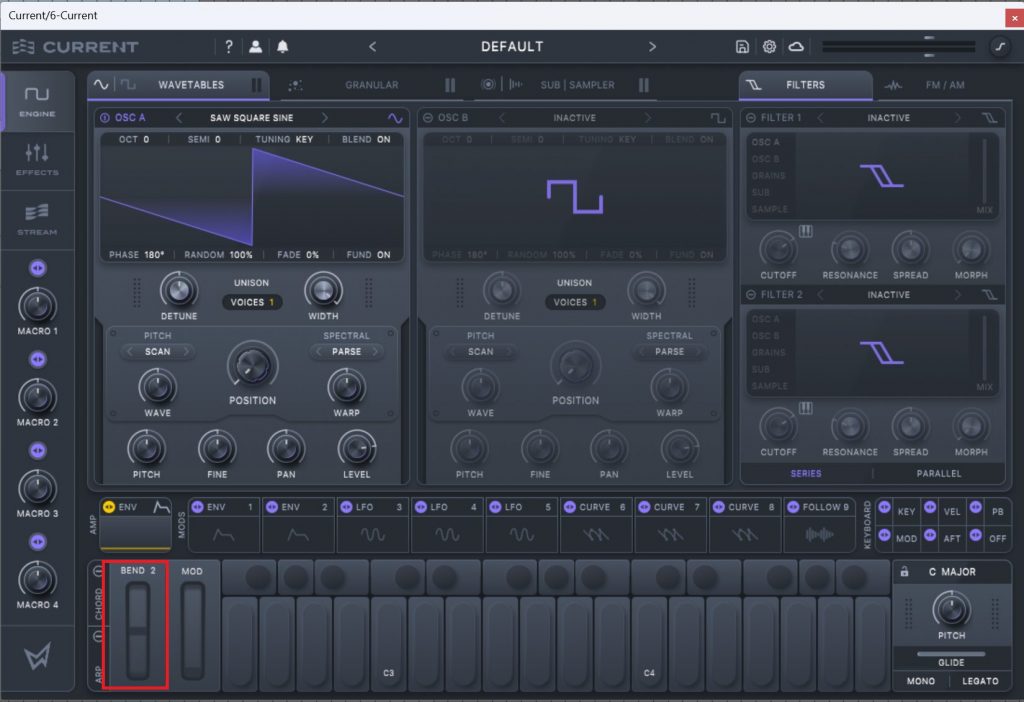
Why this setting is critical:
The value you set here dictates the scale of your pitch expression.
- Small Range (e.g., 1-2 semitones): Useful for subtle, bluesy note inflections or gentle "scoops" into a note.
- Large Range (e.g., 12-24 semitones): Essential for the sweeping, high-energy risers and dramatic falls that define many modern DnB leads.
For this lesson, set your pitch bend range to 12. This gives you a full octave to play with, providing ample room for dramatic melodic gestures.
2. Performing vs. Automating Pitch Bends
There are two primary ways to create a pitch bend:
- Performing: Using the physical pitch bend wheel on your MIDI keyboard. This method is intuitive and allows for real-time, human expression. The feel is immediate and interactive, perfect for capturing a live performance feel.
- Automating: Drawing pitch bend data directly into your DAW's piano roll or automation lanes. This method offers surgical precision, allowing you to craft perfectly timed, complex, and repeatable pitch contours that would be difficult or impossible to perform manually.
Given your background in software engineering, you can think of automation as scripting a precise pitch(time) function, whereas performing is more like direct user input. We'll focus on automation, as it's the key to building the large-scale tension effects common in electronic music production.
3. Automating Pitch Bends for Risers
A "riser" is an effect where a sound increases in tension over time, often leading into a drop or new section. A common way to create this tension is by automating a long, slow pitch bend upwards.
The following reading explains this core technique and introduces the idea of shaping the automation curve for maximum impact.
How to Create Risers in 7 Simple Steps + Advanced Tips
This article from Unison Audio provides excellent, practical advice on creating risers. We'll start with the fundamentals of pitch automation.
Please read the section titled "Pitch Modulation" under "Step #5: Automating Parameters for Dynamic Movement." Focus on the core concept: automating the pitch from a negative value (e.g., -12 semitones) up to zero over a set number of bars.
As the article explains, the process involves creating an automation curve in your DAW. Here's how the DAW's pitch bend lane relates to Serum's setting:
- Your DAW's pitch bend automation lane will have a default value of 0.
- The maximum positive value (often
+8191) corresponds to the positive bend range you set in Serum (e.g.,+12semitones). - The maximum negative value (often
-8192) corresponds to the negative bend range (e.g.,-12semitones).
To create an 8-bar riser leading into a drop:
- Hold a single MIDI note for 8 bars.
- Open the pitch bend automation lane for that MIDI clip.
- Draw a straight or curved line that starts at the minimum value (
-8192) and ends exactly at0as the 8-bar section concludes. - As suggested in the reading, using a slightly exponential curve that gets steeper towards the end will make the rise feel like it's accelerating, enhancing the sense of anticipation.
4. Advanced Pitch Bending Techniques
Simple linear pitch bends are effective, but you can create far more complex and interesting textures by layering and modulating your pitch bends. These techniques are where the true character and energy of an expressive lead come to life.
The same article from Unison Audio offers several advanced strategies.
How to Create Risers in 7 Simple Steps + Advanced Tips
Now, let's explore more sophisticated methods for pitch modulation.
Read the sections titled "Pitch-bending Secrets" and "LFO Modulation for Movement" (specifically the part about assigning a second LFO to modulate pitch). Pay attention to these powerful ideas: Layering different bend ranges: Creating two synth tracks with the same patch but different pitch bend ranges. Using LFOs for pitch wobbles: Applying a tempo-synced LFO for rhythmic pitch effects. Overlapping octave bends: One layer bending up while another bends down. Automating the bend range itself: A highly advanced technique for controlling tension.
Let's break down how to implement these ideas for a DnB lead:
-
Layered Bends for Complexity:
- Duplicate your lead track.
- On the first track, keep the bend range at
12. - On the second track, set the bend range to something non-octave, like
5or7semitones. - Apply the same pitch bend automation to both tracks. The layers will move in parallel but at different intervals, creating rich, evolving harmonics.
-
Rhythmic Pitch Wobbles with an LFO:
- In Serum's Mod Matrix, set up a new modulation:
- Source: LFO1
- Destination: Global -> Master Tune
- Type: Bipolar (
<->)
- In the LFO1 panel, set the shape to Sine or Triangle and the rate to a tempo-synced value like 1/8 or 1/16.
- Keep the modulation Amount in the matrix very low (e.g.,
1or2). This adds a rhythmic flutter to the pitch. - You can automate the LFO rate to speed up during a riser, or use a macro to control the modulation amount, adding wobbles only on certain notes. This is a classic Neurofunk technique.
- In Serum's Mod Matrix, set up a new modulation:
-
Automating the Bend Range:
- This is a master-level trick for managing tension. You can automate Serum's pitch bend range parameter itself.
- For example, during a long riser, you could have the bend range at a wide
24semitones. Right before the drop, you can automate it to snap down to12or2. This creates a feeling of the pitch "locking in" to a stable state, making the subsequent drop feel more impactful.
By combining long, automated bends with these more intricate techniques, you can design lead lines that are full of movement, energy, and surprise.
Conclusion
You have now completed our exploration of the three core pillars of expressive pitch control: portamento, vibrato, and pitch bending. While glide and vibrato add fluidity and humanization, pitch bending is your primary tool for creating large-scale drama and energy.
Key Takeaways:
- Pitch Bend Range is Key: The
BENDsetting in Serum defines the maximum interval of your pitch bend and is the most important parameter to configure. A range of+/- 12semitones is a versatile starting point for DnB. - Automation for Precision: While performing with a MIDI wheel is expressive, automating pitch bend in your DAW is essential for crafting the long, precise risers and falls that build tension in electronic music.
- The Curve Matters: The shape of your automation curve (linear vs. exponential) has a significant impact on the feeling of acceleration and tension.
- Advanced Textures: Layering synths with different bend ranges and adding rhythmic LFO modulation to pitch are powerful techniques for creating complex, modern lead sounds.
In our next lesson, we will explore how to use Serum's 'Note Latch' and arpeggiator functions. This will allow us to combine the pitch modulation techniques you've learned with rhythmic patterns to create dynamic, evolving riffs from just a few held notes.