Recommended resources
The freely available resources this lesson will direct you to.
Hello! This course starts with Python foundations, then builds toward a Django API and a React storefront. Before writing Python code, you need a dependable way to install libraries without one project disrupting another. In about 40 minutes, you’ll create a virtual environment, install and inspect a package with pip, and record the packages needed to set the project up again.
Why give each project its own environment?
Suppose two Python projects require different versions of the same library. Installing both into one shared Python installation creates a conflict: changing the library for one project may break the other. A virtual environment gives each project its own location for installed packages.
If you have used node_modules, the project-local dependency idea is familiar. A Python virtual environment also provides a project-specific Python executable. Activating it makes your terminal use that executable when you type python. This is package isolation, not a security sandbox or a separate operating system.
Python Virtual Environments - Full Tutorial for Beginners
Watch “Python Virtual Environments - Full Tutorial for Beginners” by Tech With Tim for a short demonstration of isolation, creation, activation, and installation.
Watch the motivation, environment creation, activation, and package installation. The presenter names the folder env; this lesson uses the equally valid name .venv. Focus on which environment receives the package, rather than memorizing the presenter's folder name.
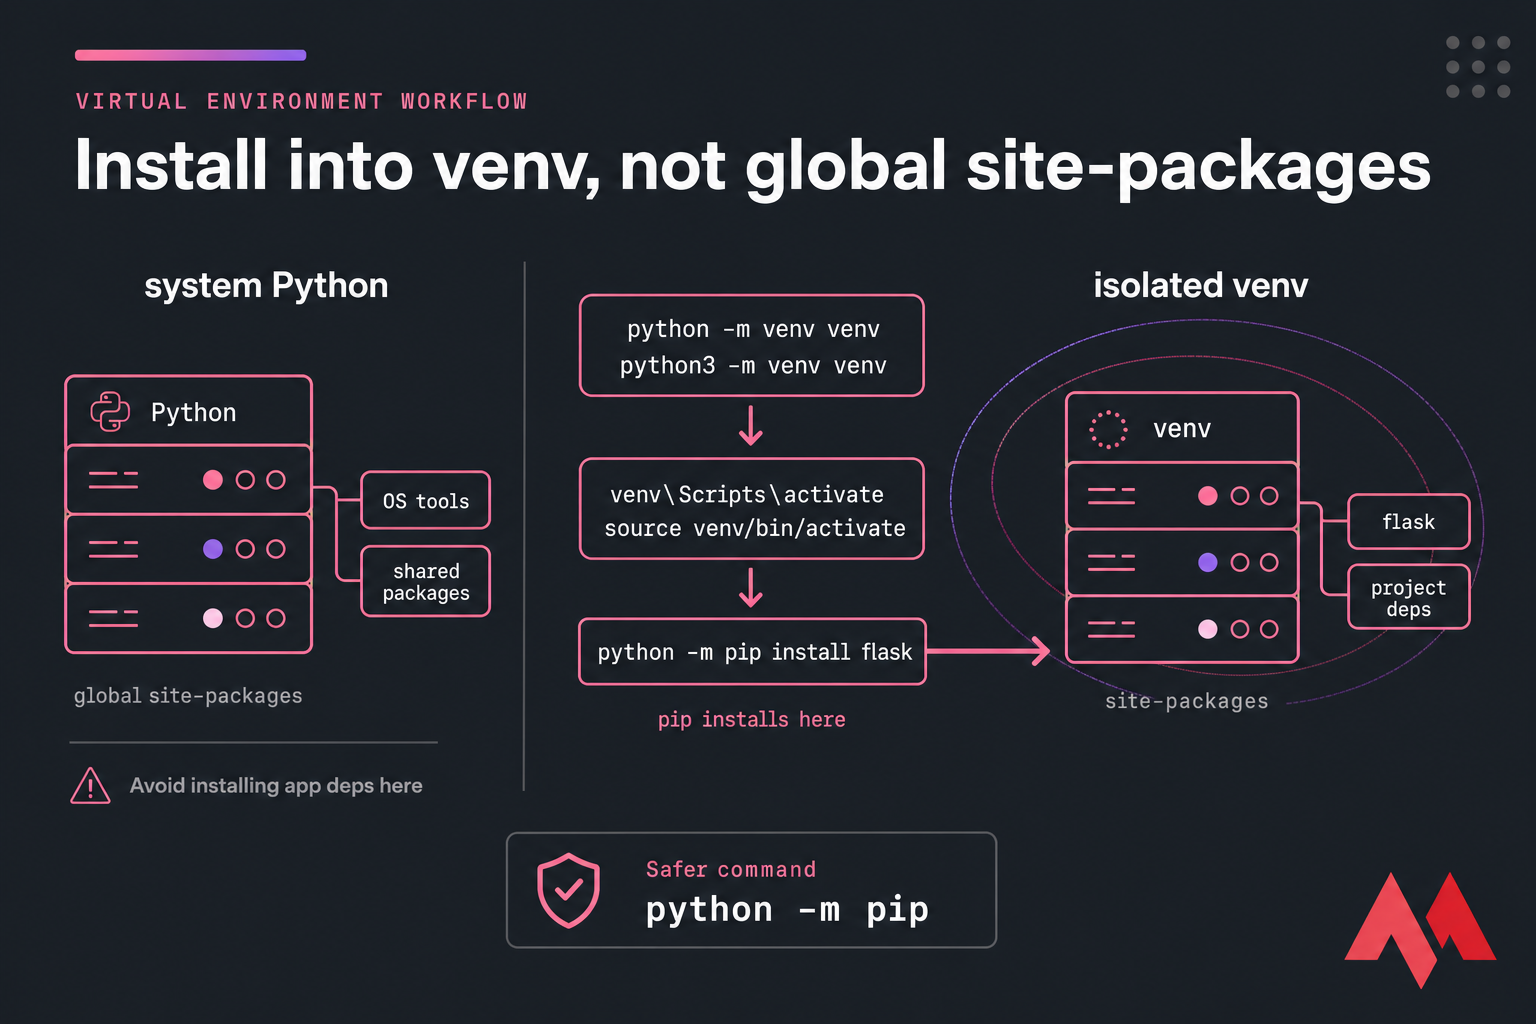
The key distinction is which Python installation runs pip. We’ll use python -m pip rather than a bare pip command: -m pip runs the pip module through the Python executable you selected, reducing the chance of installing into an unintended environment.
Create and enter a virtual environment
Open a terminal in a new, empty project folder—for example, a folder you create for Python practice. First, check that Python 3 is available:
python --version
If your system uses python3 instead, run python3 --version. On Windows, py --version may work when python does not. You need a working Python 3 installation before continuing.
From inside your project folder, create .venv with the command for your system:
| Terminal | Create the environment |
|---|---|
| macOS or Linux | python3 -m venv .venv |
| Windows | py -3 -m venv .venv |
If python already runs Python 3 on your system, python -m venv .venv works too. The final .venv is the folder name; venv after -m is Python’s built-in environment-creation module. Keep your own source files beside .venv, not inside it.
Next, activate the environment using the command that matches your terminal, which may differ from your operating system’s default terminal:
| Terminal | Activate .venv |
|---|---|
| macOS or Linux, bash/zsh | source .venv/bin/activate |
| Windows PowerShell | .\.venv\Scripts\Activate.ps1 |
| Windows Command Prompt | .venv\Scripts\activate.bat |
Your prompt will often gain a (.venv) prefix. Confirm with a stronger check:
python -c "import sys; print(sys.executable)"
python -m pip --version
The reported Python path should include your project’s .venv folder. The pip output should also point inside it. If it does not, check that you activated .venv in the same terminal where you ran these commands. If PowerShell blocks its activation script, you can use Windows Command Prompt instead; do not change security settings without understanding your system’s policy.
Activation lasts only for the current terminal session. When you finish, deactivate returns that terminal to its previous Python selection. When you come back to the project, reactivate the existing .venv; you do not need to create it again.
Install and inspect a package with pip
pip installs third-party Python packages, usually from the Python Package Index. Let’s use requests, a library for making HTTP requests. It is small enough for this walkthrough and relevant to the API work later in the course. With .venv active, run:
python -m pip install requests
python -m pip show requests
python -m pip list
install fetches the package and any packages it depends on. In the show output, look for Version, Requires, and Location. Location should be inside .venv; list will include requests and dependencies installed alongside it. You can also confirm that this Python can import the library:
python -c "import requests; print(requests.__version__)"
The Python tutorial’s package-management section is a useful command reference. Its example version numbers are historical, so use the commands and explanations rather than trying to reproduce those exact versions.
12. Virtual Environments and Packages
Read Section 12.3, “Managing Packages with pip,” in the official Python Tutorial to connect the commands you just ran with version selection, upgrades, removal, and dependency lists.
In Section 12.3, begin where the text explains that pip can install, upgrade, and remove packages. Read the pip workflow through the paragraph about putting a package list in requirements.txt; then read the immediately following sentence and example showing installation from that file. Pay particular attention to the difference between pip list (inspection) and pip freeze (versioned output suitable for a requirements file).
For day-to-day maintenance, these commands are worth recognizing:
python -m pip install --upgrade requests
python -m pip uninstall requests
The first requests the latest available version; the second removes the package after confirmation. You do not need to run them now. pip also accepts an exact version, such as requests==2.32.5, when a project must use that release. An upgrade can change a working project’s dependencies, so make it deliberately and update your recorded requirements afterward.
Record dependencies, not the environment folder
Imagine sharing your code with another developer—or setting it up on another computer. The .venv directory is specific to its local Python installation and should not be copied as the project’s dependency record. Instead, while your environment is active, write its installed package versions to a text file:
python -m pip freeze > requirements.txt
Open requirements.txt. You should see requests and packages it depends on, with version numbers. freeze records everything installed in this environment, including indirect dependencies. That makes it useful for recreating the current installation, but it also means you should avoid installing unrelated packages into a project environment.
Python Virtual Environments - Full Tutorial for Beginners
Return to the same tutorial for its demonstration of exporting installed versions and using the resulting file to provision an environment elsewhere.
Watch requirements workflow. Notice that the presenter creates a new environment before installing from requirements.txt: the text file travels with the project, while the environment folder is created locally.
Someone setting up the project can create and activate their own .venv, then run:
python -m pip install -r requirements.txt
Here -r means “read requirements from this file.” You can run it in your current environment as well; if the listed versions are already installed, pip should report that they are satisfied.
Your project folder can now look like this:
python-practice/
  .venv/
  requirements.txt
Keep requirements.txt with the project. If you use Git, put .venv/ in a .gitignore file so the local environment is not committed. You’ll work with Git in a later module; for now, the rule is simply share the dependency instructions, not the installed environment.
What to carry forward
You can now create a project-local .venv, activate it, verify the Python you are using, and manage packages through python -m pip. pip show and pip list tell you what is installed; pip freeze and pip install -r requirements.txt let you record and recreate an installation.
Keep this practice environment available. In the next lesson, you’ll begin writing Python expressions with variables and basic types—and you’ll already have a reliable place to run them.