Recommended resources
The freely available resources this lesson will direct you to.
Hello! This course begins with Python in a notebook, then builds toward working with data and training machine-learning models. A notebook is a useful starting point because you can run a small piece of code and inspect its result immediately.
In this lesson, you’ll execute Python statements, distinguish code from its output, and see why the order in which you run cells matters. You don’t need prior Python experience.
Meet the notebook
A notebook is made of cells. A code cell holds instructions for Python; a text cell holds explanations. When you run a code cell, a Python kernel executes its contents, and any visible result appears below the cell.
Watch these short excerpts from Michael Fudge’s Quick introduction to Jupyter Notebook. The interface may look a little different from the one you use, but the code-cell behavior is the same.
Quick introduction to Jupyter Notebook
In Quick introduction to Jupyter Notebook, Michael Fudge shows code, explanation, and output together, then demonstrates running a cell.
Watch the notebook overview to see how the pieces fit together. Then watch running a cell; focus on clicking into a code cell, using the Run control or Shift+Enter, and finding the output. The example asks for input, but you will not need to do that here.
For a place to try this without setting up software locally, use the provided Google Colab notebook. Read just its introductory cell instructions:
Google Colab’s basic-features notebook gives you an executable notebook and shows its controls. Read these parts before adding your own code cell.
Under “Cells,” continue through “Code cells.” Read cells and shortcuts, paying particular attention to the Play icon and Shift+Enter. Then, under “Text cells” and “Adding and moving cells,” read adding cells so you can make a space for your own code. You can leave the later “Working with python” examples for another time.
If Colab shows CONNECT rather than CONNECTED, connect its runtime before trying to run code. Use + CODE to add a cell; you do not need to run every example in the provided notebook.
The image below shows a classic Jupyter interface rather than Colab. Notice the distinction between what was entered and what Python returned.
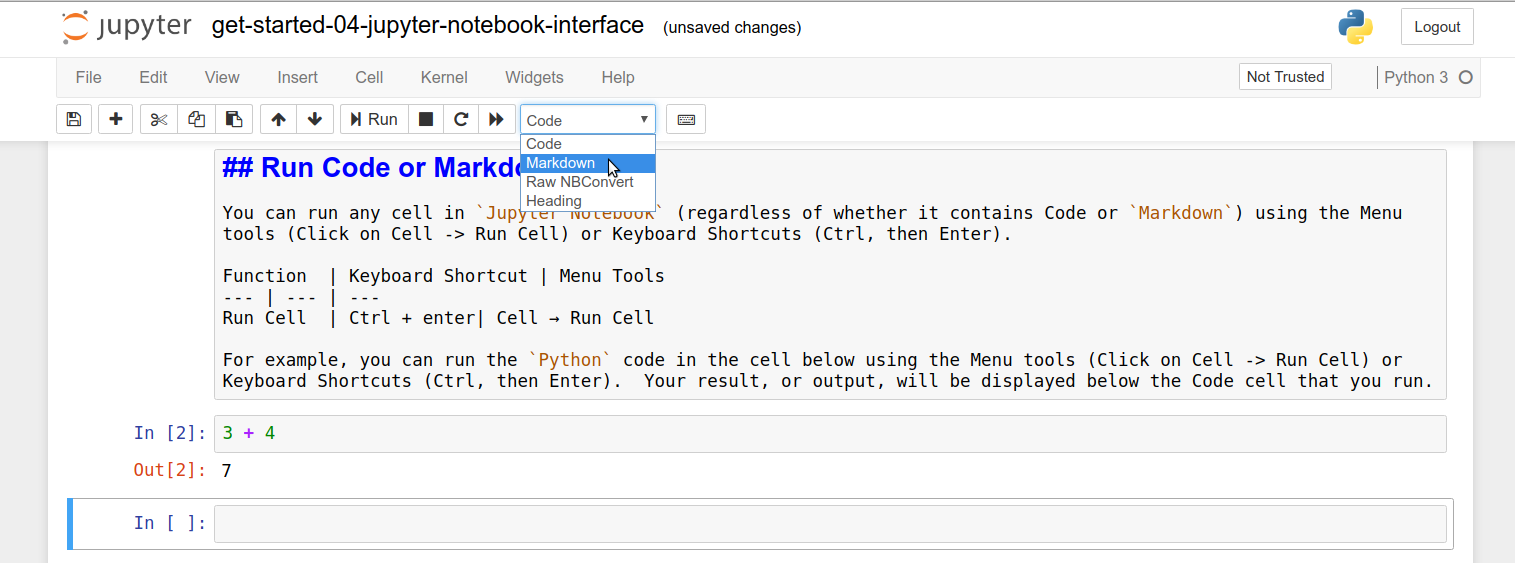
Run code and read the result
In a new code cell, type:
3 + 4
Press Shift+Enter, or click the cell’s Play/Run button. You should see 7 below the code. Shift+Enter also moves your focus to the next cell, creating one if needed. The text 3 + 4 remains the input; 7 is the output.
Now try an explicit instruction to show something:
print("Notebook ready")
After you run it, Notebook ready appears below the cell. print(...) asks Python to produce visible text. By contrast, a code cell can also show the value of its last expression without a print call, as 3 + 4 did.
That difference becomes clearer with these two cells. Run the first:
score = 8
You should not expect a displayed value. This statement stores 8 under the name score; it does not ask to show anything. In the next cell, run:
score
Now you should see 8. For this lesson, treat a name such as score as a way to keep a value available for later cells. You’ll explore Python’s values and expressions in more detail next lesson.
A cell can contain more than one line. Run:
print("Starting score:", score)
score + 2
You should see a line reading Starting score: 8, followed by the result 10. The first came from print(...); the second is the value of the last expression. This is a quick way to inspect an intermediate value and a final calculation in the same cell.
If a cell shows an error instead of the expected result, first check that you typed it exactly and that you ran the earlier cell defining score. Errors are useful information, not a sign that you have damaged the notebook; a later lesson will teach you how to read them systematically.
Why running order matters
Notebook cells share the kernel’s current working state. Their position on the page does not guarantee the order in which they were run.
Return to the cell containing score = 8. Change it to:
score = 20
Run that cell, then look at the output still visible under score + 2. It may still say 10: a notebook does not automatically rerun other cells when you edit or execute one. Run the score + 2 cell again, and its result should become 22.
This leads to two habits that will matter when your notebooks eventually contain data preparation and model results:
- Rerun a cell after editing it. Changing the text alone does not change the kernel’s state or refresh its output.
- Rerun dependent cells after changing an earlier value. An output on the page records an earlier execution; it is not a live calculation.
In classic Jupyter, execution numbers beside cells indicate run order, not where cells sit on the page. A cell may also show an asterisk while it is running. Colab presents these indicators differently, but the underlying issue is the same: inspect what actually ran, not just what the notebook currently displays.
For a visual demonstration, return to the later excerpt of Quick introduction to Jupyter Notebook:
Quick introduction to Jupyter Notebook
The same video illustrates what happens to stored values when a kernel restarts and how execution indicators reveal run order.
Watch lost state for the distinction between a value previously shown in a cell and a value still available to Python. Then watch run indicators to see how completed cells are numbered. You do not need to restart your own notebook for this lesson.
Restarting a kernel or runtime clears values held in memory. Previously displayed output may still be visible, so it is not proof that those values are currently available. When in doubt, run the necessary cells again in order, beginning with the ones that establish the values you need.
Takeaways
You can now enter Python in a code cell, run it with Shift+Enter or the Run control, and inspect the output beneath it. print(...) explicitly produces visible text, while the final expression in a cell can display its value automatically. Assignments can store values without displaying anything, and changing an earlier cell does not refresh later results until you rerun them.
Next, you’ll use numbers, strings, booleans, and comparisons to write more expressive Python code in those cells.