Recommended resources
The freely available resources this lesson will direct you to.
Hello! Last time, we built the foundation for displaying data by loading a list of items when a page first loads. You saw how a component can be designed to fetch its own content using hx-trigger="load", and we contrasted this with the more traditional server-side include approach.
Today, we'll address a critical aspect of displaying data collections: what happens when the list is too long to show all at once? The answer is pagination, a pattern you've undoubtedly implemented many times in React. In this lesson, we will build on our list-view foundation to implement server-side pagination. Our goal is to create "Previous" and "Next" controls that efficiently fetch and replace only the list's content, without requiring a full page reload, all while keeping the UX sharp and the browser's URL up to date.
This is a classic feature where the hypermedia approach demonstrates its elegance. Instead of fetching a page of JSON, managing loading states, and rendering the new items on the client, we will instruct the server to do the rendering and send us a ready-made HTML fragment for the next page.
The Pagination Flow: From Client Click to Server-Rendered Fragment
The core logic of HTMX-driven pagination is straightforward and relies on the principles we've already covered.
- The Trigger: The user clicks a "Next" or "Previous" button. This element is an
<a>tag or a<button>with HTMX attributes. - The Request: The
hx-getattribute on the button points to the same endpoint we used for the list, but with a query parameter like?page=2. - The Target: The
hx-targetattribute points to the container element that holds the list of items (e.g., a<tbody>or a<div>). - The Server Logic: The Express server receives the request, reads the
pageparameter from the query, and fetches the corresponding slice of data from the database. It then renders an HTML fragment containing only the rows/items for that page. - The Swap: The browser receives this HTML fragment and swaps it into the element specified by
hx-target, using the defaultinnerHTMLswap strategy. The rest of the page remains untouched.
Let's see this in action by building a paginated character explorer, using the "Rick and Morty Character Explorer" article as our guide. This example uses Express.js and EJS, aligning perfectly with our chosen stack.
Server-Side: Handling the page Parameter
First, the server needs to be aware of pagination. The route that serves our list must be able to parse a page number from the request URL and use it to limit the data it retrieves.
Building a Rick and Morty Character Explorer with HTMX and Express.js - DEV Community
This article provides a complete example of a paginated list. We'll start by examining how the Express server is set up to handle pagination requests.
In the server.js file, focus on the main app.get('/', ...) route handler. Notice how it de-structures the page parameter from req.query, with a default value of 1. Read through the code block from the server setup and pay close attention to how the url variable is constructed using this page parameter.
As you can see in the example, the line const { page = 1, name, status } = req.query; is the key. It extracts the page number from the URL's query string. If no page is provided, it defaults to 1. This number is then used to construct the request to the backing data source (in this case, an external API, but for us, it would be a database query with an OFFSET and LIMIT clause).
The server then renders a full EJS template, passing in the fetched data. This data object should contain not only the items for the current page (data.results) but also metadata about the pagination state, such as links to the next and previous pages (data.info.next and data.info.prev).
Frontend: The Pagination Controls
Now, let's look at the EJS template that generates the "Previous" and "Next" buttons. This is where we wire up the HTMX attributes that drive the interaction.
Building a Rick and Morty Character Explorer with HTMX and Express.js - DEV Community
The magic happens in the pagination controls themselves. Let's analyze the EJS snippet that creates the "Previous" and "Next" links.
Find the section "Implementing Interdimensional Pagination" and examine the code block for the pagination div. You can find it between <tf start="<div class="pagination">" end="">these lines</tf>. Focus on the attributes of the ` tag for the "Next" button.
Let's deconstruct the <a> tag for the "Next" button. It's a masterclass in progressive enhancement and modern hypermedia controls.
<a href="/?page=<%= currentPage + 1 %>"
   hx-get="/?page=<%= currentPage + 1 %>"
   hx-target="body"
   hx-push-url="true">Next</a>
href: This makes the link a standard, functioning hyperlink. If JavaScript or HTMX fails to load, the user can still navigate. It's also crawlable by search engines.hx-get: This tells HTMX to hijack the click and issue an AJAXGETrequest to this URL instead of performing a full-page navigation.hx-push-url="true": After a successful request, this attribute instructs HTMX to update the browser's URL in the address bar to the one fromhx-get. This ensures that the page state is bookmarkable and the back button works as expected—a crucial piece of the SPA-like experience.hx-target="body": This tells HTMX where to place the HTML response from the server.
Refining the Target and Swap
The hx-target="body" approach in the article is simple and effective. Since the server always returns the full page template, replacing the entire <body> works. However, it's not the most efficient method. The server is re-rendering the header, footer, and other static parts of the page on every pagination click, and sending that extra markup over the wire.
A more optimized approach, which builds on what we learned about serving partials in Module 2, would be:
- On the Server: Detect the
HX-Requestheader. If it's present, render only the table/list partial. If not, render the full page layout. - On the Client: Change the target to be more specific, for example
hx-target="#character-table".
This way, for pagination clicks, the server only renders and sends the new table rows, minimizing payload size and server load.
The Problem of Stale Controls and the OOB Solution
If we refine our approach to target just the table content (hx-target="#character-table"), we create a new problem. The pagination controls themselves are outside the target area. When we load page 2, the table updates, but the "Next" button might still point to page 2, and the "Previous" button might be incorrect or disabled.
How do we update the table and the pagination controls in a single request?
The answer is Out-of-Band (OOB) Swaps. This is an advanced HTMX feature that allows a single server response to update multiple, disjoint areas of the page. Given your experience, this pattern should feel like a powerful tool for composing UI updates.
Here's how it works:
- The primary part of the server's response will be swapped into the
hx-targetas usual. - The server can include additional HTML fragments in the response. If these fragments have an
idand thehx-swap-oob="true"attribute, HTMX will find the element with the matchingidin the current document and swap the fragment's content into it.
Let's look at a concrete example from Mark Volkmann's blog.
This blog post provides a very concise and powerful example of pagination using OOB swaps.
In the "Pagination" section, examine the code for the server response. You'll see it returns a <table> fragment and a <div id="pagination"> fragment. Find the description that starts with this explanation. Notice how the pagination div is marked with hx-swap-oob.
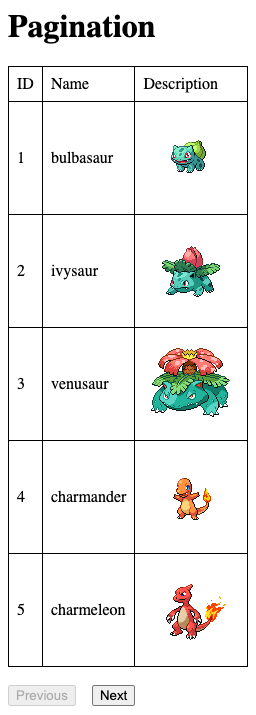
In this pattern, a GET request to /pokemon-rows?page=2 would be triggered by a button inside a #pagination div. The server would respond with something like this:
<!-- This is the main part of the response, it goes into the hx-target -->
<tbody>
  <tr>... new row 1 ...</tr>
  <tr>... new row 2 ...</tr>
</tbody>

<!-- This is the OOB part, it will replace the element with id="pagination" -->
<div id="pagination" hx-swap-oob="true">
  <button hx-get="/pokemon-rows?page=1">Previous</button>
  <button hx-get="/pokemon-rows?page=3">Next</button>
</div>
This is an exceptionally clean and powerful pattern. It allows you to create highly cohesive components where a single action can trigger logical updates across the UI, without complex client-side state management.
Alternative Pattern: Infinite Scroll
A popular alternative to "Previous/Next" buttons is infinite scroll, where new content is loaded automatically as the user scrolls to the bottom of the list. HTMX makes this pattern trivial to implement.
The key attributes are:
hx-trigger="revealed": Instead ofclick, this trigger fires a request when the element first scrolls into the viewport.hx-swap="afterend": Instead of replacing the content of the target, this appends the response after the target element.
You typically place these attributes on the last item of the current list. When that last item scrolls into view, HTMX fetches the next batch of items and appends them to the list. The new last item now carries the trigger for the subsequent fetch.
This video gives a quick, clear demonstration of the concept.
First Astro+HTMX impressions: HTMX infinite scroll, (Astro DB, partials, cursor based pagination)
This video introduces the concept of infinite scroll using HTMX.
Watch the short segment from the beginning, where the presenter explains the three core HTMX attributes used for infinite scroll: hx-trigger="revealed", hx-get, and hx-swap="afterend".
Conclusion
Today you've mastered one of the most common and essential patterns in web development using the hypermedia approach. You now have the tools to handle large data sets efficiently and elegantly.
Key Takeaways:
- Server-Side Pagination: The core pattern involves adding a
pagequery parameter to ahx-getrequest. The server uses this to return a fragment of the next page's content. - Targeting & Swapping: Use
hx-targetto specify which part of the page to update (e.g., the<tbody>of a table). - URL State:
hx-push-url="true"is essential for maintaining a shareable and bookmarkable URL that reflects the current page of data. - Out-of-Band Swaps: Use
hx-swap-oob="true"to solve the "stale controls" problem by allowing a single response to update multiple, independent parts of your UI, like the list content and the pagination buttons. - Infinite Scroll:
hx-trigger="revealed"combined withhx-swap="afterend"provides an easy way to implement infinite scrolling as an alternative to traditional pagination buttons.
You've now covered how to read and display data, both as a complete initial list and in paginated chunks. In our next lesson, we will move on to the "Create" part of CRUD. You will learn how to implement an inline form that uses hx-post to add a new item to our list without a page refresh.