Recommended resources
The freely available resources this lesson will direct you to.
- Pattern drafting for 3 different dresses with princess seamswww.youtube.com
- Princess Seams // How to Switch to Style Lineswww.youtube.com
- Patterning Basics - Princess Seam Manipulations on a Bodice Block — Madeline Designsitsmadelinedesigns.com
- Armscye Princess Line Manipulation - Sempstresswww.sempstress.org
Welcome back! In our previous lesson, you expertly translated your design concept into a functional pattern, drafting the V-necklines and 2cm straps while ensuring the top will be easy to pull over your head. You've essentially defined the outer architecture of the garment.
Today, we move from the silhouette to the internal structure. This lesson focuses on creating the back panels of your top. You will learn to draft a classic armhole princess seam and, in the process, absorb the back waist dart's shaping function directly into this new seam. This is a fundamental pattern drafting technique where you transform a shaping element (a dart) into a design feature (a seam line). This process of reconfiguring components while maintaining overall system integrity should feel familiar from your work in product and systems design.
First, let's establish a clear mental model of what we're about to do. A princess seam is simply a style line that has absorbed the function of a dart.
Princess Seams // How to Switch to Style Lines
To begin, watch this brief conceptual introduction from the channel TheClosetHistorian. It provides an excellent demonstration of how darts are not truly eliminated, but rather their volume is moved and integrated into a new seam.
Watch from the beginning to the end of the demonstration. Pay close attention to how cutting the block apart and removing the dart creates two new pattern pieces whose curved edges will form the shape when sewn together.
The "before and after" of this process looks like this:
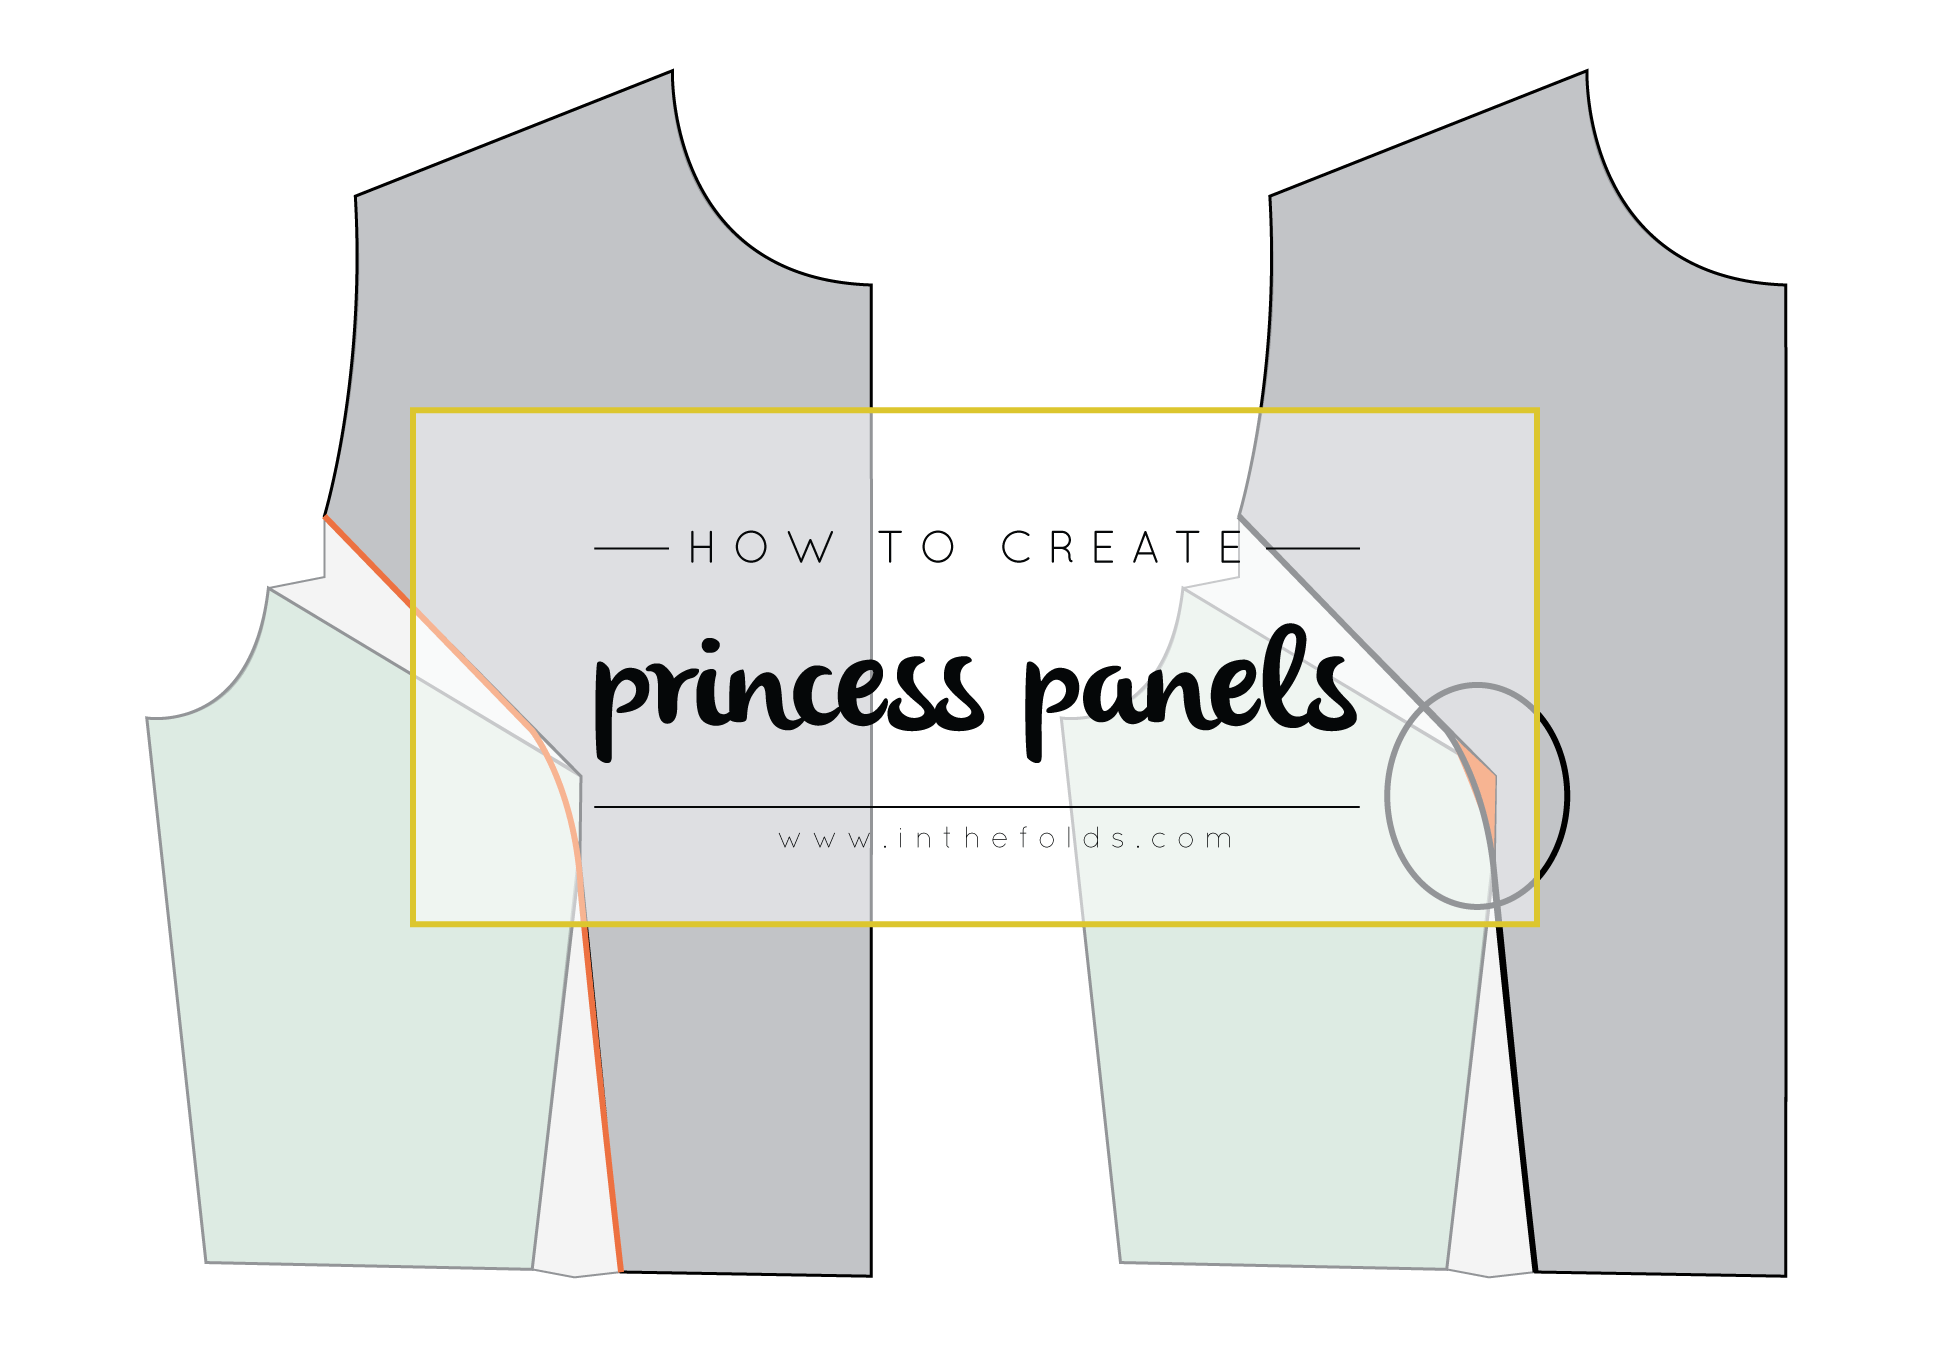
1. Preparing Your Back Bodice Block
Take out your back bodice sloper that you modified in the last lesson. You'll also need your pencil, a ruler, and a French curve.
Many back bodice blocks include a small shoulder dart to provide shaping over the shoulder blade. Before we can draw our new princess seam, we need to close this dart and transfer its value elsewhere. A common practice is to move it to the armhole, where it can be subtly incorporated or trimmed away.
The following video demonstrates this initial step.
Pattern drafting for 3 different dresses with princess seams
This clip from Needle Eye Patterns shows how to handle the back shoulder dart before proceeding with the princess seam.
Watch the short segment from this timestamp. Follow the 'slash-and-spread' method shown: Draw a line from the tip of the shoulder dart to the armhole. Cut along this line and one leg of the dart. Pivot the paper to close the shoulder dart and tape it shut. Smooth out the armhole curve if needed. If your back sloper does not have a shoulder dart, you can skip this step.
2. Drawing the Back Princess Seam
With your sloper prepared, you can now draft the style line for the princess seam. This is a design decision, but a classic armhole princess seam starts roughly at the midpoint of the armhole and curves down to meet the point of the waist dart.
- Find the Armhole Point: Measure your back armhole curve (the one you redrafted for the sleeveless top) and make a mark at its midpoint. This will be the origin of your princess seam.
- Identify the Dart Point: The destination of your line is the tip (apex) of your back waist dart.
- Draw the Curve: Using your French curve, draw a smooth, graceful line connecting the armhole midpoint to the dart apex. There's no single "correct" curve; aim for a line that looks balanced and fluid.
This part of the Needle Eye Patterns video shows this process clearly.
Pattern drafting for 3 different dresses with princess seams
Now, let's watch how to draw the style line.
Focus on the segment from this point. Observe how the presenter connects the armhole to the top of the waist dart with a curved line.
3. Creating the Two Back Panels
This is where the transformation happens. You will now cut your pattern along the new style line and simultaneously eliminate the waist dart, creating two separate pieces: the Center Back and the Side Back.
- Carefully cut along the princess line you just drew, starting from the armhole and stopping precisely at the dart's apex.
- From the apex, cut down along one leg of the waist dart to the waistline.
- Finally, cut up the other leg of the dart from the waistline back to the apex. This will completely remove the paper wedge of the dart.
You should now have two distinct pattern pieces. The shaping that was once created by folding and stitching the dart is now engineered into the curved seam that will join these two new panels.
The video from TheClosetHistorian provides a quick, clear visualization of this cutting process.
Princess Seams // How to Switch to Style Lines
This clip shows the physical act of cutting the back pattern apart and removing the waist dart.
Watch from this segment. Notice how cutting up through the dart and along the style line separates the block into two pieces while discarding the dart fullness.
4. Truing and Marking
Your new panels are almost complete. The final drafting step is to ensure the pieces will sew together perfectly.
- True the Armhole: When you transferred the shoulder dart, you may have created a slight point or unevenness in your armhole. Check that the curve where the new Center Back and Side Back panels meet is smooth. Place the two pieces together along the princess seam at the top and redraw the armhole curve so it flows smoothly across both pieces.
- Add Notches: To ensure you can align the curved edges of your new panels accurately when sewing, add one or two notches. Mark a short perpendicular line that crosses the princess seam on both the Center Back and Side Back panels, about halfway down the curve. This is a critical manufacturing guide that prevents errors during assembly.
You have now successfully engineered your back bodice pattern into two princess-seamed panels.
Key Takeaways
- Princess seams are style lines that absorb the shaping function of darts.
- Drafting the back princess seam involves drawing a curve from the armhole to the waist dart apex.
- Any existing shoulder darts must be closed and transferred before drafting the new seam.
- By cutting along the new style line and removing the waist dart, you create two new panels (Center Back and Side Back) where the seam itself provides the garment's shaping.
- Adding notches to the new seam is essential for accurate sewing.
Next Steps
With the back panels finalized, our next challenge is the front bodice. The process is similar in principle but more complex in execution, as we will need to absorb the shaping from both the side-bust dart and the waist dart into a single, elegant princess seam. This will require a technique known as dart rotation, a powerful tool in your growing pattern drafting skill set.