Recommended resources
The freely available resources this lesson will direct you to.
Welcome back. In the previous lesson, we built our first multi-step conversational flows using the conversations plugin. You learned how to guide a user through a sequence of questions with conversation.form, turning a complex state machine into a linear, readable script. However, the forms we built were still trusting; they performed basic type checking but didn't rigorously inspect the content of the user's input.
This lesson focuses on making those conversations robust. We will explore how to properly validate and sanitize user input at each step. As a seasoned front-end developer, you're already an expert on this topic in the context of web forms. The core principles—never trust user input, validate for correctness, and sanitize for safety—are directly applicable here. The goal is to protect your bot from erroneous data, prevent unexpected behavior, and ensure a smooth user experience.
Input Validation vs. Input Sanitization
Before we dive into the code, let's clarify two fundamental concepts: validation and sanitization. While related, they serve distinct purposes.
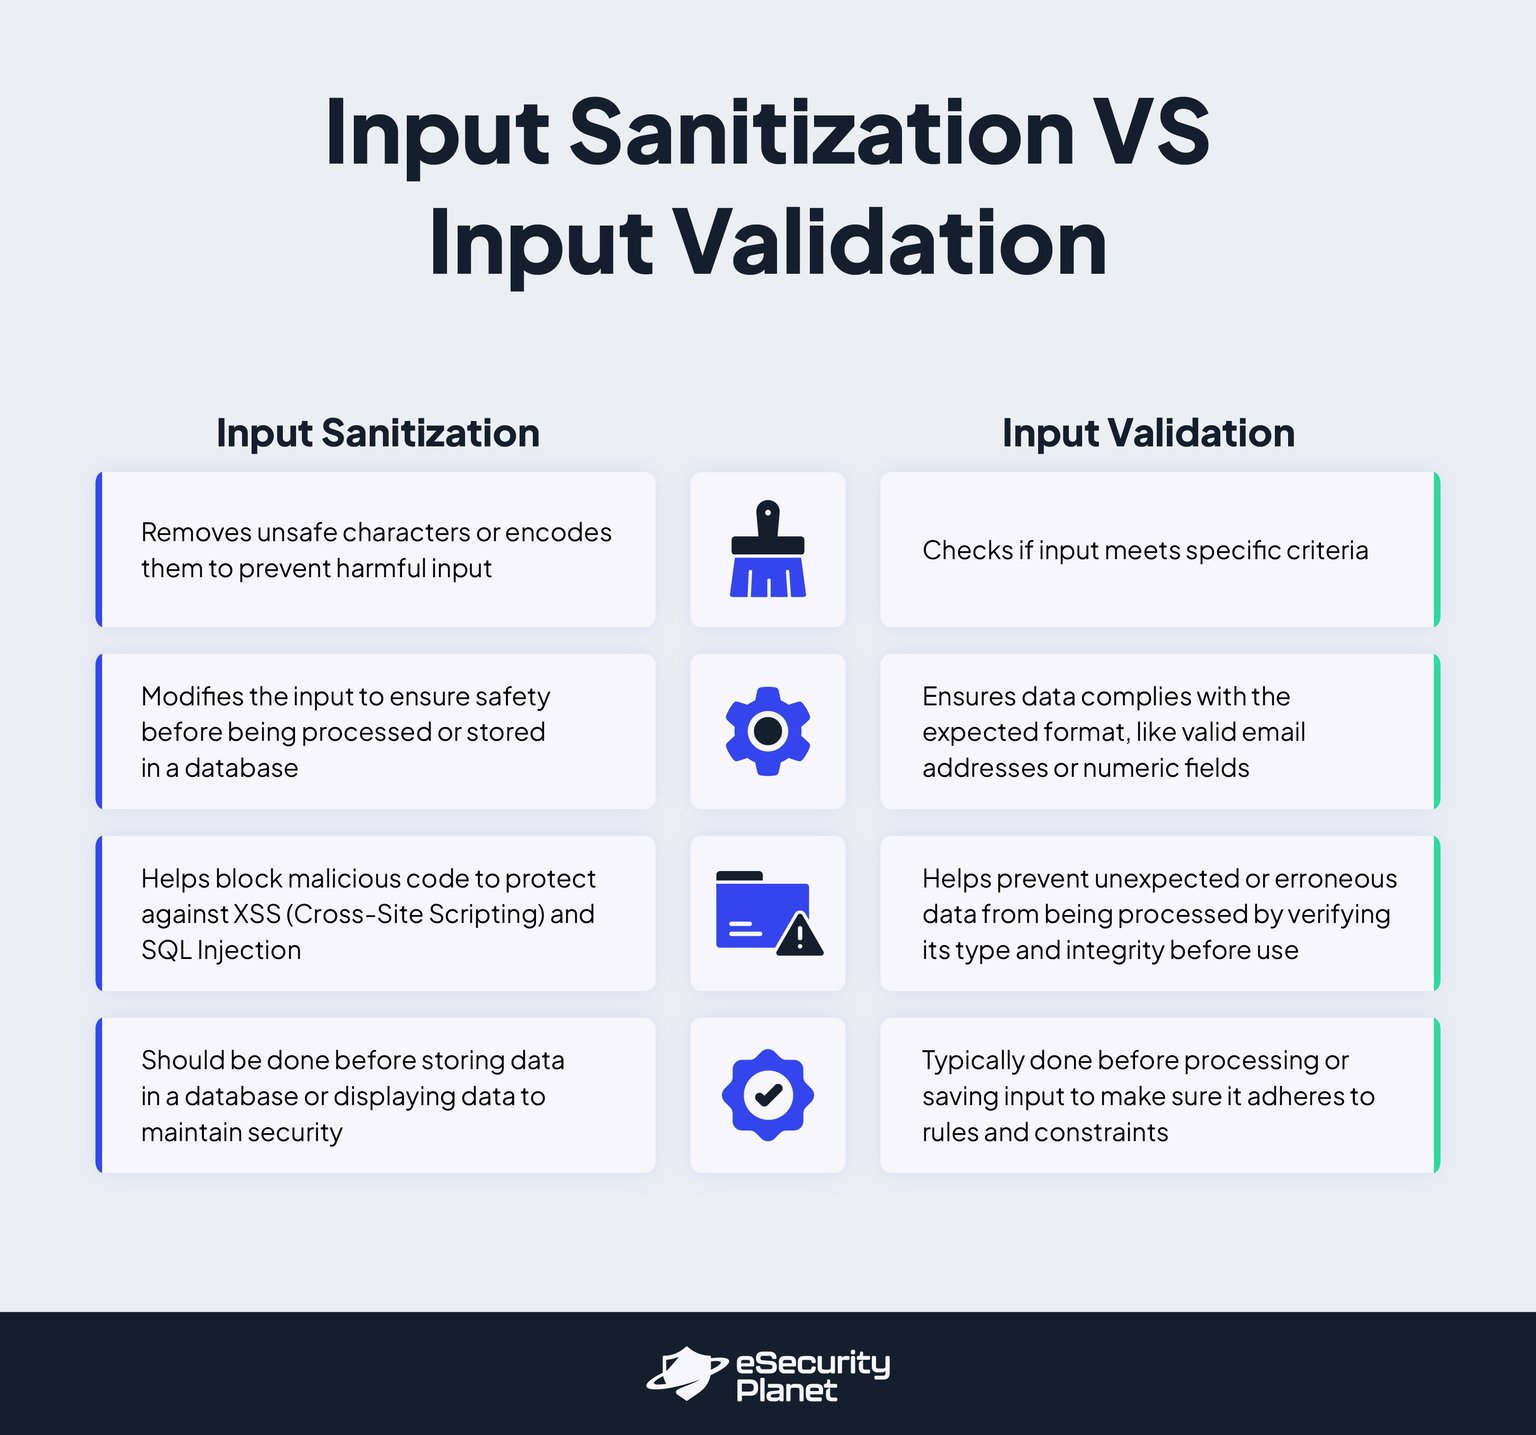
As the chart illustrates:
-
Input Validation is the process of checking if user-provided data conforms to a set of predefined rules. It ensures the data has the correct format, type, and value. For example: Is this string a valid email address? Is this number within the accepted range of 1 to 100? Validation is a gatekeeper; it either accepts or rejects the input. It doesn't change the input itself.
-
Input Sanitization is the process of cleaning or modifying user input to remove or neutralize potentially harmful characters or code. This is a defensive measure to prevent security vulnerabilities like Cross-Site Scripting (XSS) or formatting issues. For instance, if a user enters
<b>John</b>as their name, sanitization might strip the<b>tags to produce justJohn.
The general best practice is to validate first to ensure the input is structurally sound, and then sanitize the valid input before you use it or store it.
Advanced Validation in Conversations
In our last lesson, conversation.form.int({ otherwise: ... }) provided basic type validation. But what if you need more complex rules? For example, what if the number of participants for a meeting must be a positive integer?
The grammY conversations plugin offers several powerful ways to implement custom validation logic.
Method 1: Custom Validation with a while loop
Since conversation functions are just JavaScript, you can use standard control flow structures to create a validation loop. This approach gives you maximum flexibility. Let's modify our createMeeting conversation to ensure the number of participants is greater than zero.
// In src/conversations/meeting.ts

// ...
await ctx.reply("How many participants will there be?");

let participants: number;
while (true) {
  const participantsCtx = await conversation.waitFor("message:text");
  const parsed = parseInt(participantsCtx.message.text, 10);

  if (isNaN(parsed) || parsed <= 0) {
    await ctx.reply("Please enter a positive number!");
    continue; // Ask again
  }

  participants = parsed;
  break; // Exit loop on valid input
}

// ...
This works, but it's a bit verbose. We're manually waiting for a message, parsing it, and checking the condition.
Method 2: Using conversation.waitUntil
A more elegant approach is to use the conversation.waitUntil method. It allows you to provide a predicate function that returns true for valid input. The conversation will pause and wait until it receives an update that satisfies your predicate.
Let's refine the date input from our createMeeting example to enforce a YYYY-MM-DD format using a regular expression.
The waitUntil method is a powerful tool for custom validation. This section of the API reference explains how it works.
Read the section on the waitUntil method. Pay close attention to how it uses a predicate function and an otherwise option for handling invalid inputs.
Now, let's apply waitUntil to our date validation problem.
// In src/conversations/meeting.ts
// ...

await ctx.reply("On what date will the meeting take place? (e.g., YYYY-MM-DD)");

const dateRegex = /^\d{4}-\d{2}-\d{2}$/;

const dateCtx = await conversation.waitUntil(
  (ctx) => ctx.has("message:text") && dateRegex.test(ctx.message.text),
  {
    otherwise: (ctx) => ctx.reply("Please enter a valid date format (YYYY-MM-DD)."),
  }
);
const date = dateCtx.message.text;

// ...
This code is much cleaner. waitUntil handles the re-prompting logic for us via the otherwise callback. The predicate (ctx) => ctx.has("message:text") && dateRegex.test(ctx.message.text) ensures we only proceed when we receive a text message that matches our desired format.
Input Sanitization in Practice
Now, let's turn to sanitization. Imagine a user sets their meeting title to *My Awesome Meeting*. If your bot later sends a summary using Markdown parsing, that title will appear as My Awesome Meeting. This might be undesirable and could break your UI's formatting.
A simple and effective sanitization technique is to trim leading/trailing whitespace and strip any characters that have special meaning in Markdown or HTML.
Let's write a simple sanitization utility function. You can place this in a new file, src/utils.ts.
src/utils.ts
/**
 * A simple function to sanitize text by trimming whitespace and
 * removing characters that have special meaning in Telegram's MarkdownV2.
 * @param text The text to sanitize.
 * @returns The sanitized text.
 */
export function sanitizeText(text: string): string {
  if (!text) return "";
  // Characters to escape in MarkdownV2
  const charsToEscape = /[_*[\]()~`>#+\-=|{}.!]/g;
  return text.trim().replace(charsToEscape, '\\$&');
}
Note: This is a basic sanitizer for MarkdownV2. A production-grade sanitizer would be more comprehensive, but this illustrates the concept effectively.
Now, we can use this function within our conversation. The best place to sanitize is right after you've received the raw input.
// In src/conversations/meeting.ts
import { sanitizeText } from "../utils"; // Don't forget to import it
// ...

await ctx.reply("What is the title of the meeting?");
const titleCtx = await conversation.waitFor("message:text");
const sanitizedTitle = sanitizeText(titleCtx.message.text);

// You can add validation after sanitization
if (sanitizedTitle.length === 0) {
    await ctx.reply("Title cannot be empty. Please try again.");
    // Here you would add logic to loop back and ask again.
}
const title = sanitizedTitle;

// ...
A Fully Validated and Sanitized Form
Let's combine these concepts to create a robust version of our createMeeting conversation.
src/conversations/meeting.ts
import type { MyConversation, MyContext } from "../types";
import { sanitizeText } from "../utils";

export async function createMeeting(conversation: MyConversation, ctx: MyContext) {
  // 1. Ask for title (with sanitization and validation)
  await ctx.reply("What is the title of the meeting?");
  let title: string;
  while (true) {
    const titleCtx = await conversation.waitFor("message:text");
    const sanitized = sanitizeText(titleCtx.message.text);
    if (sanitized.length > 0 && sanitized.length < 100) {
      title = sanitized;
      break;
    }
    await ctx.reply("Title must be between 1 and 100 characters. Please try again.");
  }

  // 2. Ask for participants (with validation)
  await ctx.reply("How many participants will there be?");
  const participants = await conversation.form.int({
    otherwise: (ctx) => ctx.reply("Please enter a valid number!"),
    validate: (value) => value > 0, // New: add a custom validate function!
  });

  // 3. Ask for the date (with validation)
  await ctx.reply("On what date will the meeting take place? (YYYY-MM-DD)");
  const dateRegex = /^\d{4}-\d{2}-\d{2}$/;
  const dateCtx = await conversation.waitUntil(
    (ctx) => ctx.has("message:text") && dateRegex.test(ctx.message.text),
    {
      otherwise: (ctx) => ctx.reply("Please enter a valid date format (YYYY-MM-DD)."),
    }
  );
  const date = dateCtx.message.text;

  // Summarize and finish
  await ctx.reply(
    `Great! Meeting "${title}" with ${participants} participants is scheduled for ${date}.`
  );
}
In the participants step, I've introduced a validate property within the conversation.form.int() options. This is a convenient feature of conversation.form helpers that lets you add custom validation logic directly, without needing a full while loop. The plugin will automatically re-prompt using the otherwise message if validate returns false.
Best Practices
Your experience in web development has taught you to be paranoid about user input. That same paranoia is a virtue in bot development.

Let's interpret these for our context:
- Don't Trust User Inputs: This is the core principle we've applied throughout this lesson. Every piece of data from a user must be checked.
- Don't Trust Client-Side Validation: This is a perfect analogy. You can think of the Telegram app itself as the "client." While it might prevent a user from sending certain malformed data, your bot's server is the ultimate authority. All critical validation must happen in your code.
- Consult the OWASP Web Testing Guide: While aimed at the web, the principles in the OWASP guides (like those on input validation) are universal security best practices.
- Enable Strict Mode: In our context, this translates to having robust error handling, strict TypeScript settings (
"strict": trueintsconfig.json), and defaulting to rejecting invalid data rather than trying to guess the user's intent.
Conclusion
You have now elevated your conversational forms from simple scripts to robust, secure data collection flows. By integrating validation and sanitization, you ensure data integrity, improve the user experience by providing clear feedback, and protect your bot from malformed or malicious input.
Key Takeaways:
- Validation checks if data is correct, while Sanitization cleans data to make it safe.
- You can implement custom validation using simple
whileloops for maximum control. conversation.waitUntilprovides a cleaner, predicate-based approach for complex validation rules (like regex matching).conversation.formhelpers often include avalidateoption for concise validation logic.- Sanitization should be applied to user input to prevent unwanted formatting and potential injection attacks.
- The principle of "never trust user input" is as crucial for chatbot development as it is for web development.
In our next lesson, we will complete our mastery of the conversations plugin by addressing two final key aspects: allowing users to gracefully cancel a conversation midway and handling timeouts for inactive users. This will prepare you to build truly polished and user-friendly interactive experiences.