Recommended resources
The freely available resources this lesson will direct you to.
- A Drawing Exercise Every Beginner Artists Should Do (Draw Better Circles & Ellipses)www.youtube.com
- Curved Line Drawing Exercises For Beginners | Boost Your Skills 2www.youtube.com
- Practice Dexteritypracticedrawingthis.com
- How to Improve Line Quality: 6 Sketching Exercises for Cleaner ...www.thedesignsketchbook.com
Good to see you again. Last time, you practised separating a mark into plan, ghost, and commit: choose the path, rehearse it above the paper, then make one smooth ink stroke without repairing it.
This lesson extends that habit from straight paths to repeated curved ones. You will practise circles, ellipses, C-curves, and S-curves while keeping both the shape and the pen pressure steady. These marks recur throughout ink drawing: vessel rims, eyes, wheels, petals, stems, animal joints, roof arches, and the flowing contours of plants or terrain.
Keep a reliable fineliner or ballpoint, inexpensive paper, and enough clear desk space to move your arm. For this session, an imperfect but fluent mark is more useful than a slowly corrected one.
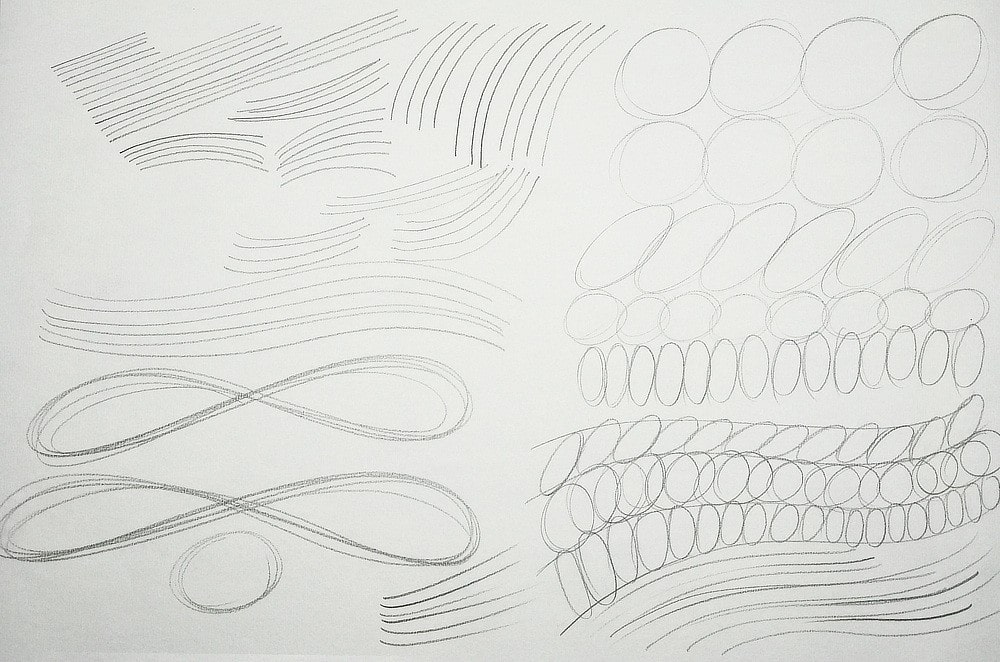
Curves have rhythm, not just outline
A straight line asks your arm to travel in one direction. A curve asks it to change direction smoothly without losing momentum. The usual difficulty is trying to steer every millimetre with a tight wrist. That produces uneven pressure, flattened sections, pointed turns, and hesitant starts or stops.
Instead, think of each curve as a short physical gesture that has a beginning, a directional flow, and an end.
- A C-curve bends consistently in one direction, like a parenthesis, a smile, an eyebrow, or part of a leaf edge.
- An S-curve combines two opposing C-curves. Its direction changes once at an inflection point, the central place where the curve reverses.
- A circle is a closed curve whose width and height are equal.
- An ellipse is a smooth, symmetrical oval. It has a long axis and a short axis; neither end should become pointed.
The word consistent does not mean mechanically identical. It means that marks intended to belong to a family share a clear rhythm: similar width, height, tilt, spacing, and pressure. A row of deliberate C-curves can vary slightly while still reading as one coherent pattern. A row in which every curve has a different peak, width, or darkness does not.
For short curves, fingers and wrist can contribute. For broad curves and full ellipses, let the elbow—and sometimes the shoulder—carry more of the movement. As before, rotate the page rather than forcing your hand into an awkward arc.
One pass in ink, many passes in the air
For this course, distinguish between ghosting and retracing:
- Ghost the intended shape in the air two to five times. Feel its speed and scale.
- Put the pen down and draw one continuous circuit or curve.
- Lift the pen. Leave the result as it is.
Some drawing drills use several overlapping passes of the pen to find a shape. That can be useful in pencil sketching, but it does not train the direct-ink decisiveness you are developing here. Your repeated marks should be multiple separate attempts, not repeated repair of one attempt.
Keep your pressure light to moderate and as even as possible. With a fineliner, pressing harder usually will not create attractive line-weight variation; it is more likely to make the line darker through pauses, damage the tip, or dent the paper. With a ballpoint, pressure changes are more visible, so choose one comfortable pressure and maintain it.
A Drawing Exercise Every Beginner Artists Should Do (Draw Better Circles & Ellipses)
Watch “A Drawing Exercise Every Beginner Artists Should Do (Draw Better Circles & Ellipses)” by My Drawing Tutorials. It demonstrates a useful circular-motion warm-up and reinforces the connection between a relaxed arm movement and smoother closed forms.
Watch the running track drill to see the basic repeated-motion idea. Then watch movement and grip advice, paying particular attention to the recommendation to use the shoulder for larger shapes and to practise attentively rather than merely filling a page. Adapt the repeated motion to this course by ghosting several loops, then making only one ink loop per circle or ellipse.
Building circles and ellipses deliberately
Before committing an ellipse, identify its invisible structure. Imagine a light cross through its centre:
- the major axis runs through the longest dimension;
- the minor axis runs through the shortest dimension;
- the two halves on either side of each axis should balance.
You do not need to draw these axes on every warm-up shape. But imagining them prevents the common “lopsided bean” effect, in which one end is round and the other is narrow, or one side bulges more than the other.
For a circle, use a smooth rotational motion. A circle may initially look a little oval, polygonal, or slightly open at the seam. Do not slow down to force the final millimetre to meet the start point. The pause will often create a blob. Instead, complete the motion at a consistent speed and observe what happened.
For an ellipse, begin with the same circular rhythm, then extend the motion along one chosen direction. The long axis stays stable throughout the loop. Avoid making it from two separate semicircles: the join often develops a kink. Think of the whole ellipse as one continuous orbit.
In later modules, ellipses will become the ends of cylinders, cups, plant pots, wheels, and architectural arches. For now, the immediate task is simpler: produce clear, even oval families on the page.
Read the circles-and-ellipses portion of “Practice Dexterity.” It introduces a practical constraint that makes uneven placement and inconsistent scale immediately visible: fitting related shapes between parallel boundaries.
In Section 5, “Circles And Ellipses,” find the paragraph beginning “You can draw longer straight lines.” Read the band fitting drill. Focus on why the guide lines and neighbouring shapes make inaccuracies easier to diagnose. Use the constraint below as a measurement aid, not as a reason to slow the pen to a crawl.
The band-fitting principle
Parallel boundaries provide feedback without demanding perfection. If every ellipse is meant to touch the top and bottom guide, then a too-tall, too-short, tilted, or flattened ellipse reveals itself immediately. The guides are not there for you to trace against; they are destinations, like the dots in last lesson’s line drill.
When you draw several ellipses in one band:
- keep their long axes parallel;
- aim for each ellipse to meet both guides lightly;
- leave similar gaps between neighbouring ellipses;
- accept a miss rather than going back over it.
This is a visual version of noticing patterns in a draft: a single anomaly can be incidental; a recurring tendency tells you what to alter in the next attempt.
C-curves and S-curves: finding the gesture
A C-curve is easiest to practise as a row of repeated arcs. First choose whether you are making “eyebrow” arcs or “smile” arcs. Give each one approximately the same span and height. If the curves grow shorter, flatter, or darker as the row continues, do not correct the earlier ones. Relax your hand, reset your starting position, and make the next three with a fresh intention.
For an S-curve, plan three landmarks before you draw:
- the starting point;
- the central inflection point;
- the endpoint.
Ghost the entire path. The key is not to pause at the centre: the first curve should flow through the inflection into the second. Imagine a vine bending one way and then responding to its own weight by bending back. The movement changes direction, but it remains continuous.
Curved Line Drawing Exercises For Beginners | Boost Your Skills 2
Watch “Curved Line Drawing Exercises For Beginners” by The Pencil Room Online for a compact demonstration of arc, wave, and ellipse drills. Its boundary-based exercises are particularly useful for making curved motion measurable without becoming stiff.
Start with small arcs for the basic upward and downward C-curve families. Continue with the wavy line drill, observing how each alternating bend creates an S-like rhythm and how the elbow carries a longer curve. Finish with guided ovals to see the same fluid motion applied to ellipses. The video uses exploratory, light pencil passes; in your ink page, ghost those passes and make one committed final mark.
A focused 20-minute curve page
Divide a sheet into four loose zones. Do not rule an elaborate grid; two or three simple guide bands are enough. Before every new row, take a breath, soften your grip, and decide whether the motion should come mainly from fingers, wrist, elbow, or shoulder.
1. C-curve families — 4 minutes
Make four rows of six to eight C-curves:
- two rows of upward “eyebrow” arcs;
- two rows of downward “smile” arcs.
Within a row, keep the span, height, and spacing approximately consistent. Make the curves large enough that you can move fluidly—around 3 to 5 centimetres across is a useful starting point.
Ghost one arc before each ink stroke. Use one pass. Aim for a line that begins and ends cleanly, without a dark dot at either end.
2. S-curve bands — 5 minutes
Draw two pairs of parallel lines about 3 centimetres apart. Place alternating dots along the upper and lower guide: one at the left on the upper line, the next on the lower line, and so on.
Draw a continuous S-curve that travels across the band, touching alternating target dots. Make a second band with the direction reversed.
The purpose is not a decorative wave. You are practising four things simultaneously:
- equal rhythm between turns;
- a clear, flowing inflection point;
- even distance from the guide boundaries;
- consistent ink pressure from start to finish.
If the curve collides with a guide too soon, resist the urge to flatten the next bend in compensation. Complete the gesture, then alter the next S-curve.
3. Circles and ellipses — 7 minutes
First, draw six medium circles, each about the size of a large coin. Ghost each circular motion several times, then draw a single loop. Leave enough space between them to see their individual silhouettes.
Next, draw three horizontal bands using two parallel lines in each band. In each band, place four or five ellipses that touch the upper and lower boundary without tracing along either line.
Vary the bands deliberately:
| Band | Shape family | What to maintain |
|---|---|---|
| First | Nearly circular ellipses | Equal width and height, even contour |
| Second | Moderately wide ellipses | Shared horizontal long axis |
| Third | Narrow ellipses | Smooth, rounded ends rather than pointed tips |
A narrow ellipse requires confidence. Its top and bottom are close together, so the temptation is to slow down and steer. Ghost it longer instead; then draw it with a light, continuous rotation.
4. A small organic application — 4 minutes
In an unused corner of the page, draw three imaginary winding stems. Each stem is one long C-curve or S-curve, drawn directly in ink. Add only three simple leaf pairs to each stem: each leaf can be made from two meeting C-curves.
This is not a finished botanical illustration. It is a way to feel how the warm-up marks become useful drawing marks. Let a slightly irregular curve remain irregular. A living stem need not be geometrically perfect, but it should still be smooth and intentional.
Diagnose patterns, not individual marks
Set the pen down and look at the full page from arm’s length. A warm-up page should look like evidence of motion, not a page that needs rescuing.
Use the following patterns to choose one adjustment for your next session:
| Pattern | Likely cause | Next adjustment |
|---|---|---|
| Circles have corners or flat spots | Movement is too slow or repeatedly corrected | Ghost larger, then maintain a steadier cadence |
| Ellipses are pointed at the ends | You are drawing two halves rather than one loop | Ghost the full orbit; keep moving through both ends |
| Ellipses lean inconsistently | The intended long axis was not established | Imagine the centre axis before beginning each shape |
| S-curves have an angular middle | You paused at the inflection point | Rehearse the entire curve as one continuous gesture |
| Curves get darker at one end | The pen is dwelling as it starts or stops | Use lighter pressure and lift decisively after the endpoint |
| Rows become progressively smaller | Your movement is shrinking as attention tightens | Reset posture and redraw at a consciously larger scale |
Choose only one issue to work on at a time. Trying to correct shape, spacing, pressure, speed, and orientation all at once tends to bring back the cautious steering you are trying to outgrow.
Key takeaways
Curved marks improve through rhythm, repetition, and a willingness to leave each attempt visible.
- C-curves bend in one direction; S-curves reverse direction once but should remain continuous.
- A circle or ellipse is best drawn as one complete, ghosted motion rather than two carefully assembled halves.
- For related shapes, consistency comes from shared scale, tilt, spacing, and pressure.
- Use boundary lines and target points as feedback, not as edges to trace.
- With a fineliner, keep pressure light and steady; do not use repeated passes to repair a curve.
- Look for repeated patterns across a page, then make one specific adjustment in the next row.
Next, you will combine straight lines and these curved marks in a small household-object sketch, using deliberate single-pass fineliner lines throughout.