Hello! Welcome to the sixth lesson in our module on AI-Powered Content Generation.
In our last lesson, we focused on crafting dialogue. We saw that a character's unique voice is what makes their conversations engaging and believable. But where does that voice come from? It comes from a deep and consistent understanding of who the character is.
That brings us to today's topic. Our learning outcome is to develop vivid and consistent character descriptions using AI. This is the foundation upon which everything else—dialogue, action, and narrative arc—is built. Whether you're creating a friendly guide for a tech book, a brave hero for a children's story, or a complex villain for a comic, a well-defined character is your most important asset.
1. The Character Blueprint: Textual Development
Before we generate a single image, we need to create a detailed blueprint of our character. This blueprint, often called a character sheet or profile, acts as a single source of truth for both you and the AI. It ensures that your character's personality, backstory, and motivations are coherent.
Given your background in IT, you can think of this as creating a detailed specification document or a class definition in object-oriented programming. It defines all the properties and methods of your character object before you create an instance of it.
The following article provides an excellent, structured approach to this process.
Develop Your Characters With AI - Bill L. Sherley - Medium
The article 'Develop Your Characters With AI' by Bill L. Sherley on Medium outlines a step-by-step method for building a character from the ground up using AI prompts.
Please read the article from the beginning down to the end of the 'Lily’s Character Development Sheet' section. Pay close attention to: The Building Blocks: The sections on 'Basics,' 'Profile,' 'Role,' 'Strengths and Weaknesses,' 'Conflict and Growth,' and 'Background and Motivation.' The Master Template: The 'Character Development Sheet Template' is the key tool we'll be using. It's a comprehensive structure for defining your character. The Process in Action: See how the author uses a detailed prompt to have the AI (Grok, in this case, but the principle applies to ChatGPT, Gemini, etc.) fill out the sheet for the character 'Lily.' Notice how they also correct the AI when it goes off-track.
The Character Development Sheet is the most critical takeaway here. It organizes character creation into a logical and repeatable process. By filling this out, you provide the AI with a rich context, which allows it to generate far more nuanced and consistent content, whether that's descriptive text, dialogue, or visual prompts.
Test your understanding!
You want to create a character for a mentoring book on tech startups. The character is a wise, approachable, 45-year-old former CTO named Alex.
Write a prompt for an AI that instructs it to use the Character Development Sheet Template from the article to flesh out Alex's full profile. Your prompt should provide the basic information (name, age, role) and ask the AI to creatively fill in the rest.
Show answer
Here’s a well-structured prompt:
`Act as an expert character developer. I want to create a character profile for a non-fiction book about tech startups. Use the template provided below to create a detailed character sheet for Alex, a 45-year-old former CTO who now acts as a mentor to young entrepreneurs.
Fill in all sections of the template to fully develop Alex’s character. Ensure the information aligns with his role as a wise and approachable mentor, adding creative and specific details to make him compelling and relatable to an audience of aspiring founders.
Character Development Sheet Template:
Basic Information
Name: Alex Chen
Age: 45
Sex: Male
Family Background:
Friends or Key Relationships:
Location:
Physical & Psychological Profile
Physical Appearance:
Personality Traits:
Character Role
Type: Mentor/Guide
Current Occupation: Startup Advisor & Angel Investor
Skills and Abilities
Special Skills:
Notable Abilities:
Strengths and Weaknesses
Internal Strengths:
Vulnerabilities or Flaws:
Conflict and Growth
Internal Conflicts:
External Conflicts:
Character Arc: (As it relates to his past career and current mentoring role)
Background & Motivation
Backstory:
What They Want:
What They Fear:
What They Need:
Additional Details
Leadership Style:
Relational Dynamics:
Fun Facts or Quirks:`
This prompt gives the AI a clear role, context, a specific task, and the structured format to use, leading to a much higher quality output.
2. The Visual Challenge: Achieving Consistency
Once we have our character's "DNA" on paper, the next step is bringing them to life visually. This is where many creators struggle. You ask an AI for an image of your character, and it looks great. Then you ask for the same character in a different pose, and they suddenly have a different face, hair color, or body type.
This inconsistency breaks the reader's immersion. For children's books and comics, it's a fatal flaw.
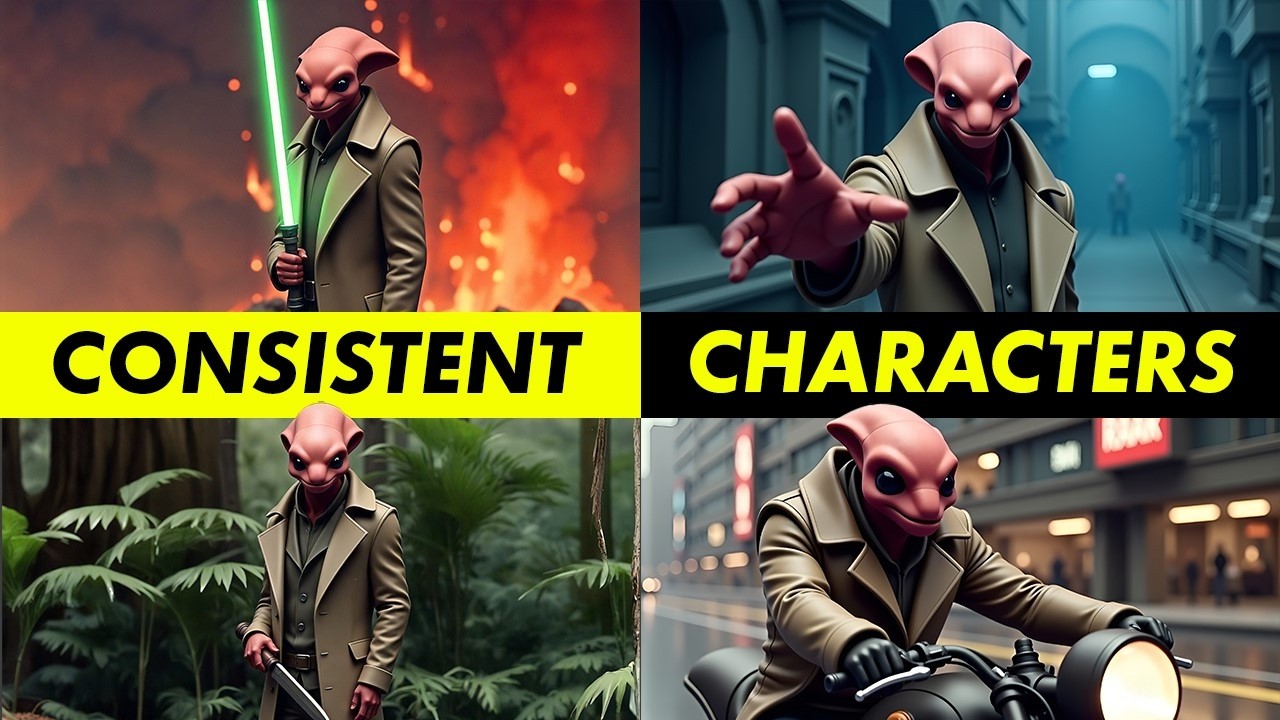
To understand how to achieve this, we first need to understand why AI struggles with consistency.
How to Create Consistent AI Cartoon Characters (2026)
The article 'How to Create Consistent AI Cartoon Characters' from Neolemon provides a clear, non-technical explanation of why consistency is difficult for AI and introduces the core concepts for solving it.
Please read two key sections: Start with 'What Makes AI Characters Inconsistent (and How to Fix It).' Focus on the concepts of 'identity locks' (what must stay the same) and 'scene variables' (what you want to change). Then, read the section 'Step 1: Write Your "Character DNA" (This Is Your Real Asset).' This introduces a practical template that translates your character sheet into a visual specification.
The main idea is to separate your prompt into two parts:
- The Identity Block: Core visual traits that never change (face shape, hair silhouette, signature outfit). This is derived directly from your Character Development Sheet.
- The Scene Block: The variable elements for a specific image (pose, expression, background).
By keeping the Identity Block constant, you anchor the AI and prevent it from "drifting."
3. A Practical Workflow for Visual Consistency
Now, let's look at the step-by-step workflow for generating vivid and consistent characters using free tools like ChatGPT (with DALL-E 3) and Google Gemini.
Step 3.1: Generate Your "Anchor Image"
The first and most important step is to create a single, definitive "master" image of your character. This is your anchor image. All future images will be generated as variations of this one.
A good anchor image should be:
- Full body: To capture proportions and the complete outfit.
- Neutral pose: Standing or a simple 3/4 view works best.
- Simple background: A plain white or simple background prevents the AI from getting distracted.
- Clear view: No objects obscuring the face or body.
Step 3.2: Use Structured Prompts to Maintain Identity
Once you have your Character DNA defined, you need a way to communicate it effectively and repeatedly to the AI. Here are two powerful techniques.
Method 1: The Re-supply Method (Simple & Effective)
This method involves explicitly providing the key appearance details in every image prompt. It's straightforward and works well in tools like ChatGPT.
How to Create Consistent Characters with AI
The video 'How to Create Consistent Characters with AI' by Blue Lightning demonstrates this simple but effective workflow using ChatGPT.
Watch the first part of the video (00:27 - 01:48). Notice how the creator first generates the textual description, saves it, and then re-pastes the 'appearance details' into the prompt when asking for a new image. This constant reinforcement is key.
Method 2: The JSON Prompting Method (Advanced & Precise)
For your IT background, this method may feel very intuitive. JSON (JavaScript Object Notation) is a data-interchange format. By structuring your prompt as a JSON object, you can explicitly tell the AI which elements are fixed ("identity") and which are variable ("scene"). This gives you a higher degree of control.
The Best Way to Create AI Consistent Characters with Nano Banana Pro (JSON Workflow)
The video 'The Best Way to Create AI Consistent Characters' from AI Edge Mastery introduces a powerful JSON-based workflow using Google Gemini.
Please watch these clips: Why JSON? (00:00 - 00:53): Understand how separating prompt elements into a structured format gives you more control. Building a 'Gem' (01:05 - 01:57): This is the core technique. See how you can create a custom instruction set (a 'gem' in Gemini) that automatically converts a simple description into a structured JSON prompt. This is a powerful, reusable tool. Combining with a Reference (01:44 - 02:33): The final step involves using the JSON prompt along with your anchor image as a reference to generate new, consistent images.
Creating a custom "gem" in Gemini to handle your character's JSON structure is a perfect example of building a reusable asset for your book-writing workflow.
Step 3.3: Build a Library of Poses and Expressions
A character isn't just a static image; they are "vivid" because they show emotion and perform actions. The final step is to use your anchor image and structured prompts to generate a library of poses and expressions.
How to Create Consistent Characters with AI
Let's return to the 'How to Create Consistent Characters with AI' video, which shows how to generate different facial expressions.
Watch the clip from 04:07 to 04:56. The key here is to prompt for an 'expression sheet' with specific emotions, while still referencing your character's core description.
Start by building a foundational library for each character. For example:
- Poses: Standing, walking, running, sitting, jumping, pointing.
- Expressions: Happy, sad, angry, surprised, thinking, worried.
By generating these from your anchor image, you build a set of consistent assets you can use throughout your book.
Conclusion
Today, we've established a complete, end-to-end workflow for creating characters that are both vivid in detail and consistent in appearance. This process turns character creation from a game of chance into a predictable, repeatable engineering task.
Key Takeaways:
- Blueprint First: Always start with a detailed Character Development Sheet. This is the textual DNA of your character.
- One Anchor to Rule Them All: Generate a single, high-quality anchor image that serves as the master visual reference.
- Structure Your Prompts: Use methods like re-supplying details or, for more control, JSON prompting to separate fixed identity traits from variable scene elements.
- Build Your Asset Library: Create a library of reusable poses and expressions from your anchor image to bring your character to life dynamically.
Preview of the Next Lesson:
Now that you have a fully realized character, you need to introduce them to your reader in a way that grabs their attention immediately. In our next lesson, we'll cover how to write compelling book introductions that hook the reader and establish the book's promise.