Hello! Welcome back to our series on building a high-performance telemetry engine.
In our last lesson, we established the foundation for storing data by exploring C++'s variables and data types. You learned the critical difference between platform-dependent types like int and the fixed-width integers from <cstdint> (e.g., uint64_t), which are essential for creating the portable and efficient data structures your telemetry system will rely on.
Now that you know how to store individual pieces of information, it's time to build logic. This lesson covers control flow, which is how you direct the execution path of your program. We'll focus on two fundamental constructs:
- Conditionals (
if,else if,else): To make decisions and execute different code based on specific criteria. - Loops (
for,while): To perform repetitive tasks, like processing a buffer of events.
For your project, these are not just abstract concepts. The efficiency of your conditional branches and loops directly impacts the "observer effect." A poorly structured loop can introduce performance bottlenecks, slowing down the application you're trying to measure. Understanding how these constructs translate to machine code is key to writing the "zero-overhead" profiler you're aiming for.
Part 1: Conditional Execution with if and else
At its core, a computer program is a sequence of instructions. Conditional statements allow you to break that linear sequence and create branches, executing some instructions while skipping others. The most common way to do this in C++ is with an if statement.

Let's start with a video that introduces the syntax and the underlying concept of branching.
CONDITIONS and BRANCHES in C++ (if statements)
The video 'CONDITIONS and BRANCHES in C++' by The Cherno provides an excellent introduction to if statements. It explains the concept of branching and how conditions are evaluated.
Watch from the beginning to 5:52. Pay attention to the basic syntax of an if statement, the use of the == operator for comparison, and how a comparison results in a boolean true or false value.
As the video showed, the basic structure is:
if (condition) {
    // Code to execute if the condition is true
}
You can handle the false case using an else block:
if (condition) {
    // Code to execute if the condition is true
} else {
    // Code to execute if the condition is false
}
And for multiple, mutually exclusive conditions, you can chain them with else if:
int value = 0;

if (value > 0) {
    // value is positive
} else if (value < 0) {
    // value is negative
} else {
    // value must be zero
}
The Low-Level View of Branching
Your interest in low-level engineering makes it crucial to understand what's happening under the hood. An if statement isn't magic; the compiler translates it into a set of machine instructions that involve a comparison and a "conditional jump." A jump instruction tells the CPU to change the instruction pointer to a different location in memory, effectively skipping or "jumping" to another part of the code.
This branching has a performance cost. Modern CPUs are heavily pipelined and use branch prediction to guess which path will be taken. If the prediction is wrong, the pipeline must be flushed and refilled, causing a stall. For high-frequency code, minimizing unpredictable branches is a key optimization.
The next segment of the video provides a fantastic, practical look at this. The presenter uses a debugger to inspect the assembly code generated for a simple if statement.
CONDITIONS and BRANCHES in C++ (if statements)
This part of the video is highly relevant to your systems programming interests. It demystifies conditionals by showing you the assembly instructions the CPU actually executes.
Watch from 5:52 to 11:55. Focus on how the C++ if statement is translated into assembly instructions like cmp (compare) and jne (jump if not equal). Notice how the boolean values true and false are represented numerically (non-zero and zero).
Conditionals are just Zero-Checks
The key takeaway from that disassembly view is that C++ treats any non-zero value as true in a conditional context, and zero as false. This leads to a common and concise C++ idiom, especially when dealing with pointers.
Instead of writing:if (pointer != nullptr)
You will very often see:if (pointer)
This is more than just a stylistic choice; it reflects the fundamental mechanism. The if statement is simply checking if the value in the pointer variable is zero (nullptr is essentially a typed zero) or not.
Test your understanding!
You are writing a part of your telemetry system's consumer thread. It pops an event from a queue. The pop function returns a pointer to an Event object if successful, and nullptr if the queue is empty. Write a small code snippet that processes the event only if the pop was successful. Use the concise pointer-checking idiom.
Show answer
// Assume 'Event* pop_event_from_queue()' is a function you have.
Event* new_event = pop_event_from_queue();

if (new_event) {
    // Process the event here, for example:
    // process_event(new_event);
} else {
    // The queue was empty, maybe wait for a bit
}
A Performance Note: if-else vs. switch
When you have a series of if-else if statements that all check the same variable for equality against different constant values, the compiler might be able to optimize it. However, C++ provides a dedicated construct for this: the switch statement.
switch (errorCode) {
    case 0:
        // handle success
        break;
    case 1:
        // handle file not found
        break;
    case 2:
        // handle access denied
        break;
    default:
        // handle other errors
        break;
}
For a small number of cases, a switch statement and an if-else if chain might generate identical machine code. However, for a larger number of cases, a switch statement allows for a powerful optimization: the jump table. Instead of a sequence of comparisons (O(n)), the compiler can create a table of memory addresses. It uses the value of errorCode as an index into this table to directly jump to the correct code block (O(1)).
Is the switch statement faster than the if statement?
This short article provides a practical demonstration of this performance difference by comparing the assembly generated for both if-else and switch.
Read the entire article. It's short and directly to the point. Focus on the author's discovery when looking at the assembly code: the if version has multiple compare instructions, while the switch version uses a table to jump directly to the right code.
Part 2: Iteration with for and while Loops
Loops are for doing things more than once. Your telemetry profiler will live inside loops: the application's main game loop, the rendering loop, and your consumer thread's loop that processes event data.
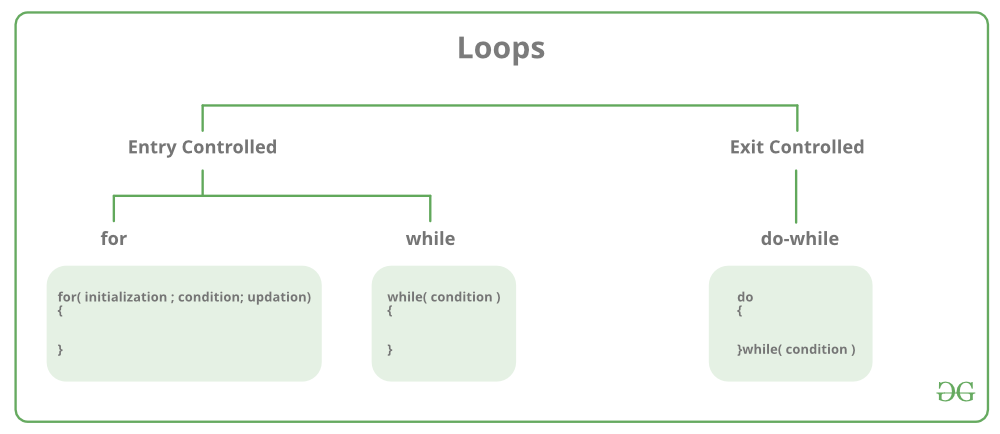
Let's watch a video that breaks down the most common loop types.
Loops in C++ (for loops, while loops)
This video from The Cherno covers the for, while, and do-while loops, explaining the syntax and the typical use case for each.
Watch the video, paying close attention to these segments: Introduction (0:00 - 1:39): Understand the need for loops. The for loop (1:39 - 5:00): Focus on its three components: initialization, condition, and post-iteration statement. The while loop (7:13 - 9:44): Understand its simpler structure and when to prefer it over a for loop. The do-while loop (9:44 - 11:03): Note its key difference: the body always executes at least once.
To summarize:
forloop: The workhorse of iteration. Use it when you know the number of iterations or are iterating over a sequence. Its structure keeps the initialization, condition, and increment logic cleanly in one place.for (int i = 0; i < 10; ++i) { // This code will run 10 times, with i from 0 to 9. }whileloop: Simpler. Use it when the loop should continue as long as a condition is true, but you don't necessarily have a simple counter.bool should_keep_running = true; while (should_keep_running) { // ... do something ... if (some_stop_condition) { should_keep_running = false; } }
Part 3: A Deeper Dive into Loop Implementation
Just like conditionals, loops are syntactic sugar over more primitive machine instructions. The following article provides an exceptional low-level deconstruction of how loops work, starting from the most basic form (if and goto) and building up to the for loop.
C/C++ Low Level Curriculum Part 9: Loops
This article, 'C/C++ Low Level Curriculum Part 9: Loops', is perfectly aligned with your interests. It meticulously examines the assembly code generated for each loop type, providing a deep understanding of their mechanics.
Read the sections for if-goto, The while loop, and The for loop. For each one, study the C++ code snippet and the corresponding debug x86 disassembly. The goal is to see how these seemingly different constructs can produce very similar low-level code.
The Ultimate Payoff: Optimized Assembly
Now for the most interesting part. The debug assembly is a direct translation of your code, but it's not what runs in a final, high-performance application. When you compile in "Release" mode, the compiler performs aggressive optimizations. The same article demonstrates this by analyzing the optimized assembly. You'll see a technique called loop unrolling, a fundamental optimization in high-performance computing.
C/C++ Low Level Curriculum Part 9: Loops
This final reading connects directly to your goal of building a performance-oriented system. It reveals the 'magic' the compiler performs to make your loops faster.
Read the section 'Optimised Disassembly O’clock!'. Don't worry if every single assembly instruction doesn't make sense. Focus on the high-level pattern: the optimized loop processes two elements per iteration instead of one. Understand the author's explanation of why this is faster (improving the 'looping instructions to working instructions' ratio).
This is why we write clean, high-level code using for loops. We express our intent to the compiler, and we trust the optimizer—which is far more clever than we are—to transform it into the fastest possible machine code.
Conclusion
In this lesson, we moved from storing data to acting upon it. You've learned how to control your program's execution path, a fundamental skill for any programmer. More importantly, you've started to peek behind the curtain to see how these high-level constructs translate into low-level machine instructions and how the compiler optimizes them for performance.
Key Takeaways:
- Conditionals (
if,else) create branches in your code, implemented at the machine level with compare and jump instructions. Branching carries a performance cost that can be significant in tight loops. switchstatements can be a high-performance alternative to longif-else ifchains for equality checks, as they can be compiled into O(1) jump tables.- Loops (
for,while) automate repetitive tasks. Theforloop is generally preferred for its clarity, as it groups the iteration logic together. - At a low level, all loops are implemented with jumps.
- Compiler optimization is key. A simple
forloop can be transformed by the compiler into highly optimized machine code, including techniques like loop unrolling, to maximize performance.
In our next lesson, we will focus on "Define and call functions, explaining the difference between passing by value, reference, and pointer." Now that you can store data and control program flow, functions will allow you to encapsulate logic into reusable, modular blocks, which is the first step toward building a complex application like your telemetry engine.