Hello! Welcome back to our module, "The Art of the Edit: Pacing and Assembly."
In our last lesson, we explored the art of pacing—how you control the rhythm of your edit to guide the audience's emotions. You learned to use fast cutting for energy and action, and slower, longer takes for reflection and emotion.
Today, we shift from the emotional flow to the logical flow of your story. A collection of beautifully paced but disconnected clips is just that—a collection. To create a narrative, those clips must be sequenced in a way that is clear, coherent, and makes sense to the viewer. This lesson will focus on exactly that. Our learning outcome is to sequence generated video clips to match the storyboard and create a coherent narrative flow.
We'll treat your storyboard as the essential blueprint for this process, guiding you as you assemble your generated clips into a story that flows seamlessly from one shot to the next.
1. The Storyboard: Your Editing Blueprint
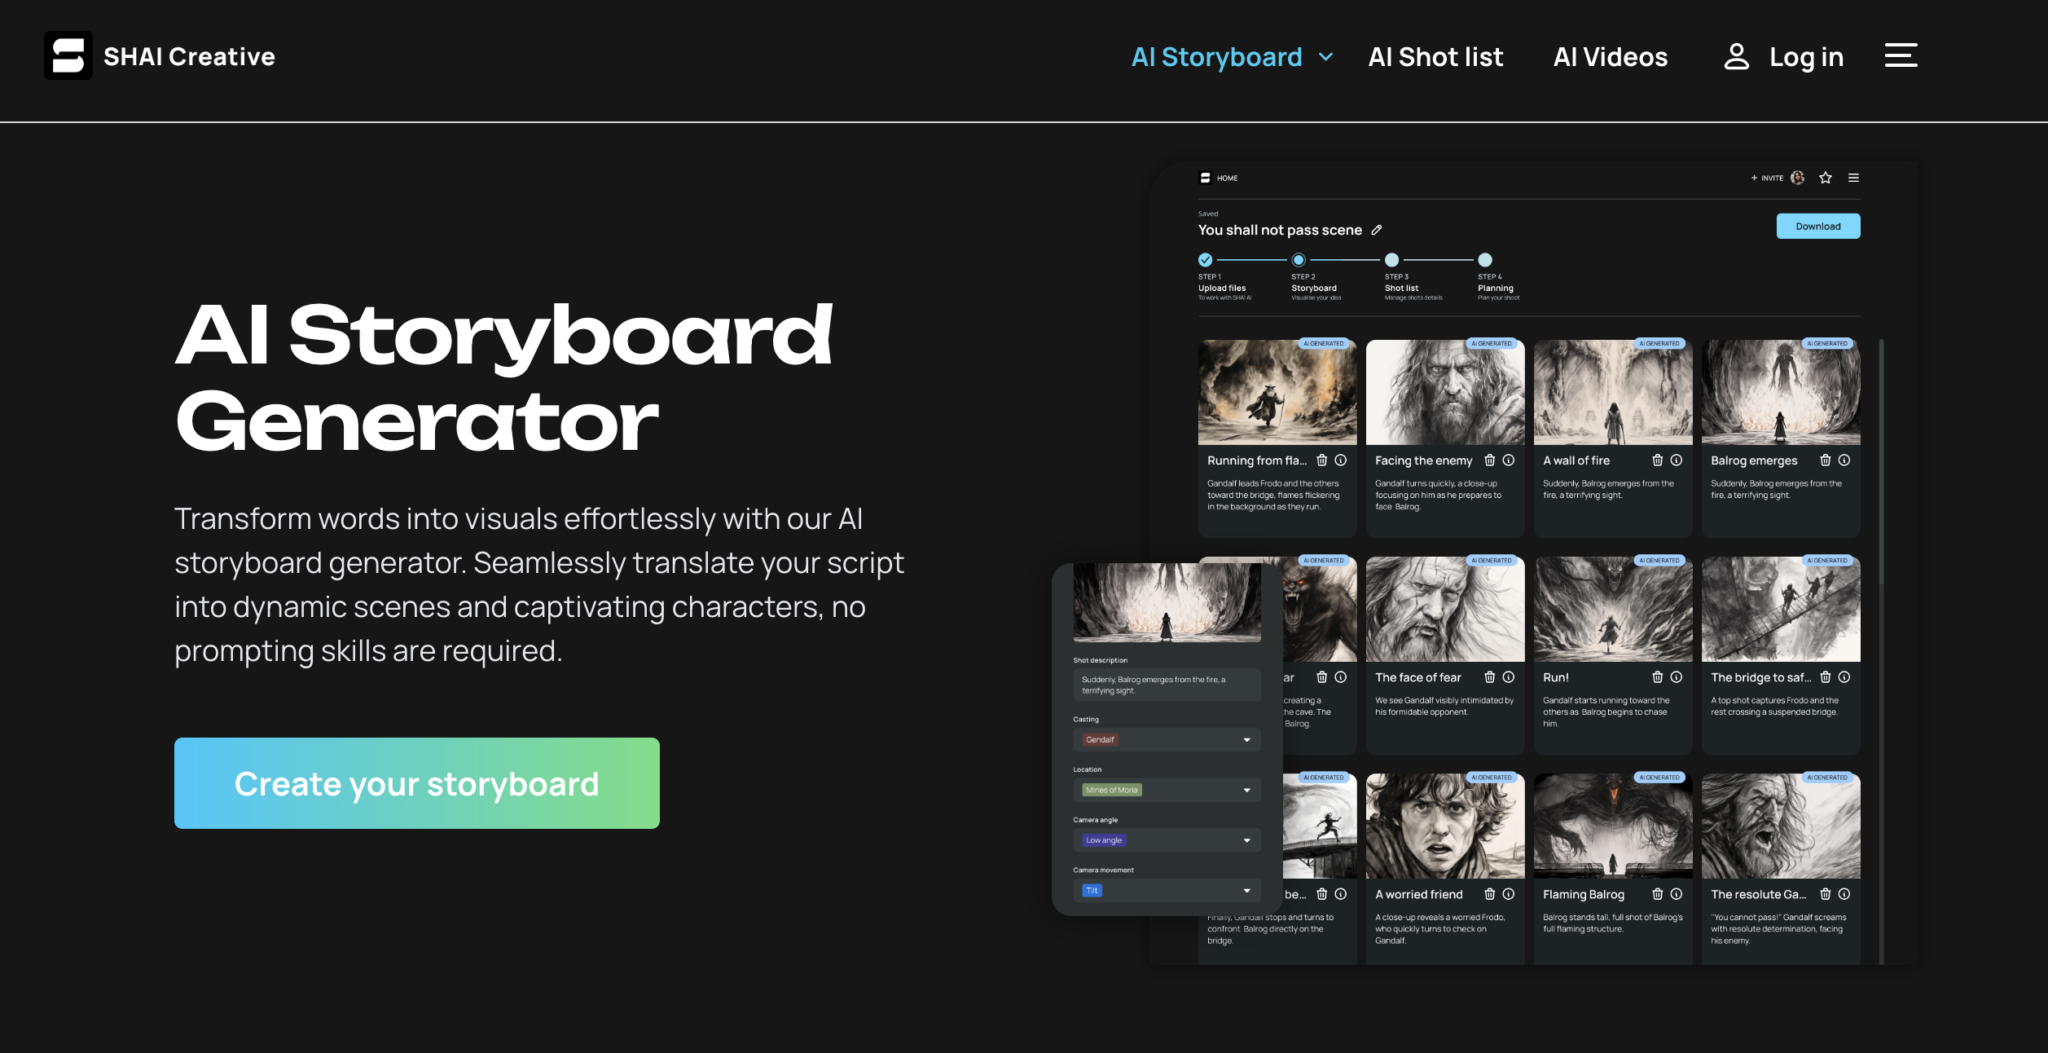
Before you even open your editing software, your most important tool is the storyboard you've already created. Think of it as the architectural plan for your video. Just as a builder wouldn't start laying bricks without a blueprint, an editor shouldn't start assembling clips without a storyboard. It provides the fundamental order and logic for your narrative.
Your background in consulting has likely shown you the value of a solid project plan; the storyboard serves the exact same function here. It's your single source of truth for what happens, in what order, and from what perspective.

The structured nature of AI storyboarding tools, which break a script down into visual panels, makes this process even more direct.
2. Validating Your Sequence: The Animatic
Following your storyboard is crucial, but what if there's a problem in the storyboard itself? A transition that feels jarring, a scene that drags, or a missing shot that breaks the narrative flow? Discovering this after you've spent time and resources generating high-quality video clips is inefficient.
This is why professional workflows include a step called the animatic: a timed-out version of the storyboard using the static storyboard frames and rough audio. It's a low-cost way to test your story's sequence and pacing.
AI Storyboard To Animation Pipeline: Complete Workflow
The article 'AI Storyboard To Animation Pipeline' explains why creating an animatic is a 'non-negotiable' step. It acts as a cost filter, allowing you to identify problems with your sequence before committing to the expensive process of video generation and final editing.
Please read the section titled 'How To Create An Animatic From Your Storyboard,' focusing on the part 'Why Animatics Are Non-Negotiable.' Notice the types of problems an animatic helps you discover early.
By validating your sequence with an animatic, you ensure that when you "sequence clips to match the storyboard," you're matching a plan that you already know works. It turns the editing process from one of discovery and potential chaos into one of deliberate execution.
3. The Assembly Edit: Building the Narrative Foundation
Once you have your storyboard (and ideally, a validated animatic), the first practical step in your editing software is the assembly edit. This involves two main actions:
- Laying down your primary audio track (narration or music) to provide a timeline and rhythm.
- Placing your generated video clips on the timeline in the correct order, as dictated by your storyboard.
At this stage, don't worry about perfect timing or fancy transitions. The goal is simply to get all the pieces in the right place.
How To Create AI Animated Stories with ChatGPT!
This short clip from the 'How To Create AI Animated Stories' video provides a perfect, no-frills demonstration of the assembly process in CapCut, a popular and free editing tool.
Watch from 08:08 to 08:39. Observe how the editor first drags the voice-over onto the timeline and then arranges the video clips in order to match the narration. This is the core of the assembly edit.
4. Techniques for Coherent Shot-to-Shot Flow
With your clips assembled in order, the next step is to refine the connections between them. A simple "cut" from one clip to the next is the most common transition, but how and when you cut determines whether the sequence feels smooth and logical or jarring and confusing.
Let's explore a few powerful types of cuts that are designed specifically to create coherent narrative flow.
The ONLY 7 Cuts You Need To Tell Any Story
The video 'The ONLY 7 Cuts You Need To Tell Any Story' is a fantastic resource for editors. We will focus on three fundamental techniques that are essential for sequencing a clear narrative.
Please watch the following three segments: Wide, Medium, Close-up (04:55 - 06:19): Understand this classic pattern for establishing a scene and guiding the viewer's focus. Action Cut (03:43 - 04:55): Pay close attention to how cutting during a movement makes the edit feel invisible. Match Cut (06:19 - 07:25): Notice how this cut connects two different shots using visual similarity to create a thematic or narrative link.
Let's break down how to use these techniques:
-
The Wide, Medium, Close-up Pattern: This is a foundational sequence for introducing a scene.
- Wide Shot: Establishes the location ("Where are we?").
- Medium Shot: Shows the characters and their actions ("What is happening?").
- Close-up Shot: Reveals detail or emotion ("How does the character feel?").
By following this logical progression, you orient your audience and give your scene a clear structure.
-
The Action Cut (or "Cutting on Action"): This is the key to making your edits feel smooth and seamless. The trick is to cut from one shot to another in the middle of an action. For example, as a character begins to stand up in a medium shot, you cut to a close-up of them completing the action. The viewer's brain is focused on the continuous motion and barely registers the cut itself.
-
The Match Cut: This is a more creative cut that links two shots through a visual similarity in shape, composition, or subject matter. For example, you could cut from a close-up of a spinning record to a shot of a car's spinning wheel. This creates a powerful connection, suggesting a passage of time, a change in location, or a thematic link between two ideas.
Test your understanding!
You are editing a short sequence from your storyboard:
- A wide shot of a scientist in a lab.
- A shot of the scientist picking up a glowing beaker.
- A close-up of the scientist's worried expression as she looks at the beaker.
To make the transition between shot #2 and shot #3 feel as seamless and invisible as possible, which type of cut would you use?
Show answer
You would use an action cut. You would cut from the shot of her picking up the beaker to the close-up of her face while her hand is still in motion. The continuous action of lifting the beaker would carry the viewer's eye across the cut, making the transition feel natural and fluid.
Finally, a crucial part of narrative coherence is maintaining spatial continuity. The most famous rule for this is the 180-degree rule. Imagine an invisible line running between two characters talking to each other. By keeping the camera on one side of this line for all shots in the scene, you ensure that Character A is always on the left side of the screen and Character B is always on the right. Breaking this rule without a clear reason can disorient the audience, making them feel like the characters have suddenly switched places.
Conclusion
Today, you've learned how to move from a collection of clips to a coherent narrative. You've seen that the edit is not just about emotion, but also about logic, and that your storyboard is the essential guide for maintaining that logic.
Key Takeaways:
- The Storyboard is Your Map: Always use your storyboard as the primary guide for assembling your clips. Validating it with an animatic first can save you hours of work.
- Assemble First, Refine Second: Start with a simple assembly edit, placing your audio and video clips in order before refining the cuts.
- Cut for Coherence: Use specific editing techniques like the action cut to create seamless flow, the wide-medium-close pattern to structure scenes, and the match cut to build thematic connections.
- Maintain Continuity: Be mindful of spatial logic, like the 180-degree rule, to avoid disorienting your viewer.
Preview of the Next Lesson:
We've focused on the "hard cut" today—the instantaneous switch from one shot to another. But what about other ways to move between clips? In our next lesson, we will explore how to select and apply transitions (e.g., hard cuts, dissolves, fades) to serve the story, adding another layer of style and meaning to your edits.