Hello and welcome to a new module in our course!
In the previous module, we dove deep into Effective Unit Testing. We learned how to test individual components of your app—from asynchronous logic to reactive Combine pipelines—in complete isolation. This is the foundation of a robust testing strategy.
Now, we're moving up the testing pyramid to focus on UI and Regression Testing. Instead of testing small units of code, we will test the application from the user's perspective, simulating real interactions with the complete, running app. This is where we ensure that all the individual pieces we've built work together correctly to create the intended user experience.
Our first step in this journey is foundational. Before we can automate any user interaction, we need a reliable way to find UI elements like buttons, labels, and text fields on the screen. This lesson covers exactly that.
Our learning outcome is to configure accessibility identifiers to make UI elements discoverable by automation. We will learn why the accessibility framework is the backbone of UI testing in iOS, how to assign stable identifiers to your UI elements, and the best practices for managing these identifiers in a professional, scalable way.
Why Accessibility is the Key to UI Automation
You might think of accessibility as a feature primarily for users with disabilities, enabled by technologies like VoiceOver. While that is its most important purpose, Apple has built the UI testing framework, XCUITest, directly on top of the same accessibility infrastructure.
This means that for your UI tests to "see" and interact with an element, that element must first be "visible" to the accessibility system.
To understand this crucial link, let's watch a short segment from an Apple Developer presentation.
WWDC25: Record, replay, and review: UI automation with Xcode | Apple
This clip from a WWDC session explains that accessibility is the underlying framework that powers UI automation, providing the test framework with information about elements on screen.
Watch from 04:35 to 05:28. The key takeaway is that a great accessibility experience directly leads to a great UI automation experience.
accessibilityLabel vs. accessibilityIdentifier
The accessibility framework exposes several properties for each UI element. Two of the most important (and often confused) are the accessibilityLabel and the accessibilityIdentifier. Understanding their distinct roles is critical for writing robust tests.
accessibilityLabel: This is for the user. It's the text that VoiceOver reads aloud. It should be localized, user-friendly, and might change based on design updates or A/B testing (e.g., changing a button's text from "Submit" to "Continue").accessibilityIdentifier: This is for the developer and automation scripts. It's a unique, stable string that is never shown to the user and is not localized. It acts as a fixed "test ID" for an element.
Relying on the accessibilityLabel for your tests is a common mistake that leads to "flaky" tests—tests that break when user-facing text changes or when the app is run in a different language. The accessibilityIdentifier is the correct tool for the job.
What's the difference between setAccessibilityLabel and accessibilityIdentifier
For a clear, concise explanation of this distinction, please read the top-voted answer on this Stack Overflow page. It provides an excellent summary of the purpose of each property.
Read the highest-voted answer by Mark A. Donohoe. It clearly breaks down the purpose of accessibilityLabel, accessibilityIdentifier, and accessibilityHint.
How to Configure Accessibility Identifiers
Now that we understand the "why," let's get practical. You can set accessibility identifiers both programmatically in your code and directly in Interface Builder.
The Problem with Using Labels
Before we add identifiers, let's see why using element labels for tests is problematic.
How to Run Automated UI Tests in iOS with XCUITest - SwiftUI - Xcode 16
In this video, Karin Prater demonstrates how Xcode's UI test recorder initially uses an element's label to find it, and then explains why this is not a reliable approach.
Watch from 03:36 to 06:00. Notice how a test that relies on the button's label ("remove last") would fail if the text were changed or localized. This sets the stage for using a stable identifier instead.
Adding Identifiers in Code
The way you add an identifier depends on whether you are using SwiftUI or UIKit.
In SwiftUI, you use the .accessibilityIdentifier() view modifier.
Button("Remove Last") {
    viewModel.deleteLastItem()
}
.accessibilityIdentifier("deleteLastItemButton")
In UIKit, you set the accessibilityIdentifier property on any UIView or UIAccessibilityElement.
let deleteButton = UIButton(type: .system)
deleteButton.setTitle("Remove Last", for: .normal)
deleteButton.accessibilityIdentifier = "deleteLastItemButton"
If you are using Interface Builder, you can set the identifier in the Identity Inspector.

Let's watch a demonstration of adding an identifier in a SwiftUI view to make a test more robust.
How to Run Automated UI Tests in iOS with XCUITest - SwiftUI - Xcode 16
Continuing with Karin Prater's video, this segment shows the practical application of adding an .accessibilityIdentifier modifier to a SwiftUI button to fix the fragile test from the previous clip.
Watch from 06:00 to 06:56. This short clip directly addresses our learning outcome by showing you how to set the identifier in code and then use it in the test query.
A Professional Workflow for Managing Identifiers
Simply hardcoding string identifiers like "deleteLastItemButton" across your app and your test files is a recipe for typos and maintenance headaches. A professional developer will create a centralized, type-safe system for managing these identifiers. The most common pattern is to use a nested enum.
This approach has several advantages:
- Single Source of Truth: All identifiers are in one place.
- Type Safety: The compiler prevents typos (e.g.,
UIID.ItemList.deleteBtnvs"deleteLastItemButon"). - Discoverability: Autocomplete helps you find the identifier you need.
- Scalability: The nested structure organizes identifiers by screen, preventing name collisions as your app grows.
Let's walk through creating and using this pattern.
How to Run Automated UI Tests in iOS with XCUITest - SwiftUI - Xcode 16
This is a crucial segment for leveling up your testing skills. Karin Prater provides a detailed walkthrough of creating a structured enum for identifiers, sharing it with the test target, and handling dynamic elements.
Watch from 12:24 to 18:18. Pay close attention to these key steps: Creating a new Swift file for the identifiers. Structuring the identifiers using nested enums (e.g., UIIdentifiers.ItemListScreen). Adding the file to both the app target and the UI test target. Creating a function inside the enum to generate dynamic identifiers for list items (e.g., item(id: UUID)). Using the enum in both the SwiftUI view and the test case.
To reinforce this powerful concept, here is an article that also describes this best practice.
XCUITest: How to Write UI Tests for SwiftUI Apps - swiftyplace
This article provides a great written summary of the enum-based approach for managing accessibility identifiers, complementing the video you just watched.
Read the sections 'Recommended Naming: Unique and Clear', 'Pro Tip: Use a Central enum to Store Them', and 'Updating the SwiftUI Views with Accessibility Identifiers'. This will solidify your understanding of the naming convention and implementation.
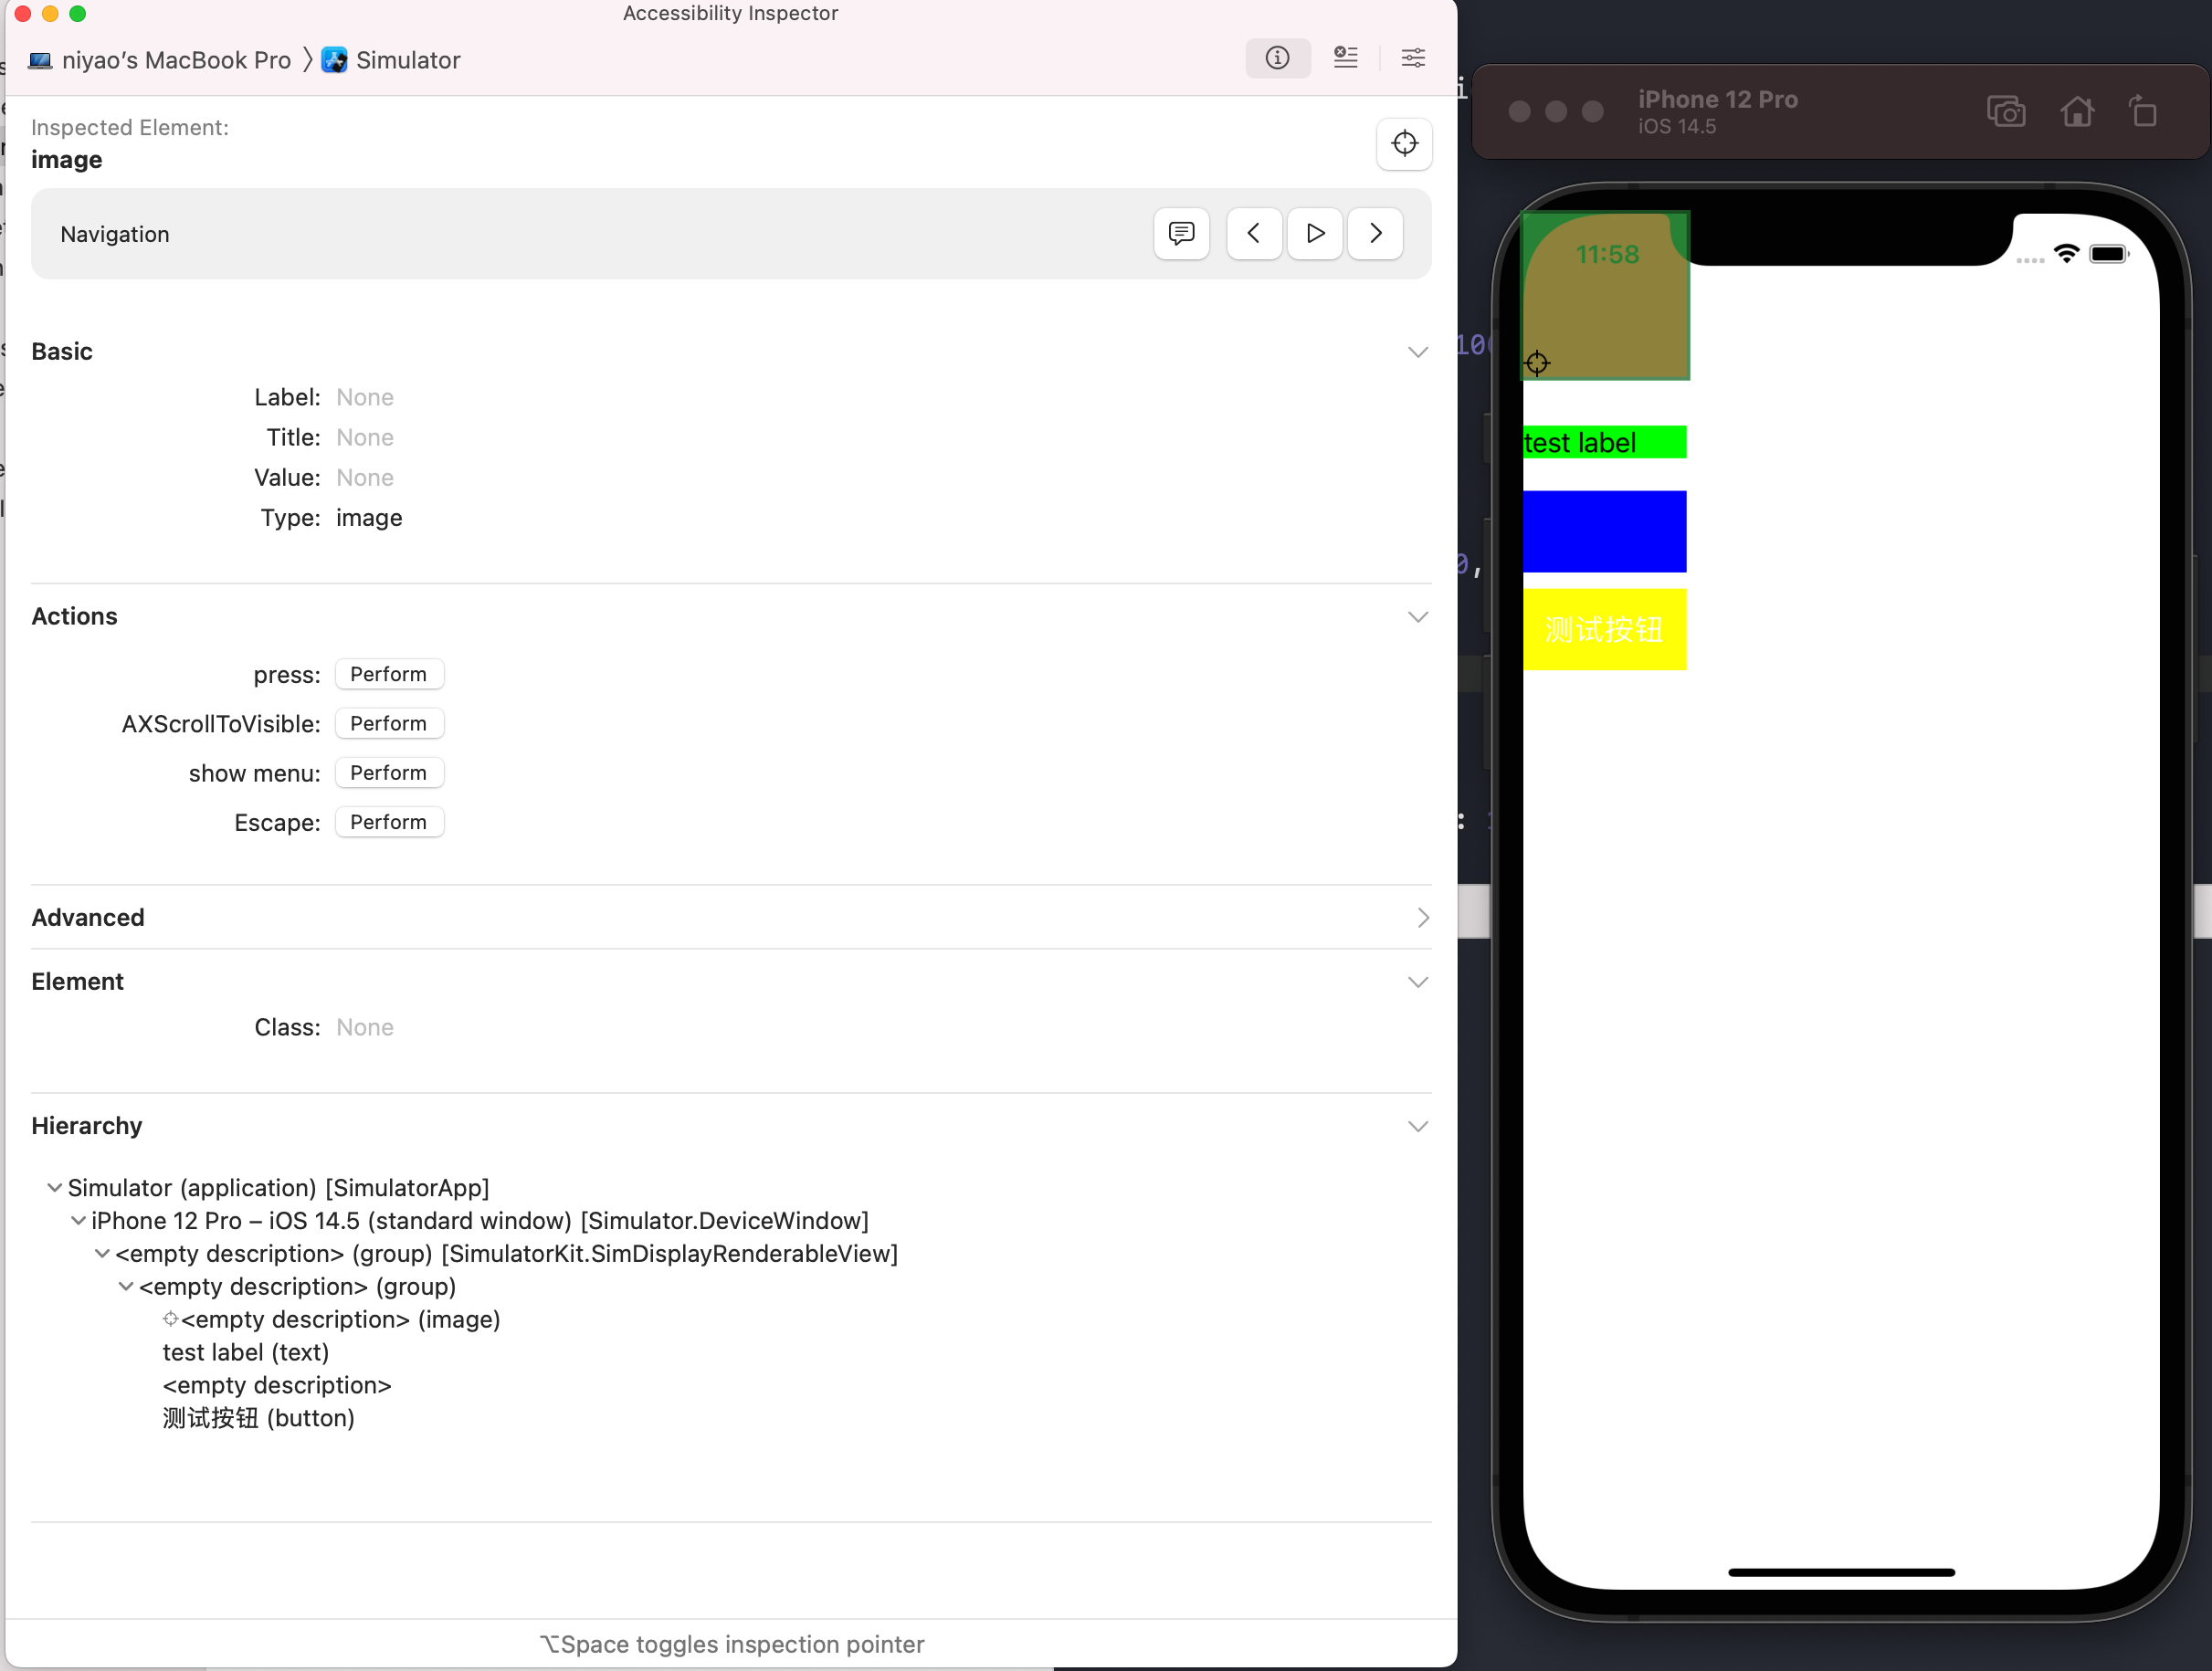
Verifying Your Identifiers with the Accessibility Inspector
After adding identifiers to your UI, how do you confirm they've been applied correctly without writing a full test? Xcode provides a powerful tool called the Accessibility Inspector.
This tool lets you inspect a running application (on a simulator or a real device) and see the full set of accessibility properties for any element your cursor hovers over, including its label, value, traits, and—most importantly for us—its identifier.
WWDC25: Record, replay, and review: UI automation with Xcode | Apple
Let's return to the WWDC video to see a demonstration of the Accessibility Inspector in action.
Watch from 09:24 to 10:43. Learn how to launch the inspector from Xcode and use it to select UI elements and view their properties. This is an indispensable debugging tool for UI testing.
Conclusion
You've just learned the essential first step for all UI automation on iOS. By correctly configuring accessibility identifiers, you create the stable "hooks" that enable your tests to reliably find and interact with your app's UI, independent of language, layout, or user-facing text. Adopting a professional pattern for managing these identifiers will make your test suite scalable and maintainable.
Key Takeaways:
- UI automation in iOS is built on the accessibility framework.
- Use the
accessibilityIdentifierfor UI tests, as it's a stable, non-localized, developer-facing property. Avoid using the user-facingaccessibilityLabel. - Establish a centralized system for managing identifiers, typically with a nested
enumshared between your app and UI test targets. - Follow a consistent naming convention (e.g.,
Screen.ElementType.Purpose) to keep your identifiers organized and unique. - Use the Accessibility Inspector to quickly verify that your identifiers are correctly applied to your UI elements.
Preview of the Next Lesson:
Now that we know how to make our UI elements discoverable, we're ready to start interacting with them. In our next lesson, we will write an XCUI Test to simulate a user flow, including taps, swipes, and text input. We'll finally put these identifiers to work