Hello! Welcome back to your Godot mastery course.
In our last lesson, we established the core architectural theory of Godot: Nodes are the atoms, the Scene Tree is the runtime structure, and Scenes are the reusable blueprints. You have a solid conceptual understanding of what these are. Now, it's time to put that theory into action.
This lesson directly addresses the learning outcome: Create, save, and instantiate scenes. We will move from the abstract to the concrete, performing the fundamental workflow you'll use every day in Godot. This practical skill is the foundation for building your Metroidvania, where you'll create scenes for the player, enemies, items, and rooms, and then assemble them into a cohesive world.
1. A Quick Recap: The Blueprint Analogy
Remember from our last lesson:
- A Scene is a blueprint saved as a
.tscnfile (e.g.,Player.tscn). - When you use a scene in your game, you create an instance of it.
- At runtime, these instances are just nodes that have been added to the main Scene Tree. The "scene" itself doesn't exist as a separate entity once the game is running; it's just the template that was used.
Today, we'll walk through the process of creating the blueprint, saving it, and then using it to create instances.
2. Creating and Saving Your First Scene
Let's start with the traditional "Hello World" of any new environment. We'll create a very simple scene, save it, and run it. This process demonstrates the basic cycle of scene creation.
All There Is To Know About Godot's Scenes and Nodes
The GDQuest channel has an excellent video that walks through this exact process. I recommend you open a new, empty Godot project and follow along with the steps shown.
Watch from 03:05 to 07:36. Focus on these steps: Creating a root node for the new scene (a Label node). Modifying the node's properties in the Inspector. Saving the scene to a .tscn file. Running the scene using F6. Setting the scene as the 'Main Scene' to run with F5.
For your reference, the official Godot documentation covers the same steps in text format. You can use this to review the concepts without re-watching the video.
This documentation page provides a step-by-step written guide to creating, saving, and running your first scene.
Read the sections titled 'Creating your first scene', 'Changing a node's properties', 'Running the scene', and 'Setting the main scene'. This mirrors the content from the video.
Key Concepts from this Step:
- Saving a Scene: When you save a scene, you are writing the definition of its node tree—the nodes, their properties, and their hierarchy—into a
.tscntext file. - Running a Scene vs. Running a Project:
- Run Current Scene (F6): This is for testing a specific scene in isolation. Extremely useful when you're working on a single component, like a player character or an enemy, and want to test it without loading the entire game.
- Run Project (F5): This runs the game from its designated entry point, the "Main Scene". This is how a player would experience your game. You typically set your main menu or first level as the Main Scene.
3. Instancing: Building with Blueprints
Creating a single scene is just the first step. The real power of this architecture comes from instancing—creating live copies of your scene blueprints.
This is how you build complexity. You don't copy and paste 50 nodes to make a second enemy; you create one "Enemy" scene and instantiate it twice.

Let's see this in practice.
Getting Started With Godot's Scene Instances
This next video from GDQuest provides a hands-on project to demonstrate instancing. It clearly shows how to bring your saved scenes into another scene.
Follow the video's instructions to download the starter project. Watch from the beginning to 04:08. Pay attention to: The concept of the ball.tscn as a blueprint. The two primary ways to create an instance: using the 'Instantiate Child Scene' button (the link icon) and dragging the .tscn file from the FileSystem dock. How each instance is an independent object at runtime.
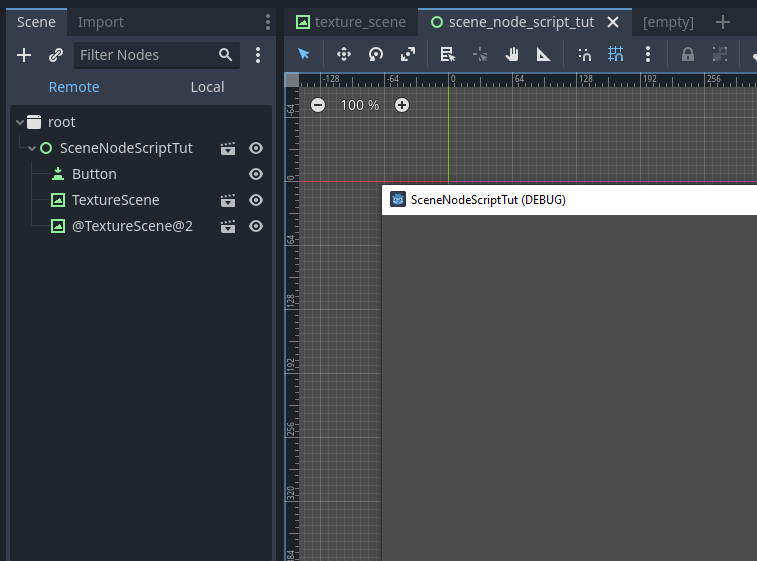
When you add an instance of a scene to your tree, it appears as a single node in the editor, often with a clapperboard icon. This helps keep your scene tree clean and organized. You can see the internal nodes of an instanced scene by clicking the icon next to it, but by default, the complexity is hidden.
4. Editing Instances vs. The Source Scene
This is where the power of the blueprint analogy becomes most apparent and connects directly to your programming background. Think of a .tscn scene file as a class and an instance of it in your game as an object (an instance of that class).
- Changing the Class: If you edit the original
ball.tscnfile, your changes will propagate to every instance of that ball in your game. This is like changing a method or default property in a class definition. - Changing the Object: If you select a single ball instance in your main level scene and change one of its properties in the Inspector, you are overriding the default value for that instance only.
Getting Started With Godot's Scene Instances
Let's continue with the GDQuest video, as it demonstrates this powerful concept perfectly.
Watch from 04:08 to the end. Observe how: Changing the 'Bounce' property in ball.tscn affects all balls. Changing the 'Gravity Scale' on a single instance only affects that one ball, and a 'revert' icon appears. The video briefly mentions a special case with 'Resources' (the PhysicsMaterial). This is an advanced but important concept you'll appreciate: some properties are objects that are shared by reference, not copied. We will cover Resources in depth later, but it's good to be aware of this distinction.
This dual behavior is the cornerstone of efficient level design and object management in Godot. You can define the universal behavior of an enemy in its own scene, then place it in a level and tweak a single instance to be slightly faster or have more health, without having to create an entirely new enemy type.
Test your understanding!
You are building your Metroidvania. You've created a HealthPotion.tscn scene. By default, it restores 25 HP.
You place three instances of this potion in your level. You want the third potion to be a "Super Potion" that restores 100 HP, while the other two remain standard.
Describe the steps you would take in the editor to achieve this, referencing the concepts of editing a source scene versus editing an instance.
Show answer
- You would not edit the
HealthPotion.tscnfile directly. Changing the HP restoration value there would affect all three potions. - Instead, in your level scene, you would select the specific instance of the potion you want to be "super".
- In the Inspector dock, you would find the property that controls HP restoration (e.g.,
hp_restored) and change its value from25to100. - A 'revert' icon would appear next to this property for that instance, indicating that you have overridden the value from the source blueprint (
HealthPotion.tscn). The other two instances would remain unchanged, still restoring 25 HP.
Conclusion
You have now bridged the gap between the architectural theory of scenes and the practical workflow of using them. This loop of creating, saving, and instancing is the fundamental process for building anything in Godot.
Key Takeaways:
- Scenes are created by building a node tree and saving it as a
.tscnfile using Scene > Save Scene. - You can run the currently edited scene in isolation (F6) or run the whole project from its designated Main Scene (F5).
- Instancing is the process of adding a scene blueprint into another scene, either with the 'link' icon or by dragging from the FileSystem.
- Changes made to the source
.tscnfile propagate to all its instances. - Changes made to a property on an individual instance override the value from the blueprint for that instance only.
In our next lesson, we will take a step back from building game components to set up the project itself. We will configure project settings for a 2D pixel art game. This involves setting the window size, stretching behavior, and default texture import settings to ensure our pixel art looks crisp and clean, which is essential for the Metroidvania you aim to build.