Hello! This is the first step in a learn-by-doing path toward TypeScript. Before writing typed programs, you need a reliable way to write and run a JavaScript file on your own computer. Today you’ll set up an editor and Node.js, run a small program, and learn how to tell whether it worked. Allow about 40 minutes, including installation time.
Set up the editor and runtime
Visual Studio Code (VS Code) is where you’ll edit the file. Node.js is the runtime that executes it. Writing code in an editor does not, by itself, run that code; you’ll use a terminal command to ask Node to run the saved file.
Node.js tutorial in Visual Studio Code
Read the opening of VS Code’s Node.js tutorial for the installation and verification steps. Its instructions are more useful here than any particular version number shown in an older demonstration.
At the start of the article, before “Hello World,” read the explanation of why VS Code still needs a Node.js runtime, beginning with editor and runtime. Then follow the installation paragraph: it points to the official Node.js download and notes that you need a new terminal after installing. Finish with the version check. You can stop at the “Hello World” heading; we’ll build that program below.
Install VS Code if you do not already have it, and install Node.js using the official download referenced in the reading. Choose a current LTS release if the download page offers a choice. After installation, open a new terminal—an already-open terminal may not recognize a newly installed command.
You can use VS Code’s terminal via View > Terminal, or use a separate terminal. Run:
node --version
A version number means the node command is available. If the terminal says the command is not recognized or not found, close and reopen the terminal first. If that does not help, revisit the installation steps before continuing.
See the file-and-terminal workflow
This short demonstration shows the two actions you’ll repeat throughout the course: save a .js file, then run that file with Node. The video is older, so use the installation guidance above rather than its stated Node version.
Node.js Tutorial - 6 - Hello World
Watch selected parts of “Node.js Tutorial - 6 - Hello World” by Codevolution to see the VS Code terminal and a saved JavaScript file in action.
Watch the tools for the editor/runtime distinction, then the terminal for the version check inside VS Code. Skip the interactive Node demonstration and resume at the saved file. Notice that the filename in the node command matches the file the presenter created. You will use app.js instead of the video’s index.js.
The important distinction is between code and output. The .js file holds instructions you can save and edit. The terminal displays what happens when Node executes those instructions.
Build and run your first program
Create a folder called js-start somewhere convenient, then open that folder in VS Code with File > Open Folder. Opening the folder matters: VS Code’s terminal will normally start in the open folder, making it easy for Node to find your file.
In the Explorer panel, select New File and name it app.js. The screenshot shows the button; your VS Code layout may look slightly different.
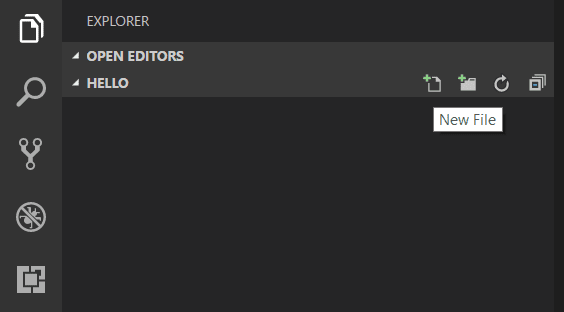
Enter this code in app.js:
console.log("Hello from my first program!");
Save the file, open View > Terminal, and run:
node app.js
You should see:
Hello from my first program!
Then the terminal prompt should return. That return is expected: Node finished the file and is ready for another command. console.log(...) prints a message to the terminal; the quotation marks mark the message in your source code but are not printed.
Now change the message in the file to:
console.log("I edited and ran this file again.");
Save, then run node app.js again. The terminal should show the new message. This small edit-and-rerun cycle is the basic local development workflow you’ll use as the programs grow.
If the result is not what you expected
- The old message still appears: Save
app.js, then run the command again. Node runs the saved file, not unsaved text in the editor. - Node cannot find
app.js: Check that the terminal is in the folder containing the file. The name in the command must match the filename, including its spelling and.jsextension. nodeis not recognized or found: Open a new terminal and retrynode --version. If it still fails, check the Node.js installation.- Nothing appears: Check that the file contains
console.log(...), save it, and runnode app.jsagain. Look for the output in the terminal, not in the editor.
What you have established
You can now distinguish the three parts of a local program: VS Code edits the source file, the terminal accepts a command, and Node.js executes the saved JavaScript. You also have a repeatable way to verify changes: save, run node app.js, and inspect the output.
In the next lesson, you’ll put values into JavaScript variables using const and let, giving your programs more to work with than a fixed message.