Hello! Welcome back to our series on multi-service applications with Docker Compose.
In our last lesson, we tackled the crucial challenge of service readiness, using healthcheck and depends_on with conditions to build resilient applications where services start in the correct order and wait for dependencies to be healthy. This is a cornerstone of reliable container orchestration.
Now, we'll address another fundamental aspect of professional software deployment: managing configurations for different environments. A setup for local development looks very different from one for production. You might need debugging tools and live-reloading in development, while production requires optimized, secure, and static configurations. Hardcoding these settings into a single docker-compose.yml is inflexible and a common source of errors and security risks.
Today's lesson will show you how to manage environment-specific configurations using .env files and multiple compose files. By the end of this session, you'll be able to create clean, maintainable, and environment-aware Docker Compose setups, a critical skill for any DevOps professional.
1. Externalizing Configuration with .env Files
The first principle of environment-agnostic applications is to separate configuration from code. Sensitive data like API keys, database passwords, or external hostnames should never be committed to version control. Docker Compose provides a simple and powerful way to handle this using .env files.
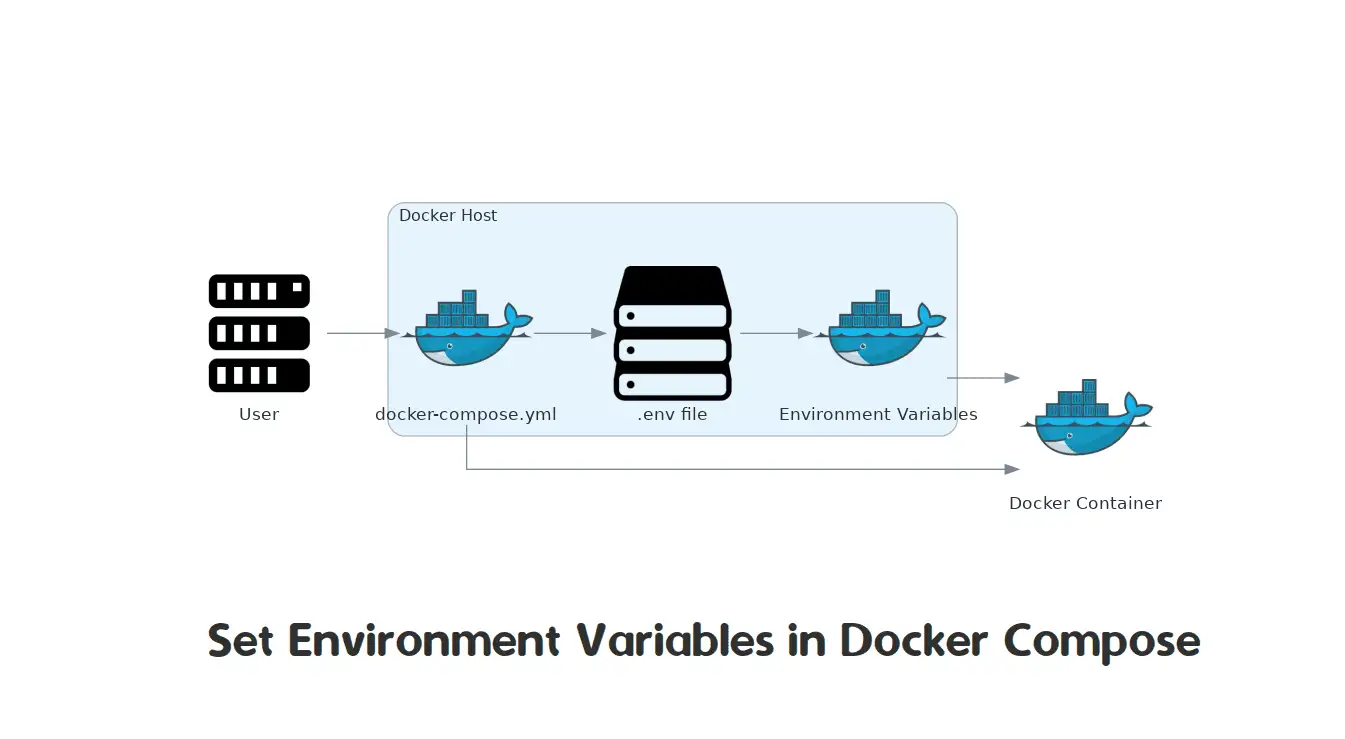
By default, when you run docker compose up, Docker looks for a file named .env in the same directory. It reads the variables from this file and makes them available for substitution within your docker-compose.yml.
Let's see how this works in practice.
Stop Struggling with Docker Compose – Use These 10 Tricks Instead!
The video 'Stop Struggling with Docker Compose – Use These 10 Tricks Instead!' provides a clear, practical demonstration of why and how to use .env files to keep your Compose files clean and secure.
Watch the segment from 04:07 to 06:45. Pay attention to how variables are defined in the .env file and then referenced in the docker-compose.yml file. The speaker also correctly emphasizes adding .env to your .gitignore.
As the video shows, the process involves two steps:
- Create a
.envfile: In your project root, create a file named.envwith key-value pairs.# .env MYSQL_ROOT_PASSWORD=my-secret-pw WEB_APP_PORT=8080 - Reference variables in
docker-compose.yml: Use the${VARIABLE_NAME}syntax to substitute the values.# docker-compose.yml services: db: image: mysql:8.0 environment: - MYSQL_ROOT_PASSWORD=${MYSQL_ROOT_PASSWORD} web: build: . ports: - "${WEB_APP_PORT}:80"
Targeting Different Environments with --env-file
The default .env file is great, but what if you have separate configurations for development, staging, and production? You can create multiple environment files (e.g., .env.dev, .env.prod) and specify which one to use at runtime with the --env-file flag.
Using Environment Variables for Configuration
The article 'Multi-Environment Deployments with Docker' expands on this idea, showing a practical pattern for managing multiple environment-specific .env files.
Read the section titled 'Using .env Files' and 'Running with Environment Files'. This will show you how to structure and use different .env files for development and production.
For example, you could have:
.env.dev:DEBUG=true.env.prod:DEBUG=false
And run them like this:
- Development:
docker compose --env-file .env.dev up - Production:
docker compose --env-file .env.prod up
This technique provides a clean way to manage variable configuration values across different deployment targets.
2. Overriding Compose Files for Structural Changes
Environment variables are perfect for values that change, but what about structural differences? For example:
- In development, you want to use a bind mount to sync your source code for live-reloading.
- In production, you want to use the pre-built image without any mounts.
- In development, you might expose a database port for debugging, but in production, it should only be accessible within the Docker network.
Trying to manage this with environment variables would be clumsy. The solution is to use multiple Compose files. The strategy is known as base and override.

The core idea is to have a docker-compose.yml with the base configuration shared across all environments. Then, you create additional files to override or extend that base.
The Automatic Override for Development
By convention, Docker Compose automatically looks for a file named docker-compose.override.yml. If it exists, its configuration is merged on top of the base docker-compose.yml. This is perfect for local development tweaks because you don't need to type any extra flags.
Let's review a detailed explanation of this powerful feature.
Defining your multi-container application with docker-compose
The Microsoft documentation on Docker Compose provides a thorough, professional explanation of this pattern. It's written from a .NET perspective, but the concepts are universal and highly relevant to your work as a DevOps Engineer.
Read the sections 'Using multiple docker-compose files to handle several environments' and 'Overriding the base docker-compose file'. Focus on the explanation of how the base docker-compose.yml and docker-compose.override.yml files work together.
Here's a typical example:
docker-compose.yml (Base)
services:
  web:
    build: .
    command: npm start
    environment:
      - NODE_ENV=production
docker-compose.override.yml (Development)
services:
  web:
    command: npm run dev # Override the command for dev
    environment:
      - NODE_ENV=development # Override the environment
    volumes:
      - .:/app # Add a volume for live-reloading
    ports:
      - "3000:3000" # Add a port mapping for local access
When you run docker compose up, Docker automatically combines these, giving you the perfect development setup. For production, you would simply deploy without the override file.
Explicit Overrides with the -f Flag
The automatic override is great for one-off tweaks, but for managing distinct environments like staging and production, you'll want to be more explicit. The -f (or --file) flag lets you specify a list of Compose files. Docker merges them in the order you provide them, with later files overriding earlier ones.
This video demonstrates the -f flag and a couple of other powerful tricks.
Docker Tip #87: Run Multiple Docker Compose Files with the -f Flag
This short and practical video from Nick Janetakis shows you exactly how to use the -f flag to combine multiple files. It also introduces two essential related concepts.
Please watch the entire video (it's short!). Pay attention to: How to use -f to combine multiple files (0:00 - 1:43). A pro-tip: using the COMPOSE_FILE environment variable to avoid long commands (1:43 - 2:48). The essential docker compose config command to verify your final configuration (2:48 - 3:30).
To summarize the workflow:
- Base file:
docker-compose.yml - Production override:
docker-compose.prod.yml - Command to run for production:
docker compose -f docker-compose.yml -f docker-compose.prod.yml up -d
The docker compose config command is your best friend when working with multiple files. It prints the final, merged YAML to the console, allowing you to see exactly what Docker Compose will execute. Always use it to verify your setup before deploying.
Test your understanding!
You are building a Python web application. Your base configuration is in docker-compose.yml:
# docker-compose.yml
services:
  webapp:
    build: .
    command: gunicorn --bind 0.0.0.0:8000 myapp.wsgi
    environment:
      - DJANGO_SETTINGS_MODULE=myapp.settings.production
Your task is to create a configuration for local development with the following changes:
- The command should be
python manage.py runserver 0.0.0.0:8000. - The
DJANGO_SETTINGS_MODULEenvironment variable should bemyapp.settings.development. - The application's source code in the current directory (
.) should be mounted into the container at/app. - The container's port 8000 should be mapped to the host's port 8000.
Create an override file that achieves this, and state the command you would run to start the development environment.
Show answer
You would create a file named docker-compose.override.yml:
# docker-compose.override.yml
services:
  webapp:
    command: python manage.py runserver 0.0.0.0:8000
    environment:
      - DJANGO_SETTINGS_MODULE=myapp.settings.development
    volumes:
      - .:/app
    ports:
      - "8000:8000"
To start the development environment, you would simply run:docker compose up
Because the override file is named docker-compose.override.yml, Docker Compose automatically detects and merges it with the base docker-compose.yml.
To see the final merged configuration before running, you could use docker compose config.
Conclusion
Today you've learned the two primary techniques for managing environment-specific configurations in Docker Compose, moving you closer to creating professional, production-ready applications.
Key Takeaways:
.envfiles are used to externalize configuration values (like secrets and ports), keeping your Compose files clean and secure. Use--env-fileto specify environment-specific files.- Multiple Compose files are used for structural overrides (like adding volumes, changing commands, or modifying port mappings).
docker-compose.override.ymlis loaded automatically, making it ideal for local development changes.- The
-fflag gives you explicit control to combine multiple files, which is the standard pattern for managing distinctdev,staging, andprodenvironments. - Always use
docker compose configto verify the final merged configuration before deployment.
In our next lesson, we will build upon our production setup by learning how to scale services to run multiple container instances for high availability. This is a key feature of Docker Compose for handling increased load and improving the fault tolerance of your applications.