Welcome to our next lesson in Advanced VBA. In our previous session, you built a robust tool for importing data from text files, a critical first step in many data-driven projects. Now, we'll tackle the reverse process: getting data out of Excel and into a clean, universal format.
This lesson addresses the common need to share data with other systems, colleagues, or platforms that may not use Excel. We will focus on automating the export of a specific data range into a Comma-Separated Values (CSV) file. A CSV file is a simple text file where values are separated by commas, making it one of the most widely supported formats for data exchange.
By the end of this lesson, you will be able to write a professional VBA macro that safely exports a worksheet range to a new CSV file, giving the user full control over where the file is saved.
What is a CSV file?
Before we dive into the code, let's clarify what we're creating. An Excel file (.xlsx) can contain many sheets, charts, formulas, and complex formatting. A CSV file, on the other hand, contains only raw, tabular data from a single sheet.

This simplicity is its strength. Almost any data analysis tool, programming language, or database can read a CSV file, making it the perfect format for exporting data for use elsewhere.
The Challenge: Exporting Safely
You might think that exporting is as simple as using a SaveAs command. While that's partly true, a naive approach can be destructive. If you simply run ActiveWorkbook.SaveAs ... FileFormat:=xlCSV, Excel will convert your entire open workbook into a single CSV file. You would lose all formulas, formatting, and any other worksheets. This is not a viable option for professional work.
The standard, safe, and professional solution is the "Copy to Temporary Workbook" pattern. The logic is as follows:
- Identify the data you want to export (an entire sheet or a specific range).
- Copy this data.
- Create a brand new, invisible, temporary workbook.
- Paste the data into this temporary workbook.
- Save the temporary workbook as a CSV file.
- Close the temporary workbook without saving any changes to it.
This process leaves your original workbook completely untouched and results in a clean CSV file containing only the data you intended to export.
Method 1: Exporting an Entire Worksheet
Let's start with the simplest version of this pattern: exporting an entire worksheet. The following article provides excellent code examples for various export methods. We'll begin with the first one.
Top 4 VBA Methods to Export Excel data as CSV File
This article from VMLogger outlines several ways to export data. We'll focus on the first method, which demonstrates the core "copy-save-close" technique.
Read the introduction and the section titled Export ActiveWorkSheet. Pay close attention to the VBA code provided. Notice how it copies the active sheet, which automatically creates a new workbook (Set tempWB = ActiveWorkbook), saves it as a CSV, and then closes it.
The code in the article is a solid foundation. The key lines are ActiveSheet.Copy, which creates the temporary workbook, and .SaveAs Filename:=myCSVFileName, FileFormat:=xlCSV.
Method 2: Exporting a Specific Range (The Preferred Approach)
More often than not, you won't want to export an entire sheet, which might contain notes, helper calculations, or other miscellaneous information. Your goal is usually to export a clean data table. For this, we adapt our pattern to copy a specific range instead of the whole sheet.
The process is very similar, but with a few key differences:
- We explicitly add a new workbook:
Set tempWB = Application.Workbooks.Add(1). - We copy a specific
Rangeobject. - We use
PasteSpecial xlPasteValuesto ensure we only transfer the raw data, not formulas, which would break in the new workbook.
This next resource provides the perfect blueprint for this more precise task.
Top 4 VBA Methods to Export Excel data as CSV File
Let's continue with the same article from VMLogger.
Now, read the section titled VBA to Export excel Range. This is the most common and robust method for exporting a clean data set. Study the VBA code and its explanation. It clearly shows the copy-paste-save-close workflow for a specific range.
Let's combine these ideas into a practical subroutine. Open the VBA Editor (Alt + F11), insert a new module, and enter the following code.
Sub ExportRangeToCSV()

    ' --- Declare Variables ---
    Dim rngToExport As Range
    Dim wbTemp As Workbook
    Dim csvFilePath As String

    ' --- Define the range to export and the output file path ---
    ' In a real tool, this range could be dynamic (e.g., a named range or UsedRange)
    Set rngToExport = ThisWorkbook.Worksheets("Sheet1").Range("A1:D10")

    ' For this example, we'll save the file on the Desktop
    ' NOTE: Replace "YourUsername" with your actual Windows username
    csvFilePath = "C:\Users\YourUsername\Desktop\ExportedData.csv"

    ' --- Start the Export Process ---
    Application.ScreenUpdating = False ' Prevent screen flicker

    ' Copy the range
    rngToExport.Copy

    ' Create a new temporary workbook
    Set wbTemp = Application.Workbooks.Add(1) ' Adds a workbook with one sheet

    ' Paste the values into the temporary workbook
    With wbTemp.Worksheets(1).Range("A1")
        .PasteSpecial xlPasteValues
    End With

    ' --- Save the Temporary Workbook as CSV ---
    ' Turn off alerts to prevent "Do you want to save?" prompts
    Application.DisplayAlerts = False

    wbTemp.SaveAs Filename:=csvFilePath, _
                  FileFormat:=xlCSV, _
                  CreateBackup:=False

    ' Close the temporary workbook
    wbTemp.Close SaveChanges:=False

    ' Restore settings
    Application.DisplayAlerts = True
    Application.ScreenUpdating = True

    MsgBox "Data successfully exported to: " & vbCrLf & csvFilePath, vbInformation

End Sub
Before running this, make sure you have some data in the range A1:D10 on Sheet1 and update the csvFilePath to a valid location on your computer. When you run the macro, it will create a new CSV file at the specified path without changing your original Excel file.
Building a Professional Export Tool
The code above works, but a freelance-quality tool should be more flexible. Hardcoding the file path is not ideal. Just as we used GetOpenFilename in the last lesson to let the user pick a file to import, we can use Application.GetSaveAsFilename to let the user choose where to save the exported file and what to name it.
The following video demonstrates a similar process of saving files. While it focuses on converting entire Excel files, the segment on saving is very relevant.
Convert Excel Files To CSV Files Using Excel VBA (Excel Automation)
This video from Jie Jenn, "Convert Excel Files To CSV Files," shows the SaveAs method in action.
Watch the brief segment from using the SaveAs method. The key takeaway is the syntax wb.SaveAs Filename:=..., FileFormat:=xlCSV. This is the core instruction that performs the conversion.
Now, let's build our final, polished macro. This version will prompt the user for a save location, export the currently selected range, and include error handling.
Sub ExportSelectionToCSV_Final()

    ' --- Declare Variables ---
    Dim savePath As Variant ' Use Variant to handle the "False" return on cancel
    Dim wbTemp As Workbook

    ' --- Check if a range is selected ---
    If TypeName(Selection) <> "Range" Then
        MsgBox "Please select a range of cells to export.", vbExclamation
        Exit Sub
    End If

    ' --- Prompt User for Save Location ---
    savePath = Application.GetSaveAsFilename( _
        InitialFileName:="ExportedData.csv", _
        FileFilter:="CSV (Comma delimited) (*.csv), *.csv", _
        Title:="Select Save Location for CSV File")

    ' --- Check if User Cancelled ---
    If savePath = False Then
        MsgBox "Export cancelled.", vbInformation
        Exit Sub
    End If

    ' --- Start the Export Process ---
    On Error GoTo ErrorHandler
    Application.ScreenUpdating = False
    Application.DisplayAlerts = False

    ' Copy the selected range
    Selection.Copy

    ' Create and use a temporary workbook
    Set wbTemp = Application.Workbooks.Add(1)
    With wbTemp.Worksheets(1)
        .Range("A1").PasteSpecial xlPasteValues

        ' Save the new workbook as CSV
        .Parent.SaveAs Filename:=savePath, _
                       FileFormat:=xlCSV, _
                       Local:=True ' Use Local:=True to match system's delimiter

        ' Close the temporary workbook
        .Parent.Close SaveChanges:=False
    End With

    ' --- Clean Up and Notify ---
    Application.DisplayAlerts = True
    Application.ScreenUpdating = True
    MsgBox "Selection successfully exported to CSV!", vbInformation
    Exit Sub

' --- Error Handling ---
ErrorHandler:
    MsgBox "An error occurred: " & vbCrLf & Err.Description, vbCritical
    ' Make sure to restore settings even if there's an error
    If Not wbTemp Is Nothing Then wbTemp.Close SaveChanges:=False
    Application.DisplayAlerts = True
    Application.ScreenUpdating = True
End Sub
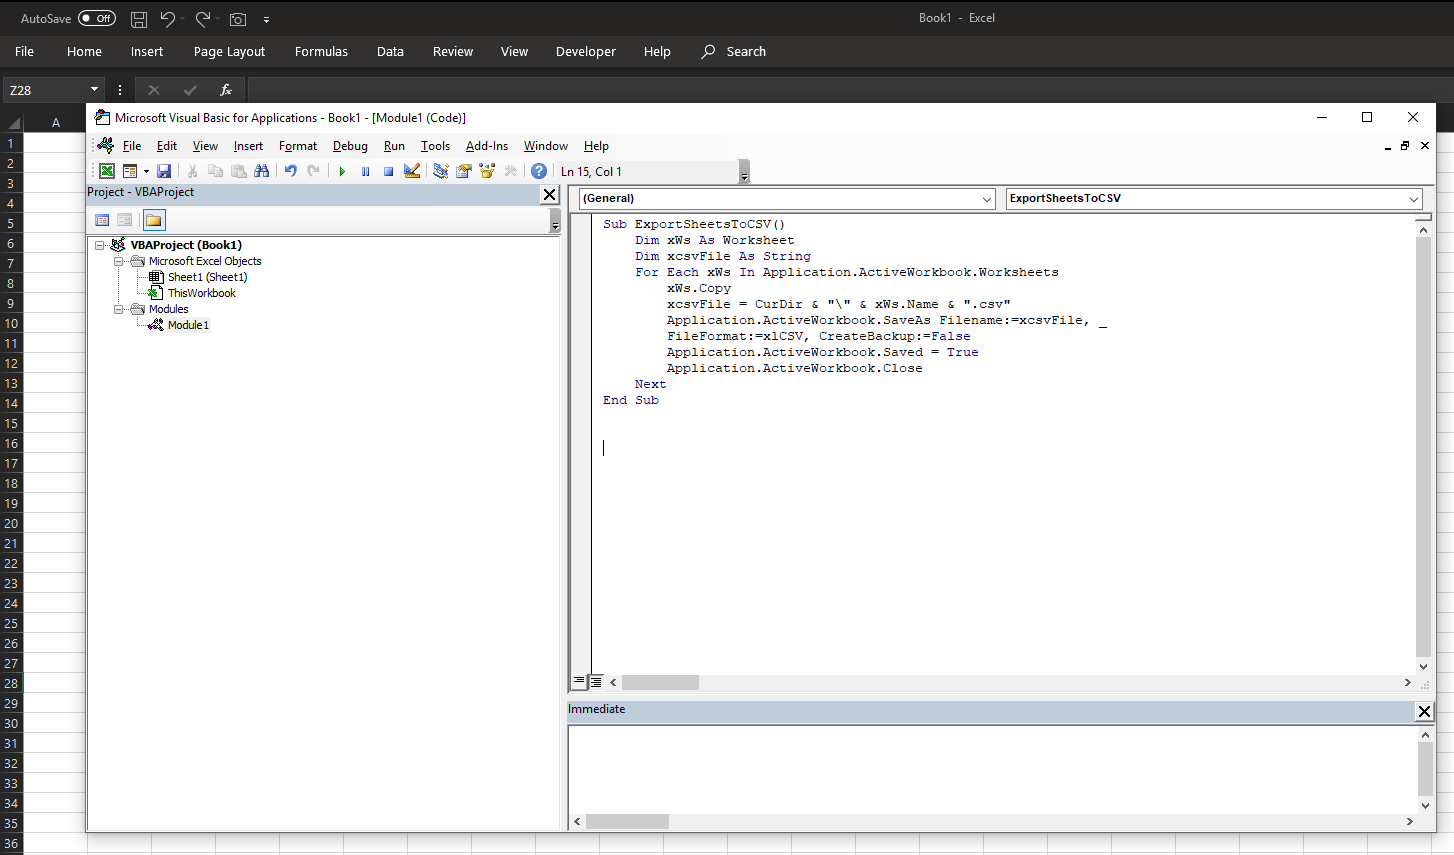
This final code is a powerful and reusable tool. You can select any block of data in any sheet, run the macro, and instantly generate a clean CSV file from it. The final code might look like this in your VBA editor:
Conclusion
You have now completed the data handling loop: importing from external files and exporting to them. The "Copy to Temporary Workbook" pattern is a fundamental technique in professional VBA development for safely creating new files without altering your primary workbook. Mastering this allows you to create tools that can seamlessly integrate with other systems.
Key Takeaways:
- A CSV (Comma-Separated Values) file is a universal plain-text format for tabular data.
- Directly using
ActiveWorkbook.SaveAsto create a CSV is destructive and should be avoided. - The "Copy to Temporary Workbook" pattern is the standard, safe method for exporting data.
- The core steps are:
Copy->Workbooks.Add->PasteSpecial xlPasteValues->SaveAs ... FileFormat:=xlCSV->Close. - Use
Application.GetSaveAsFilenameto create a professional, interactive user experience for saving files.
In our next lesson, we will leverage this ability to create files by automating another common client request: generating and sending an email with a data file as an attachment, all from within Excel.