Welcome to the first lesson in your journey toward mastering agentic AI. Before we can build intelligent systems, we need to set up a solid and reliable workshop. For us, that workshop is a properly configured Python development environment. Your experience as a developer, particularly with managing project dependencies in PHP using tools like Composer, will provide a strong conceptual foundation for the tools we'll cover today.
This lesson is designed to get you from zero to a fully functional Python setup. By the end, you will be able to configure an isolated Python environment for any project, install the packages you need, and manage your project's dependencies in a way that makes your work reproducible and shareable. This is the essential first step before we begin writing the Python code that will power our AI agents.
The Importance of Isolated Environments
If you've ever worked on multiple PHP projects simultaneously, you might have run into "dependency hell," where one project requires a specific version of a library (like Guzzle), while another project needs a different, incompatible version. In the PHP world, this is often managed with tools like Composer, which handles dependencies on a per-project basis, or by using containerization tools like Docker to isolate entire application stacks.
Python has a similar, but more lightweight and built-in, approach called virtual environments. A virtual environment is essentially an isolated folder for each of your projects that contains its own Python interpreter and its own set of installed libraries. This prevents conflicts and ensures that a library installed for Project A doesn't interfere with Project B.
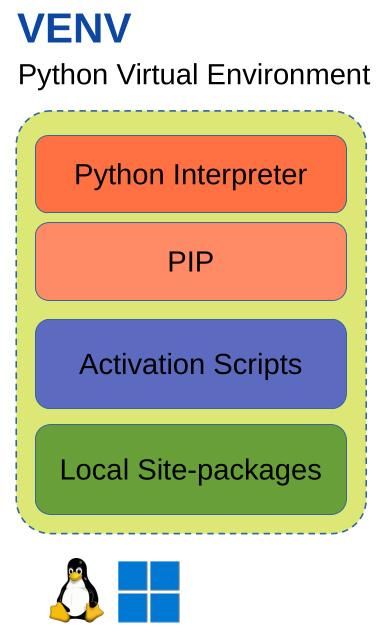
To understand this concept better, please read the following sections from the article "Back to basics with pip and venv."
Back to basics with pip and venv
This article provides a clear, no-nonsense explanation of why virtual environments are crucial and introduces the specific tool we'll be using, venv.
Please read the sections What is a virtual environment, and why to use one? and virtualenv, poetry, pipenv or virtualenvwrapper?. Pay close attention to the example of the requests library conflict; it's a classic illustration of the problem that virtual environments solve. The second section clarifies why we're focusing on venv, which comes bundled with Python, rather than other third-party tools.
Creating and Activating Your First Virtual Environment
Now that you understand the "why," let's get to the "how." We'll use the venv module, which is part of Python's standard library, to create and manage our environments. The process involves two main steps: creating the environment (a one-time action per project) and activating it (done every time you start working on the project).
The following resource provides the specific commands you'll need. Since you have experience with the command line from your PHP development work, these steps should feel straightforward.
Back to basics with pip and venv
This part of the article provides the exact, platform-specific commands to create and activate a virtual environment. Following these steps will give you a hands-on feel for the process.
First, create a new directory for our course project on your computer. Open your terminal or command prompt and navigate into that directory. Then, read the sections How to create a virtual environment and How to use a virtual environment. Follow the instructions for your operating system (Windows or Mac/Linux) to create an environment. A common convention is to name it .venv, as the article suggests. After creating it, practice activating and deactivating it using the activate and deactivate commands. Notice how your terminal prompt changes when the environment is active—this is your visual indicator that you're working inside the isolated environment.
For a visual walkthrough of this creation and activation process, the following video is an excellent supplement.
Python Virtual Environments - Full Tutorial for Beginners
This video from Tech With Tim provides a clear, concise demonstration of creating and activating a virtual environment.
Watch the segments on creating an environment and activating and deactivating it. The visual reinforcement of the commands you just read can be very helpful.
Installing Packages with pip
Once your virtual environment is active, you can install packages. Python's standard package manager is called pip (a recursive acronym for "Pip Installs Packages"). It is the direct equivalent of PHP's Composer. pip fetches packages from a central repository called the Python Package Index (PyPI) and installs them only into your currently active virtual environment.
Let's continue with our primary guide to see how this works.
Back to basics with pip and venv
This section explains what pip is and how to use it safely within an activated virtual environment.
With your .venv environment still active in your terminal, read the sections What is pip and why use it? and the command explanation. As you read, try installing your first package. A great one to start with is requests, which we'll use in a future lesson to make HTTP calls. Run this command: python -m pip install requests The article's emphasis on using python -m pip instead of just pip is a best practice that ensures you are using the pip associated with the active environment's Python interpreter, avoiding potential path issues.
Managing Dependencies for Reproducible Builds
Just as a composer.json file records your PHP project's dependencies, a requirements.txt file does the same for Python. This file is crucial for sharing your project with others or deploying it to a server, as it allows anyone to recreate your exact environment with a single command.
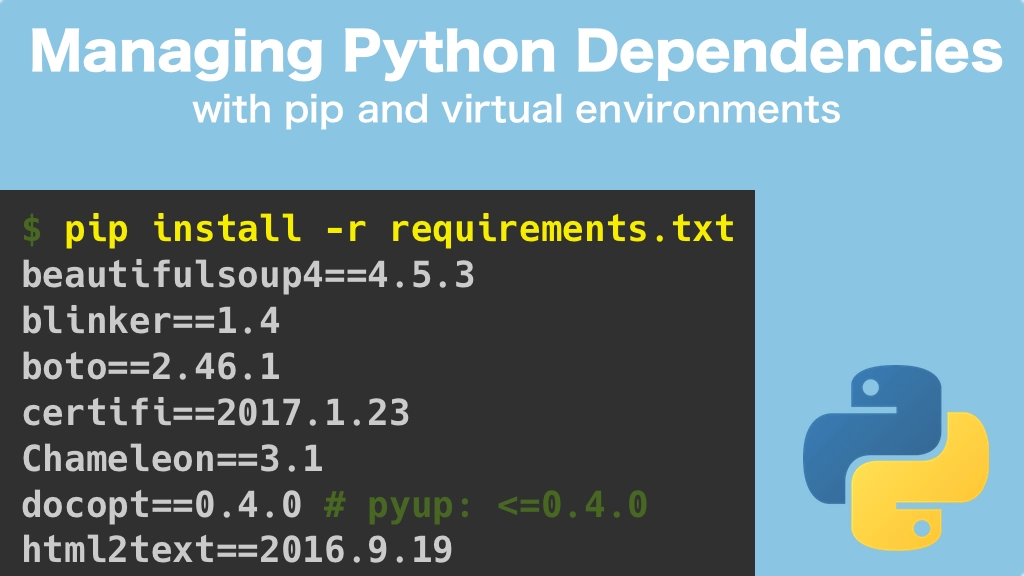
The process involves two key commands: one to "freeze" the current state of your environment into the file, and another to install from that file.
Install packages in a virtual environment using pip and venv
This official guide from the Python Packaging Authority details the standard workflow for managing dependencies with a requirements file.
In your terminal (with the virtual environment still active), read the sections Using a requirements file and Freezing dependencies. Now, put it into practice: Generate your requirements.txt file by running: python -m pip freeze > requirements.txt Open the newly created requirements.txt file in a text editor. You will see requests and its own dependencies listed with their exact versions. This file now serves as the blueprint for your project's environment.
Summary of the Development Workflow
You now have all the pieces. Here is the standard workflow you will follow for every Python project, including all the agentic systems we will build in this course:
- Create Project Directory: Make a new folder for your project.
- Create Virtual Environment: Navigate into the directory and run
python -m venv .venv. - Activate Environment:
- On Windows:
.venv\Scripts\activate - On Mac/Linux:
source .venv/bin/activate
- On Windows:
- Install Packages: As you need new tools, install them with
python -m pip install <package-name>. - Record Dependencies: Periodically, and especially before sharing your code, update your requirements file with
python -m pip freeze > requirements.txt. - Recreate Environment (if needed): On a new machine or for a collaborator, create and activate a fresh virtual environment, then run
python -m pip install -r requirements.txtto install all necessary dependencies.
Conclusion
In this lesson, you have established the most critical piece of infrastructure for your journey into Python-based AI development. You now have a repeatable, isolated, and professional setup for any project you tackle.
Key Takeaways:
- Virtual Environments (
venv) are isolated project directories that prevent dependency conflicts between projects. - Package Management (
pip) is Python's tool for installing third-party libraries from the Python Package Index (PyPI). Always use it within an active virtual environment. - Dependency Files (
requirements.txt) are the standard way to record a project's dependencies, ensuring that the development environment is reproducible.
With your environment ready, you are now set to start writing code. In our next lesson, we will dive into Python's syntax, focusing on the fundamental data structures like lists and dictionaries, and how to write functions to work with them.