Introduction
Welcome back! In our last lesson, you learned to analyze a subject and identify the "anatomy of a shadow," breaking it down into distinct parts like the form shadow, core shadow, cast shadow, and reflected light. We established that each of these parts has a different level of darkness.
Today, we transition from seeing these differences to creating them. The goal of this lesson is to learn how to create a value scale with at least five distinct, evenly-spaced steps from white to black.
A "value" is simply the lightness or darkness of a tone. A value scale is a foundational tool that helps you control your pencil, train your eye to see subtle tonal shifts, and create a consistent "palette" of grays for your drawings. Think of it as building a reliable function in programming: you create it once with care, and then you can call upon it repeatedly to render form and light convincingly.
The Five Essential Values
In the previous lesson, we identified the key components of light and shadow on a form. As it happens, these components map beautifully to a simple, five-step value scale. This isn't just a coincidence; it's a wonderfully practical system that artists use to simplify the complexity of light.
Let's watch a video that explicitly connects these two ideas.
How to Shade with Only 5 Values
In this video, "How to Shade with Only 5 Values," instructor Brent Eviston will first recap the parts of light and shadow on a sphere and then demonstrate how a five-step value scale corresponds directly to them.
Watch from 01:10 to 05:46. First, focus on how he assigns a number from the value scale to each part of the shadow (Highlight, Mid-tone, Reflected Light, etc.). Then, observe how he uses a physical value scale to check the values in his drawing of a sphere.
As you saw, the five essential values provide a clear plan for shading:
- Value 1: Highlight (The white of the paper)
- Value 2: Mid-tone (The general lit area)
- Value 3: Reflected Light (The lighter part of the form shadow)
- Value 4: Core Shadow (The darkest part of the form shadow)
- Value 5: Cast Shadow (The darkest value overall)
Now that you understand why a five-step scale is so useful, let's build one.
The Technique of Creating Value
Before you start your scale, it's crucial to understand the physical technique of applying graphite to create smooth, even tones. Rushing this step leads to "noisy" or scratchy results that make it hard to judge your values accurately.
The key is to build up darkness in layers, not to achieve it all at once by pressing hard.
Learn and Practice Shading by Creating a Value Scale | Value Scale In Graphite | Drawing
The Peonypaint channel's video, "Learn and Practice Shading by Creating a Value Scale," offers excellent advice on the mechanics of shading. Pay close attention to the details of the pencil strokes.
Watch from 01:12 to 03:57. Focus on these key technical points: Keeping your pencil sharp. Shading in one direction, not scribbling back-and-forth. The importance of light, uniform strokes without bold beginnings or ends. Building up darkness through layers.
Keep these technical points in mind as you move into the main exercise. This is about control and patience.
Practice: Building Your 5-Step Value Scale (30-35 minutes)
It's time for the core exercise. We will use a systematic process that relies on logic rather than guesswork, which may feel familiar given your background in computer science. Instead of trying to create the scale from light to dark in order, we will establish the extremes and then find the middle points, progressively subdividing the problem.
For this exercise, you will need:
- Your sketchbook or a sheet of drawing paper.
- A pencil (a 2B, 3B, or 4B is a good choice).
- A ruler (optional, but helpful for drawing the boxes).
- A kneaded eraser for adjustments.
I recommend reading through the following guide first, which clearly lays out this systematic process and highlights common mistakes.
Learn to Draw – Challenge 2: Value Scale
This article by artist Dorian Iten, "Learn to Draw – Challenge 2: Value Scale," provides a clear, step-by-step method for building a value scale. It also shows what common pitfalls to avoid.
Read the sections titled "The 6 Step Process" and "Common Mistakes." Although the demonstration shows a 9-step scale, the process is identical for our 5-step scale. Pay special attention to the advice on avoiding noise, outlines, and blurred boundaries.
Now, apply that process to create your own 5-step value scale.
Your Task:
-
Draw the Scale: Using a ruler or drawing freehand, create a rectangle and divide it into five equal boxes. Use light lines.
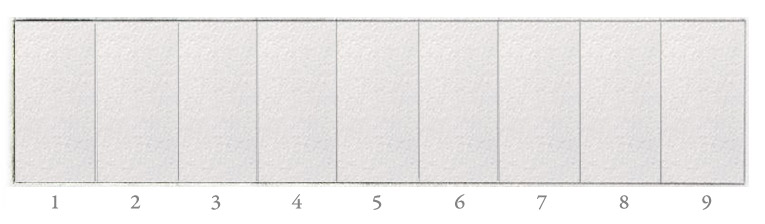
This image shows nine boxes, but you will be creating five. The principle of drawing clean, light boxes is the same. -
Establish the Extremes:
- Box 1: Leave this completely blank. This is your brightest value, the white of the paper.
- Box 5: Fill this in with the darkest value your pencil can produce. As Brent Eviston mentioned, this might be a good time to switch to a tripod grip to apply firm, even pressure without breaking the lead.
-
Find the Center:
- Box 3: Now, shade this box to be a value that appears to be exactly halfway between the white of Box 1 and the black of Box 5. This is your middle gray. Don't worry about perfection; estimate as best you can.
-
Find the Remaining Centers:
- Box 2: Shade this box to be a value exactly halfway between Box 1 (white) and Box 3 (middle gray). This will be a very light gray.
- Box 4: Shade this box to be a value exactly halfway between Box 3 (middle gray) and Box 5 (black). This will be a dark gray.
-
Rebalance and Refine:
- Now, look at your whole scale. The goal is to have an even visual jump between each step.
- The Squint Test: Squint your eyes while looking at your scale. This blurs the details and helps you see the tones more clearly. Do any two adjacent boxes seem too similar? Is there one jump that looks much larger than the others?
- Use your pencil to carefully darken any values that are too light, and use your kneaded eraser to gently lift graphite from any values that are too dark. Aim for smooth, flat tones within each box and sharp, clean edges between them.
Don't be discouraged if your first attempt isn't perfect. This exercise is about training your hand and eye. Do it two or three times. The repetition is where the real learning happens.
Conclusion
Great work today. You've tackled one of the most fundamental skills in drawing. By learning to control your pencil and create distinct, repeatable values, you have built an essential tool for rendering believable form.
Key Takeaways:
- A value scale is a series of distinct, evenly-spaced tones from white to black.
- A simple five-step value scale maps directly to the essential parts of light and shadow on a form (Highlight, Mid-tone, Reflected Light, Core Shadow, Cast Shadow).
- The most effective way to build a scale is to work from the extremes inwards, progressively finding the middle value of any remaining gap.
- Smooth, even tones are achieved through layering and controlled strokes, not by applying heavy pressure immediately.
In our next lesson, "Map the primary shadow shapes onto basic 3D forms," we will put this new skill to immediate use. You will combine your ability to identify shadow shapes with your ability to create specific values to shade simple 3D forms like spheres and cubes.