Hello! Welcome back to our design studio.
In our last module, we explored the "Designer's Toolkit," diving deep into stitch textures and the strategic use of color. We finished by learning how to use color blocking and contrast to make specific design elements pop. Now, we're ready to start building.
Welcome to Module 3: Crafting Individual Rounds. This is where we move from the abstract principles of stitches and color to the concrete practice of construction. Today's lesson is the cornerstone of this module. Your goal is to learn how to design a single, mathematically sound round that incorporates a chosen stitch pattern.
Think of this as being similar to designing a single, reusable component in web design. That component needs its own internal logic to display correctly (the math) and its own styling (the stitch pattern), all while being structured to fit seamlessly into the larger page layout (the full mandala).
The Mathematical Foundation: Why Circles Stay Flat
Before we can get creative with stitch patterns, we need to understand the fundamental rule that governs all flat circles. A crochet circle grows outwards from a central point. To keep it flat, the circumference must increase at a steady, predictable rate. In crochet, we achieve this by adding a consistent number of stitches in every round.
This concept is explained beautifully, with both simple rules and the underlying math, in the following article. Your background in frontend development might make you appreciate the logic and first-principles approach here.
How to crochet a flat circle in any crochet stitch or pattern
The article 'How to crochet a flat circle in any crochet stitch or pattern' by DoraDoes provides the essential theory for our lesson today.
Please read from the beginning down to the end of the 'The math of crocheting a flat circle' section. Focus on three key ideas: The basic pattern template and the concept of 'X' as your starting (and increasing) number. The guide for how 'X' changes based on stitch height (e.g., single vs. double crochet). The geometric explanation using Pi (π) that shows why this formula works.
Let's break down the key takeaways from that reading:
- The Golden Rule: The number of stitches you start with in Round 1 (
X) is the same number of stitches you must add in every subsequent round. - Stitch Height Matters: Taller stitches (like double crochet) have more space between them at the outer edge, so they require a larger starting number (
Xis typically 10-12) than shorter stitches like single crochet (Xis typically 6-7). - The Formula: The total number of stitches in any given round (
N) can be calculated as:
This means a flat circle has a beautifully predictable structure. If you start with 12 double crochet stitches (X=12), Round 4 should have stitches, and Round 5 should have stitches. The process of designing is the process of making the stitches fit this mathematical blueprint.

From Theory to Practice: Calculating Your Increases
Knowing your target stitch count is the first step. The second is figuring out how to get there.
Let's use our example:
- You just finished Round 4, which has 48 stitches.
- Your goal for Round 5 is 60 stitches.
- You need to add stitches.
To keep the circle round and not create points, you must distribute these 12 increases evenly around the 48 stitches of the previous round.
This tells you that you need to place an increase every 4 stitches. An "increase" is simply working two stitches into one stitch from the round below. So, your pattern repeat for this round would be: (2 dc in the next stitch, 1 dc in each of the next 3 stitches). You would repeat this sequence 12 times to complete the round.
Test your understanding!
You have just completed Round 6 of a flat circle made with half double crochet (hdc). You started with 8 hdc in Round 1 (so, X=8).
- How many stitches should you have in total at the end of Round 6?
- How many stitches will you need for Round 7?
- What will the repeating instruction be for Round 7, written in the format
(increase, regular stitches)?
Show answer
- End of Round 6: stitches.
- Needed for Round 7: stitches. You need to add 8 stitches.
- Repeating Instruction for Round 7: You need to distribute 8 increases over 48 stitches. . So, you'll place an increase every 6 stitches. The pattern is: (2 hdc in the next stitch, 1 hdc in each of the next 5 stitches), repeated 8 times.
Integrating Stitch Patterns: The Creative Challenge
This is where you graduate from a crocheter to a designer. Mandalas are rarely just simple stitches. They are filled with shells, clusters, post stitches, and lacy openwork. How do you incorporate these beautiful, complex patterns while staying true to the math?
The new golden rule: No matter how complex the stitch pattern, the final stitch count of the round must still follow the mathematical formula to lie flat.
The design process becomes an iterative puzzle:
- Calculate Your Target: Know the stitch count you're aiming for.
- Choose a Motif: Select a stitch pattern you want to use (e.g., a shell, a V-stitch).
- Analyze the Motif:
- Footprint: How many stitches from the round below does one repeat of your motif use?
- Output: How many stitches does one repeat of your motif create in the new round?
- Do the Math:
- Can you fit a whole number of repeats into the previous round?
- Does the total output match your target stitch count?
If the math doesn't work, you can't use that motif as-is. You have to adjust the motif, add increases or decreases between motifs, or choose a different pattern. Let's see this in action.
The video below walks through making a mandala with many different round styles. We'll use it as a case study to analyze a designer's choices.
Christmas Crochet Mandala Placemat You NEED This Holiday Season!
The 'Christmas Crochet Mandala Placemat' by Secret Yarnery is full of examples of different stitch patterns being used in different rounds. Let's analyze a couple of them.
We'll look at two specific rounds. First, watch Round 4 from 09:26 to 12:02. Notice the pattern is 'skip 1, 2 dc in next'. Think about what this does to the total stitch count. Next, watch Round 6 from 13:51 to 16:18. The pattern is '(sc, 3 dc, sc) in each space'. Try to count the stitches per repeat.
Case Study Analysis:
-
Round 4 (Skip 1, 2 dc in next): The motif footprint is 2 stitches (skip 1, use 1) and the output is 2 stitches (2 dc). This means the total stitch count of the round does not change. This is a design choice to create an open, lacy effect without growing the circle. It's often used to set up the next round or to recover if a previous round had too many increases.
-
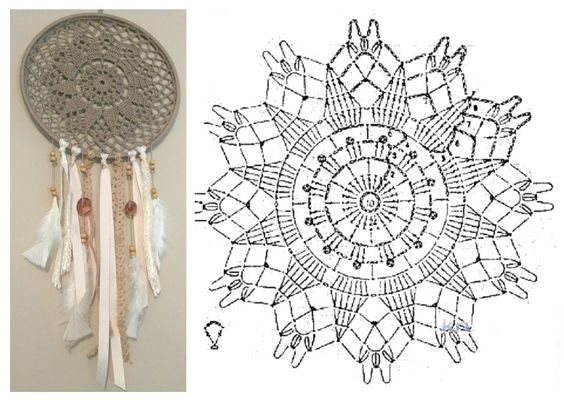
Round 6 (Shell Stitch): The motif is
(1 sc, 3 dc, 1 sc)worked into a space. The output is 5 stitches per repeat. If the previous round had 12 spaces, the final stitch count for this round would be stitches. The designer chose a shell stitch pattern that, when repeated, would naturally produce the exact number of stitches needed for the circle to lie flat in that round.
This is the essence of designing a round. You are finding a creative stitch pattern that fulfills a specific mathematical requirement.
Conclusion
Today you've learned the fundamental skill for designing any circular project. You've gone beyond simply following a pattern to understanding the 'why' behind its construction.
Key Takeaways:
- A flat circle's growth is governed by the formula:
Total Stitches = Round Number × Starting Stitches (X). - The value of
Xis determined by the height of your chosen stitch. - Designing a round involves selecting a stitch pattern (motif) and ensuring that its repetition results in the correct total stitch count for that round to lie flat.
- This process is an iterative puzzle of analyzing a motif's "footprint" (stitches used) and "output" (stitches created) to see if it fits the mathematical requirements.
In our next lesson, we'll build directly on this skill. We will focus on how to create repeating motifs that divide evenly within a round's stitch count. This is how you create the beautiful, symmetrical, star-like patterns at the heart of so many mandalas.