Hello! Welcome back to our course on web foundations.
In our last session, we organized content into ordered and unordered lists, a skill you'll find essential for structuring everything from navigation menus to step-by-step instructions.
Today, we're moving from text-based content to visual media. This lesson is all about bringing your pages to life by inserting images. You'll learn how to use the <img> tag and its two most important attributes: src, to tell the browser where to find the image, and alt, to provide a textual alternative for accessibility and search engines. By the end of this lesson, you'll be able to confidently embed images into your web pages.
The <img> Tag: Embedding an Image
Images are added to an HTML page using the <img> tag. This tag is what we call a void element (or empty element), which means it doesn't have a closing tag like <p> or <li> do. All the information the browser needs is provided through attributes within the single tag.
The two essential attributes are:
src: The source attribute, which specifies the path or URL to the image file.alt: The alternative text attribute, which provides a description of the image.
Let's start with a quick video that introduces the <img> tag and its basic attributes.
This video from W3Schools.com gives a concise overview of the <img> tag and its required src and alt attributes.
Watch from 00:19 to 01:15. Focus on the syntax of the <img> tag and the basic function of the src and alt attributes.
Here's what that looks like in code:
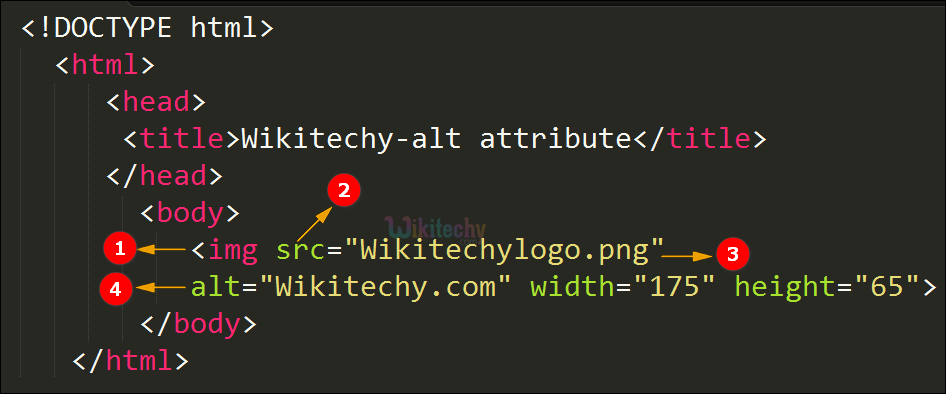
The src Attribute: Finding the Image
The src attribute is the most critical part of the <img> tag—without it, the browser has nothing to display. The value of this attribute is the location of the image file. This location can be specified in two main ways:
-
Relative Path: This points to an image file relative to the location of your HTML file. It's the most common and recommended method for your own projects.
src="dinosaur.jpg": The image is in the same folder as the HTML file.src="images/dinosaur.jpg": The image is in a sub-folder namedimages. This is a very common way to organize projects.
-
Absolute URL: This is a full web address to an image hosted on an external server.
src="https://www.some-website.com/images/photo.jpg"
While using absolute URLs is possible, it's generally considered bad practice to link to images on someone else's website without permission (a practice called "hotlinking"). It uses their server's bandwidth and you have no control if the image is moved or deleted.
To get a more detailed understanding of how to use the src attribute correctly, please read the following material.
HTML images - Learn web development | MDN
This article from the MDN Web Docs, 'HTML images', provides an excellent, in-depth explanation of how the <img> element and src attribute work.
Read the section titled 'How do we put an image on a webpage?'. Pay close attention to the examples of relative vs. absolute URLs and the warning about hotlinking.
The alt Attribute: Accessibility and SEO
The alt attribute is just as important as src, but for different reasons. It makes your website more accessible and robust.
Why is alt text essential?
- Screen Readers: Visually impaired users rely on screen readers that read web content aloud. The screen reader will announce the
alttext, describing the image to the user. - Broken Images: If an image fails to load (due to a typo in the
src, a slow connection, or a deleted file), the browser will display thealttext instead. - Search Engine Optimization (SEO): Search engines like Google use
alttext to understand the content of an image, which can help your site rank better in image searches.

Writing good alt text is a skill. It's not about describing every detail, but about conveying the purpose of the image in the context of the page.
The following video is an excellent guide on how to approach writing effective alt text.
How to write good alt text - Making images accessible with alternative text
In 'How to write good alt text', the speaker from Silktide explains the thought process behind writing meaningful alt text and how to handle different types of images.
Watch the entire video (around 3 minutes). Pay special attention to the difference between informative images (which need description) and decorative images (which should have an empty alt="" attribute).
To summarize the key idea from the video: if the image provides important information, describe it. If it's just for decoration, use alt="" so that screen readers can skip it. Leaving out the alt attribute entirely is a mistake, as some screen readers will try to read the file name instead, which is not a good user experience.
Practice: Adding an Image to Your Page
Now it's time to put this into practice. We will add a new section to your index.html file that includes an image. For this exercise, we'll use an image from an absolute URL for simplicity, but remember the best practice is to store your images locally.
Instructions:
- Open your
index.htmlfile. - Below the "My Learning Plan" list you created in the last lesson, add a new
<h2>with the text "My Workspace". - Below this new heading, add an
<img>tag. - Set the
srcattribute to the following URL:https://images.unsplash.com/photo-1517694712202-14dd9538aa97?q=80&w=2070 - Write a descriptive
altattribute. Think about what information this image conveys. A good description might be "A laptop displaying code sits on a wooden desk next to a cup of coffee and a notebook." - Finally, add
width="400"to the<img>tag. While we will learn to control styling with CSS later, setting awidthdirectly in HTML can help the browser reserve space for the image as the page loads, preventing content from jumping around.
After completing these steps, save your index.html file and open it in your browser. You should see your new heading and the image displayed below it.
Click here to see the solution.
<h2>My Workspace</h2>
<img
  src="https://images.unsplash.com/photo-1517694712202-14dd9538aa97?q=80&w=2070"
  alt="A laptop displaying code sits on a wooden desk next to a cup of coffee and a notebook."
  width="400"
>
Conclusion
Great job! You've learned how to embed one of the most common types of media on the web. Visuals make a huge difference in user engagement, and now you have the tool to add them correctly and responsibly.
Key Takeaways:
- The
<img>tag is used to embed an image and is a void element (no closing tag). - The
srcattribute is required and specifies the path to the image file. - The
altattribute is also required and provides a text description for accessibility, broken links, and SEO. - The content of the
alttext should convey the image's purpose and meaning. Decorative images should have an emptyaltattribute (alt="").
In the next lesson, we will learn how to create hyperlinks. This will allow us to link to other pages on the web or even to different sections within our own page. We'll also see how you can combine what you've learned today with the next lesson to turn an image into a clickable link.