Hello! Welcome back to your final mastering module.
In our last lesson, we added a layer of precision to our master by using a multiband compressor. You learned how to tame dynamics in specific frequency ranges—controlling the low-end boom without squashing the delicate highs—to create a track that is both powerful and transparent.
Now, with our track's tonal balance and dynamics refined, we've arrived at the final decision before exporting: how loud should it be? This single question is one of the most critical in modern music production. Make it too quiet, and it might feel weak next to other songs on a playlist. Make it too loud in the wrong way, and streaming services will simply turn it down, potentially ruining your hard work.
In this lesson, you will learn to analyze and set the final loudness of a track to meet targets for streaming platforms (LUFS). We'll demystify the numbers and standards used today, so you can confidently prepare your music for release on Spotify, Apple Music, and beyond.
1. The New Loudness: What is LUFS?
For years, engineers chased peak volume, leading to the "loudness war" where music became increasingly compressed and fatiguing. Streaming services ended this by introducing loudness normalization. Instead of looking at the loudest peak in a song, they measure its perceived average loudness over time and adjust it to match a target level.
The metric they use for this is LUFS (Loudness Units Full Scale). It's a measurement designed to mimic how the human ear experiences volume.
To get a clear, simple introduction to this concept, let's start with a short video.
LUFS Explained – SIMPLE! (Mastering for Spotify)
This video from EDM Tips provides a great, straightforward explanation of what LUFS is and why streaming services like Spotify use it.
Watch from the beginning until 02:45. Pay attention to the core difference between peak volume (like dBFS) and average volume (LUFS), and how loudness normalization creates a consistent listening experience.
As the video explained, LUFS gives us a much more meaningful way to talk about loudness. You'll typically see three LUFS readings on a meter:
- Integrated LUFS: The average loudness across the entire track. This is the main value streaming platforms use for normalization.
- Short-Term LUFS: The average loudness over the last 3 seconds. This is great for checking the loudness of a specific section, like a chorus.
- Momentary LUFS: A near-instantaneous reading of loudness.
Another crucial metric is True Peak (dBTP), which measures the absolute highest level your audio will reach, even between digital samples. Keeping this below 0 dB is essential to avoid distortion after your music is converted to formats like MP3 or AAC.
A Guide to Pro Audio Mastering Levels
To solidify these concepts, the article 'A Guide to Pro Audio Mastering Levels' offers excellent analogies and details.
Please read two sections from this guide: Start at the heading 'LUFS: Hearing It Like a Listener' and read down to the end of the 'RMS: The Old School Average' section. This will reinforce the different LUFS types and explain True Peak using helpful analogies. Next, read the section that begins with 'The Truce Called by Streaming' and ends just before 'Mastering Levels for Streaming Platforms'. This provides essential context on how normalization ended the loudness war.
2. Understanding Streaming Platform Targets
So if platforms normalize everything, what should you aim for? While each platform has slightly different specs, an unofficial industry standard has emerged around -14 LUFS Integrated with a -1.0 dBTP True Peak.
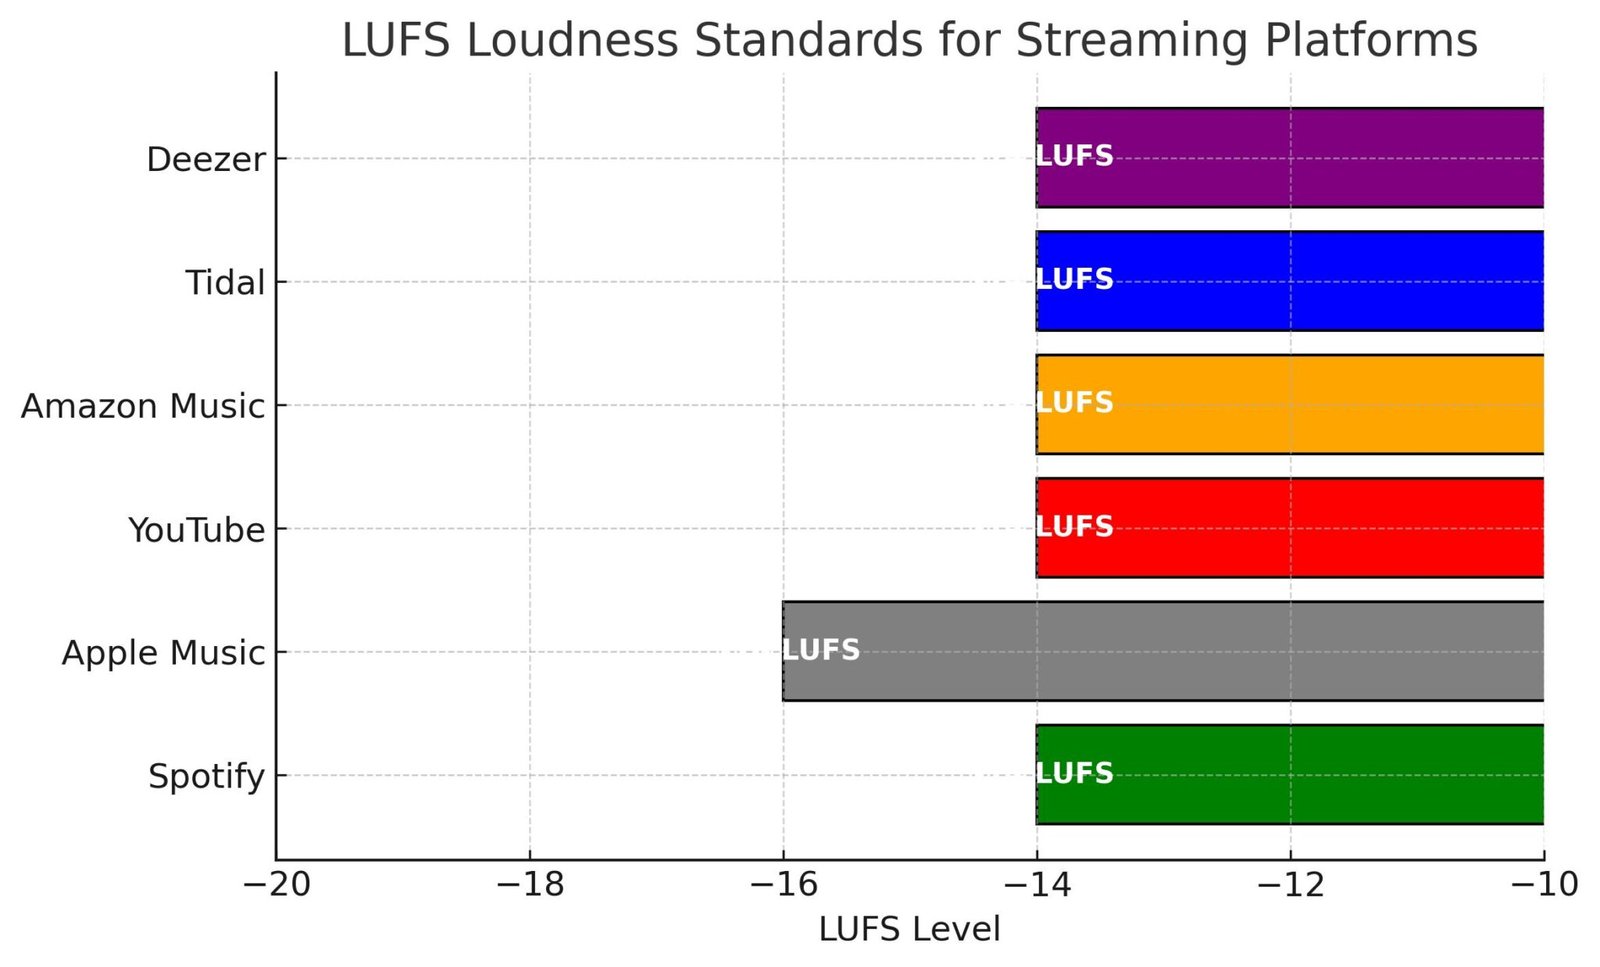
If you master your track louder than -14 LUFS, Spotify will turn it down. If you master it quieter, they will turn it up. The goal is to deliver a master that requires minimal adjustment from the platform, ensuring your listener hears it exactly as you intended.
A Guide to Pro Audio Mastering Levels
Let's return to the 'A Guide to Pro Audio Mastering Levels' article to see the specific targets and why a single master is usually sufficient.
Read the section titled 'Mastering Levels for Streaming Platforms'. Focus on the table of platform targets and the key takeaway: one well-balanced master aimed at -14 LUFS and -1.0 dBTP will work well everywhere.
While -14 LUFS is the target, different genres have different dynamic expectations. A dynamic jazz track might sit at -16 LUFS, while an aggressive electronic track might be pushed louder.
Mastering with a LUFS Meter: Loudness Targets Explained
For genre-specific guidelines, this article from Remasterify provides a helpful breakdown.
Read the short section 'LUFS Targets by Genre'. This will give you a better sense of how loudness expectations can vary based on the style of music you're producing.
3. Practical Workflow: Measuring Loudness in FL Studio
To set your final loudness, you'll need two plugins at the very end of your master track chain: a limiter to control the level and a loudness meter to measure the result.
Crucially, the loudness meter must be the very last plugin in the chain. This ensures it measures the final output after all other processing.

Many DAWs come with loudness meters, but a fantastic and widely-used free option is the Youlean Loudness Meter, which was shown in the first video.
Here is the basic workflow:
- Place your chosen limiter on your master track, followed by a loudness meter.
- Set the output ceiling of your limiter to -1.0 dBTP. This is your safety net against clipping.
- Find the loudest, most energetic section of your song (usually the chorus or drop) and loop it.
- While the loop plays, gradually increase the input gain on your limiter.
- Watch the LUFS reading on your loudness meter. Your goal is to find a level that sounds powerful and full without sounding distorted or crushed.
4. Avoiding a Common Mastering Mistake
You might be tempted to loop your chorus and adjust your limiter until the Integrated LUFS reads exactly -14. This seems logical, but it often leads to a track that is too quiet.
Why? Because Integrated LUFS is calculated over the entire duration of the audio file. The quiet intro, breakdown, and outro will bring the overall average down.
A much better approach is to focus on the Short-Term LUFS reading while looping your loudest section.
Don't Make This Loudness LUFS Mistake
The video 'Don't Make This Loudness LUFS Mistake' by Mixdown Online explains this critical concept perfectly.
Watch these key segments to understand this pro-level technique: The Mistake (00:00 - 00:53): See the problem illustrated directly. Why It Happens (03:40 - 05:18): Understand why Integrated LUFS is misleading when mastering just one section. The Solution (09:36 - 10:58): Learn why focusing on Short-Term LUFS in the loudest section is the recommended professional workflow.
As the video explains, by mastering the loudest part of your song to a higher Short-Term LUFS level (e.g., -10 to -8 LUFS), the final bounced track will have an Integrated LUFS that lands much closer to the -14 LUFS target.
Furthermore, some platforms won't apply "positive gain" (turn up quiet tracks). This means it's generally safer to master a little louder and let the platform turn it down than to master too quietly and risk your track sounding weak on some services.
Test your understanding!
You're mastering a hip-hop track and want it to be loud and competitive. You know that Spotify normalizes to -14 LUFS. During mastering, you loop the main chorus and push your limiter until the Short-Term LUFS reading is hovering around -8 LUFS. Your True Peak is set to -1.0 dBTP.
After you bounce the full track, you analyze it and find the Integrated LUFS is -12.5 LUFS.
- Is this a problem? Why or why not?
- What will Spotify likely do to your track during playback?
Show answer
- No, this is not a problem. In fact, it's a good result. By focusing on the Short-Term LUFS of the loudest section, you ensured the track has competitive energy. The final Integrated LUFS is only slightly above the target, which is much better than being too quiet.
- Spotify will simply turn your track down by 1.5 dB (from -12.5 LUFS to its -14 LUFS target). Because you didn't over-compress it into distortion, the track will still sound punchy and dynamic, just at the correct playback level for the platform.
Conclusion
Understanding loudness is the final gatekeeper of a professional master. By moving beyond simple peak levels and embracing the LUFS standard, you can make informed decisions that ensure your music translates powerfully and consistently across all platforms.
Key Takeaways:
- LUFS is the Standard: Streaming services use Integrated LUFS to measure and normalize perceived loudness, making the "loudness war" obsolete.
- Aim for the Universal Target: A master at -14 LUFS Integrated with a -1.0 dBTP True Peak is a safe and effective target for all major platforms.
- Master with a Meter: Always place a loudness meter after your limiter on the master bus to get an accurate reading of your final output.
- Focus on Short-Term LUFS: During mastering, loop the loudest section of your song and aim for a competitive Short-Term LUFS level (e.g., -10 to -8 LUFS) to ensure your final track isn't too quiet.
Preview of Next Lesson:
You now know what loudness level to aim for and how to measure it. In our final lesson, we will focus on the tool that gets you there: the limiter. You will learn to use a final limiter to achieve competitive loudness while preserving the mix's dynamics, ensuring your track is loud, punchy, and free of distortion.