Hello! Welcome back to our vocal mixing module.
In our last lesson, we focused on the crucial first step of our vocal chain: correction. You learned how to use surgical EQ to remove unwanted resonances and a de-esser to tame harsh sibilance. Your vocal track is now clean and free of distracting sonic artifacts, providing a perfect foundation for the next stages.
Today, we move from correction to control. A raw vocal performance is naturally dynamic, with loud parts that can jump out of the mix and quiet parts that can get lost. Our goal is to manage this dynamic range so the vocal sits consistently upfront without sounding squashed or unnatural. To achieve this, this lesson will teach you how to use serial compression (multiple compressors) to transparently control vocal dynamics.
1. Why Use Two Compressors Instead of One?
You've already worked with compressors, so you know they reduce the dynamic range of a signal. You might think, "Why not just use one compressor and turn up the ratio?"
While you can do that, a single compressor doing a lot of work (e.g., more than 6-7 dB of gain reduction) can often sound obvious and unnatural. It can introduce artifacts and drain the life out of a performance.
Serial compression is the technique of using two or more compressors in a row, with each one doing a small amount of work. By sharing the load, we can achieve significant dynamic control that is far more transparent and musical.

Think of it like this: instead of asking one person to lift a very heavy box, you ask two people to each lift a lighter one. The job gets done more easily and with less strain.
2. The Classic Vocal Compression Duo
A hugely popular and effective combination for serial compression on vocals is to pair a fast, aggressive compressor with a slow, smooth one. For this, two legendary pieces of hardware (now available as plugins you'll find in most studios) are the go-to choices:
-
The FET Compressor (e.g., Urei 1176): This compressor is known for its lightning-fast attack time and aggressive character. Its job is to act like a peak-catcher, instantly taming the loudest, spikiest parts of the vocal (the transients) before they get out of control. We'll call this the "Peak Tamer."
-
The Optical Compressor (e.g., Teletronix LA-2A): This compressor is famous for its slow, gentle, and musical compression. Its response is determined by an optical cell, which gives it a very smooth character. Its job is to provide overall leveling and "glue," evening out the body of the vocal after the peaks have been tamed. We'll call this the "Smoother."
The most common setup is to place the Peak Tamer (1176-style) before the Smoother (LA-2A-style) in the effects chain.
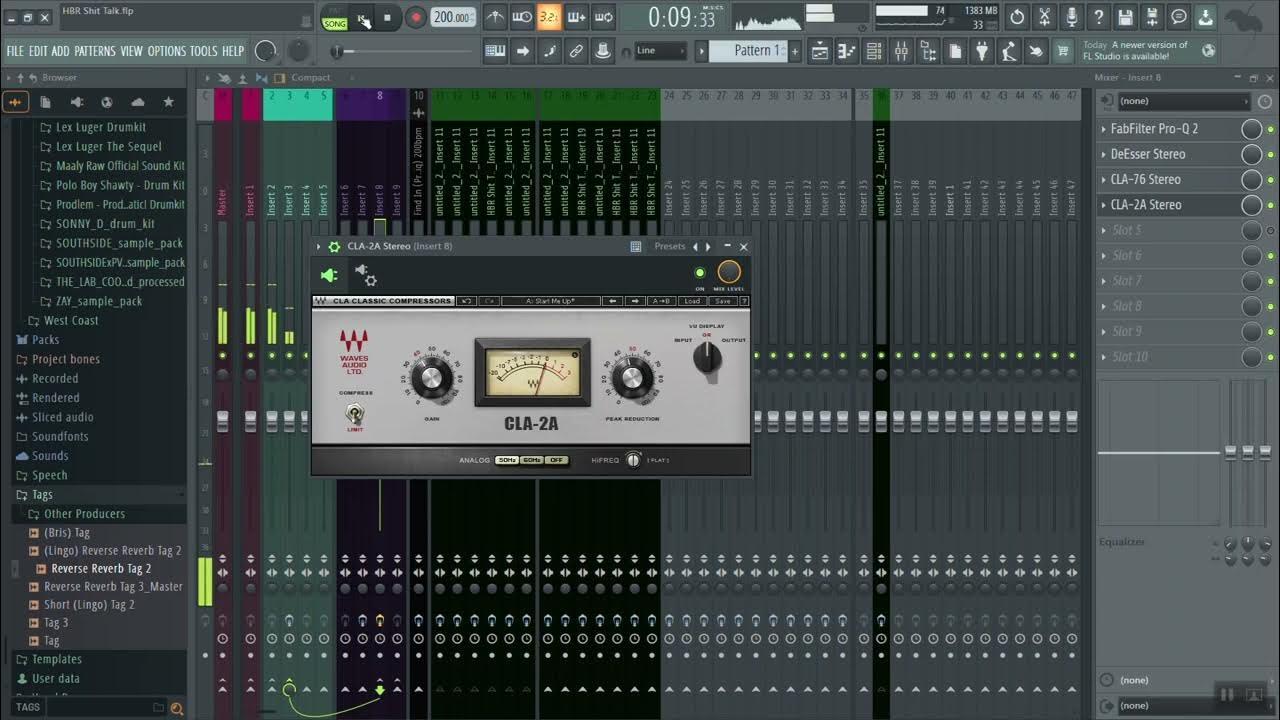
3. Building the Chain: A Practical Walkthrough
Let's get practical. The following video provides an excellent step-by-step demonstration of setting up this classic vocal compression chain. We will break it down piece by piece.
Using Multiple Compressors When Mixing Vocals
The video 'Using Multiple Compressors When Mixing Vocals' from Mix With Jerry clearly demonstrates the setup and settings for an 1176 and LA-2A chain. It's a perfect practical guide for this technique.
First, watch from 00:54 to 05:16. This section covers setting up the first compressor (CLA-76) to tame the peaks. Then, watch from 05:16 to 07:54 to see how the second compressor (CLA-2A) is used for smoothing.
Let's recap the process and the key settings to focus on.
Step 1: The Peak Tamer (1176-Style Compressor)
The goal here is to only compress the loudest peaks.
- Load an 1176-style compressor first in your chain. (FL Studio's "Fruity Limiter" in 'comp' mode can be set to be very fast, or you can use third-party emulations).
- Attack: Set it to be fast. On 1176 models, the knobs are often reversed, so a higher number (e.g., 5-7) means a faster attack. This ensures the compressor reacts instantly to catch the transient.
- Release: Set it to be fast. We want the compressor to let go of the signal quickly after the peak has passed so it doesn't affect the sustain of the note.
- Ratio: A good starting point is 4:1 or 8:1. This is moderately aggressive.
- Input/Threshold: This is the most important control. Adjust it so that you are getting 3-6 dB of gain reduction on the loudest peaks ONLY. You should see the gain reduction meter jump when a loud word hits and then quickly return to 0. It should not be constantly compressing.
Step 2: The Smoother (LA-2A-Style Compressor)
Now that the peaks are under control, we can smooth out the overall performance.
- Load an LA-2A-style compressor after the 1176.
- Controls: These are famously simple. You mainly have a "Peak Reduction" knob and a "Gain" (output) knob. The attack and release are program-dependent, meaning they react automatically to the incoming signal.
- Peak Reduction: Adjust this knob to get a slow, steady 2-4 dB of gain reduction. Unlike the 1176, you'll see the meter moving more gently and consistently, working on the body of the vocal rather than just the peaks.
- Gain: After both compressors are working, the overall signal will be quieter. Use the "Gain" knob on the LA-2A to bring the vocal's level back up so its perceived volume is similar to the uncompressed signal. This is called makeup gain and is crucial for making fair A/B comparisons.
This article provides a great summary and some go-to starting numbers for each compressor in the chain. It can serve as a handy "cheat sheet" as you practice.
The Best Compressor Settings for Vocals (Exact Settings to ...
The article 'The Best Compressor Settings for Vocals' from Music Guy Mixing reinforces the concepts we've just discussed and provides clear, numerical starting points for your compressor settings.
Read the sections titled 'Best Compressor Settings for Vocals' focusing on the paragraphs for the first compressor, and then the section at the end that discusses following it up with a second compressor (like an optical/LA-2A model). Pay attention to the recommended ratio and gain reduction amounts.
Test your understanding!
You have a vocal track where the singer's performance is generally even, but they shout one word in every line, causing it to be way too loud. You set up a serial compression chain with an 1176-style plugin followed by an LA-2A-style plugin.
Which compressor is doing most of the work to fix the "shouted word" problem, and how can you tell by looking at its gain reduction meter?
Show answer
The 1176-style compressor (the first one) is doing the main job of taming the shouted words.
You can tell by looking at its gain reduction meter. It will be mostly at or near 0 dB, but will suddenly and quickly jump to show significant gain reduction (e.g., -5 dB) only when the shouted word occurs, then immediately return to 0. The LA-2A's meter, in contrast, will be moving more slowly and consistently throughout the vocal phrase.
Conclusion
You have now added one of the most powerful vocal mixing techniques to your toolkit. By using serial compression, you can achieve a vocal that is both powerful and dynamically consistent, allowing it to sit perfectly in a dense mix without sounding artificial or over-processed.
Key Takeaways:
- Serial compression uses multiple compressors in a series to achieve transparent dynamic control.
- A classic vocal chain consists of a fast FET compressor (1176) to tame peaks, followed by a slow Optical compressor (LA-2A) to smooth the body of the vocal.
- The first compressor should be set to react only to the loudest moments, with a fast attack and release.
- The second compressor provides gentle, consistent gain reduction to level the overall performance.
- Always use makeup gain to level-match your processed and unprocessed signals for an accurate comparison.
Preview of Next Lesson:
Our vocal is now clean and its dynamics are under control. The next step in our vocal chain is to address any minor imperfections in the performance itself. In the next lesson, we will explore how to apply subtle pitch correction to tune a vocal performance without creating artifacts, ensuring the vocal is perfectly in key with the song.