Hello! Welcome back to our module on testing Spring applications.
In the previous lesson, we learned how to use AssertJ to write fluent, readable, and descriptive assertions. This gives us a powerful tool for the "Assert" phase of our tests—verifying that our code produces the correct results. Now, we'll turn our attention to the "Arrange" and "Act" phases, focusing on how to set up and test one of the most critical parts of our backend: the service layer.
Today's lesson addresses the learning outcome: Write unit tests for the service layer using JUnit 5 and Mockito. The service layer is where your application's business logic lives. We need to ensure this logic works correctly in isolation, without depending on a live database or other external components. You'll learn how to use the Mockito framework to achieve this isolation, allowing you to write fast, reliable, and focused unit tests.
1. The "Unit" in Unit Testing: Why We Need Isolation
When you write a test, it's important to define its scope. A unit test is designed to test a single "unit" of code—typically a method or a class—in isolation from its dependencies.
Consider a UserService that depends on a UserRepository to fetch data from a database.
@Service
public class UserService {
    private final UserRepository userRepository;

    // constructor...

    public User findUserById(Long id) {
        return userRepository.findById(id)
            .orElseThrow(() -> new UserNotFoundException("User not found"));
    }
}
If we were to test findUserById using a real UserRepository connected to a real database, our test would no longer be a unit test. It would become an integration test. Such a test would be:
- Slow: Connecting to a database takes time.
- Brittle: It could fail if the database is down or if the data changes.
- Unfocused: A failure wouldn't clearly tell you if the problem is in the
UserService's logic or the database interaction.
To write a true unit test for UserService, we need to isolate it from UserRepository. We do this by replacing the real repository with a "fake" one that we can control completely. This is where mocking comes in.
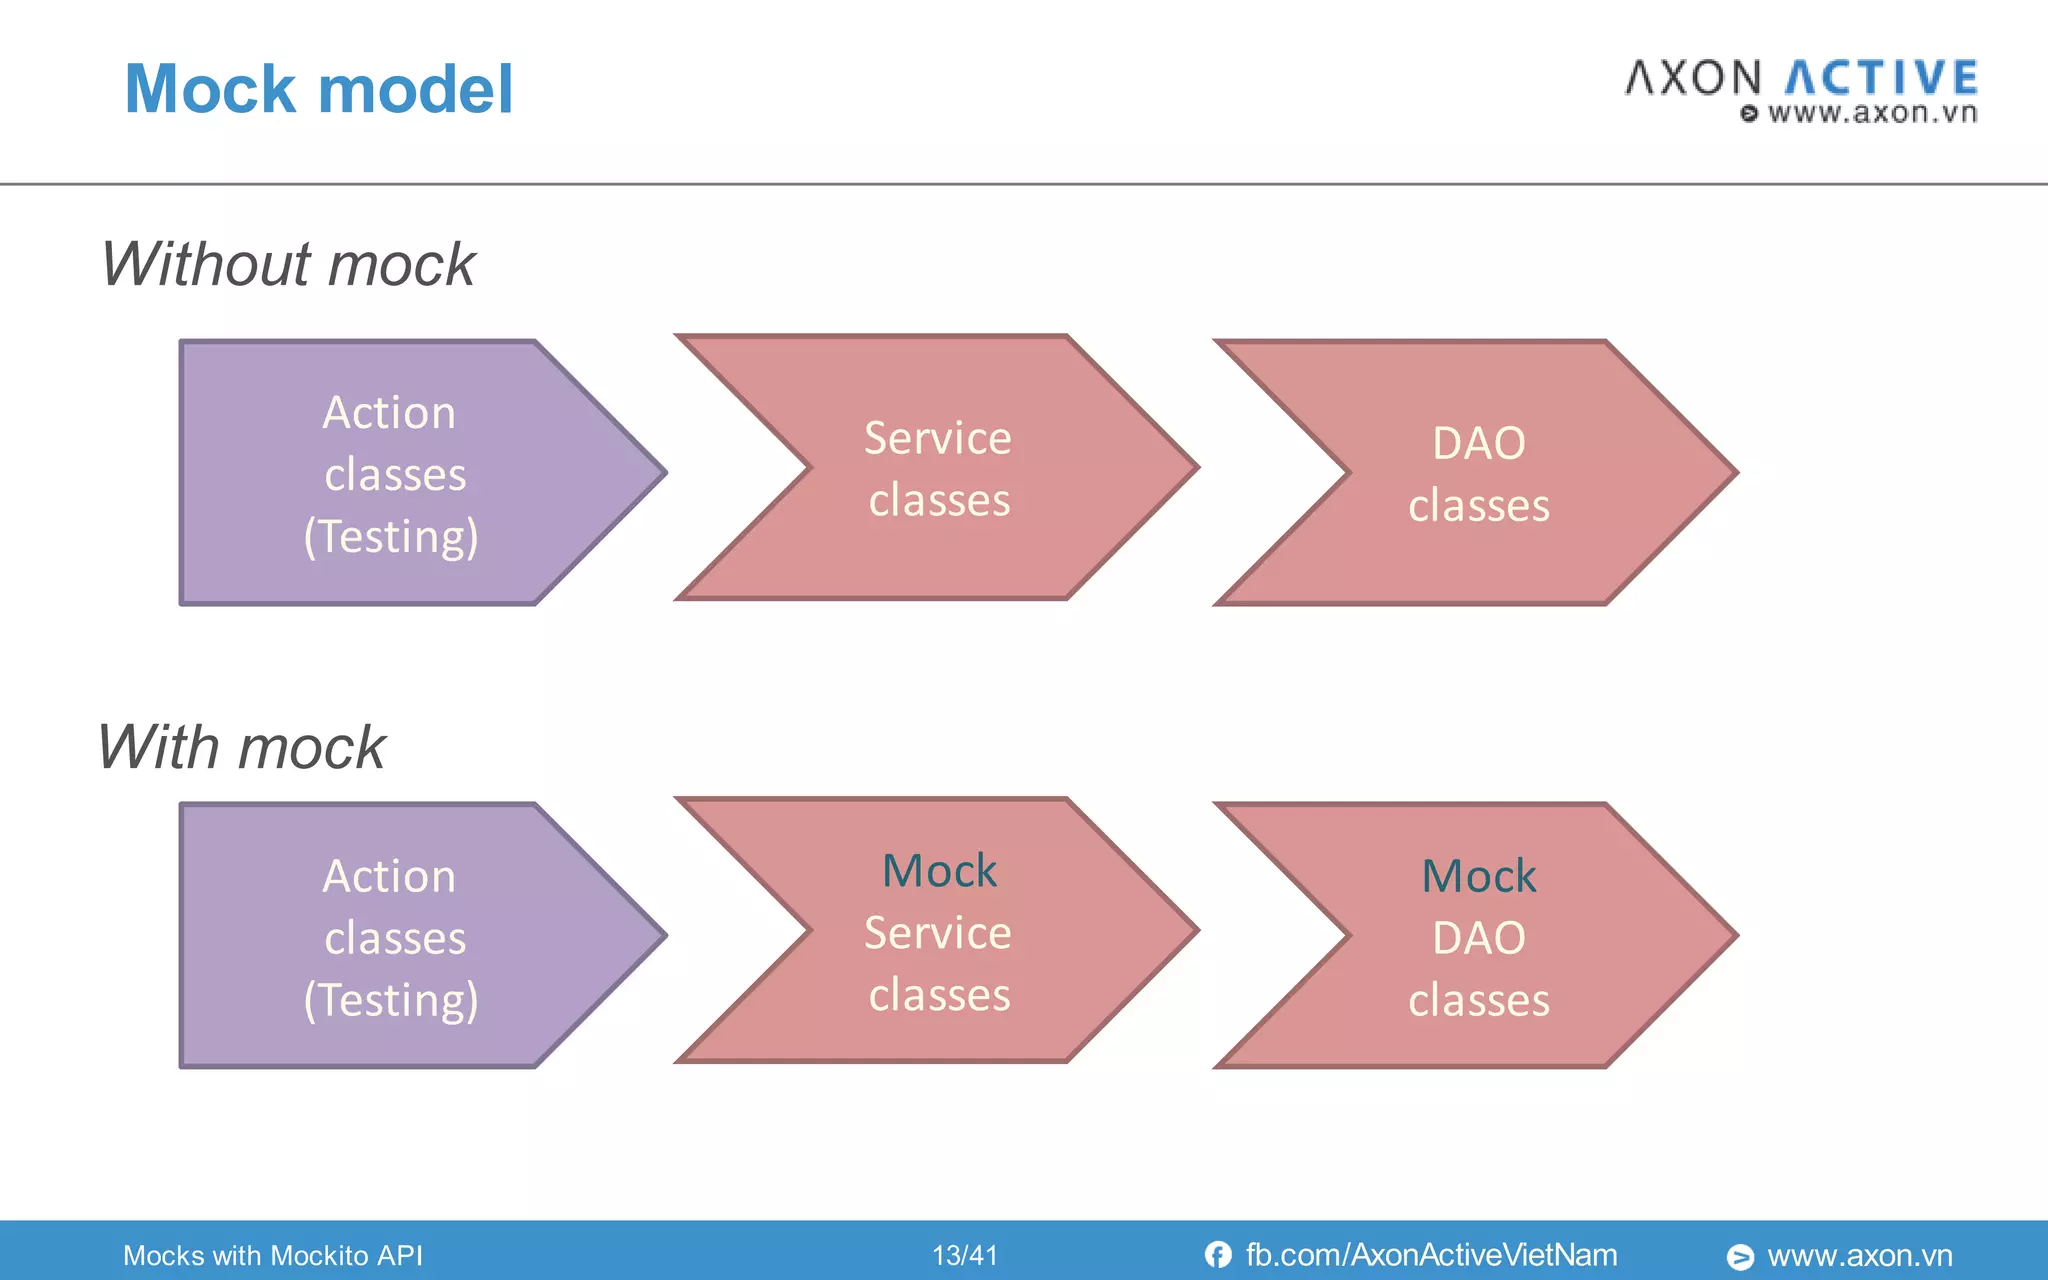
Mockito is a powerful Java library that lets us create these fake objects, called mocks.
2. Setting Up a Service Test with JUnit 5 and Mockito
Spring Boot's spring-boot-starter-test already includes both JUnit 5 and Mockito, so no extra dependencies are needed. Let's set up the test class for our UserService.
First, it's a standard convention to place test classes in src/test/java, mirroring the package structure of your main source code.

Here is the skeleton for our UserServiceTest:
import org.junit.jupiter.api.extension.ExtendWith;
import org.mockito.InjectMocks;
import org.mockito.Mock;
import org.mockito.junit.jupiter.MockitoExtension;

@ExtendWith(MockitoExtension.class)
class UserServiceTest {

    @Mock
    private UserRepository userRepository;

    @InjectMocks
    private UserService userService;

    // ... our test methods will go here
}
Let's break down these crucial annotations:
@ExtendWith(MockitoExtension.class): This JUnit 5 annotation initializes Mockito and tells it to process the annotations within this test class.@Mock: This creates a mock implementation of theUserRepository. This mock doesn't have any real logic; it's an empty shell that will only do what we tell it to do for each test.@InjectMocks: This creates a real instance ofUserServiceand then tries to inject any fields annotated with@Mock(like ouruserRepository) into it. This is how ouruserServiceinstance gets its dependency fulfilled by the mock object instead of a real one.
This setup gives us a fully isolated UserService instance ready for testing, without loading any Spring application context.
Unit Testing in Spring Boot with JUnit and Mockito
The article 'Unit Testing in Spring Boot with JUnit and Mockito' provides an excellent summary of these setup steps and the reasoning behind them.
Read sections '3. Introduction to Mockito' and '4. Unit Testing the Service Layer with Mockito'. Focus on understanding the roles of @ExtendWith, @Mock, and @InjectMocks, and how they come together to create an isolated test environment for the service class.
3. Writing Tests: The Arrange-Act-Assert Pattern
A well-structured unit test follows a clear pattern, often called Arrange-Act-Assert (or Given-When-Then).
- Arrange (Given): Set up the test conditions. This is where you prepare your test data and, crucially, program your mocks to behave in a specific way for this test case.
- Act (When): Execute the method you are testing.
- Assert (Then): Verify that the outcome is what you expected. This includes checking the return value, the state of objects, or whether certain methods on your mocks were called.
4. Testing the "Happy Path"
Let's write a test for the successful case of our findUserById method. We want to verify that when the repository finds a user, the service returns it correctly.
🚀 Master Unit Testing in Spring Boot with JUnit 5 & Mockito | Complete Guide 2025
The following video by Ali Bouali provides a masterclass in unit testing a service. We'll watch a segment where he sets up a test for a 'create' method, which follows the same principles we need for our 'find' method.
Watch from 17:36 to 34:30. Pay close attention to how he uses the 'Given-When-Then' (Arrange-Act-Assert) structure. Notice his use of when(...).thenReturn(...) to define the mock's behavior (the Arrange step) and verify(...) to check that a method was called (part of the Assert step).
Inspired by the video, here is how we would test findUserById:
import static org.assertj.core.api.Assertions.assertThat;
import static org.mockito.Mockito.when;
import static org.mockito.Mockito.verify;

// Inside UserServiceTest class

@Test
@DisplayName("Should return user when user is found by ID")
void shouldReturnUserWhenUserExists() {
    // Arrange (Given)
    User expectedUser = new User(1L, "John Doe", "john.doe@example.com");

    // Tell the mock repository what to do when its findById method is called with 1L
    when(userRepository.findById(1L)).thenReturn(Optional.of(expectedUser));

    // Act (When)
    User actualUser = userService.findUserById(1L);

    // Assert (Then)
    assertThat(actualUser).isNotNull();
    assertThat(actualUser.getId()).isEqualTo(expectedUser.getId());
    assertThat(actualUser.getName()).isEqualTo(expectedUser.getName());

    // Also, verify that the findById method on the mock was called exactly once with the argument 1L
    verify(userRepository).findById(1L);
}
The key to the Arrange step is stubbing—defining the behavior of a mock's method. The line when(userRepository.findById(1L)).thenReturn(Optional.of(expectedUser)); tells Mockito: "When the findById method is called on this mock with the argument 1L, then return this specific Optional<User>."
Test your understanding!
Imagine you are testing a saveUser method. Your UserRepository has a method existsByEmail(String email) that returns a boolean.
In your test setup (the "Arrange" block), how would you instruct your mocked userRepository to return true when it checks for the email "test@example.com"?
Show answer
You would use the when(...).thenReturn(...) pattern like this:
when(userRepository.existsByEmail("test@example.com")).thenReturn(true);
This stub ensures that when the saveUser logic calls existsByEmail with that specific string, it will receive true, allowing you to test the path where a user with that email already exists.
5. Testing the "Unhappy Path" (Exceptions)
Testing for correct behavior also means testing for expected failures. Let's test that findUserById throws a UserNotFoundException when the repository returns an empty Optional.
🚀 Master Unit Testing in Spring Boot with JUnit 5 & Mockito | Complete Guide 2025
Let's return to Ali Bouali's video. This next segment demonstrates how to test for scenarios that should throw an exception.
Watch from 41:58 to 48:30. Notice how he stubs the repository to return an empty result. He then uses assertThrows to confirm that the correct exception is thrown. Finally, he uses verify(..., never()) to ensure that methods that shouldn't be called in an exception scenario were, in fact, not called.
Applying that pattern to our test case:
import static org.junit.jupiter.api.Assertions.assertThrows;
import static org.mockito.Mockito.never;

// Inside UserServiceTest class

@Test
@DisplayName("Should throw exception when user is not found by ID")
void shouldThrowExceptionWhenUserNotFound() {
    // Arrange (Given)
    long userId = 99L; // An ID that doesn't exist

    // Tell the mock repository to return an empty Optional for this ID
    when(userRepository.findById(userId)).thenReturn(Optional.empty());

    // Act & Assert (When & Then)
    // We expect the call to userService.findUserById to throw a UserNotFoundException
    assertThrows(UserNotFoundException.class, () -> {
        userService.findUserById(userId);
    });

    // Verify
    // Ensure the findById method was called, but a 'save' method (for example) was never called.
    verify(userRepository).findById(userId);
    verify(userRepository, never()).save(any(User.class)); // 'any()' is a Mockito argument matcher
}
Here, we stub the mock to simulate the "not found" case. The combination of assertThrows and verify(..., never()) gives us high confidence that our error-handling logic is working correctly.
Conclusion
In this lesson, you've learned the fundamentals of unit testing your service layer—a skill that is absolutely essential for building reliable backend applications. You now have the tools to test your core business logic in a way that is fast, isolated, and precise.
Key Takeaways:
- Isolation is Key: Unit tests for the service layer should not depend on real databases or other external systems.
- Mockito for Mocking: We use Mockito to create mock dependencies (
@Mock) and inject them into our service under test (@InjectMocks). - Arrange-Act-Assert: This pattern provides a clean and readable structure for all your tests.
- Stubbing with
when-then: You control the behavior of your mocks by stubbing their methods to return specific values or throw exceptions for a given test scenario. - Verification with
verify: You can confirm that your service correctly interacts with its dependencies by verifying which mock methods were (or were not) called.
What's Next?
We've covered the core workflow of mocking dependencies for service tests. In the next lesson, "Mock dependencies in unit tests using @Mock and @InjectMocks," we will dive deeper. We'll explore more advanced use cases, compare different injection strategies for your tests, and introduce another powerful Mockito feature: the @Spy. This will give you more nuance and control when setting up complex test scenarios.