Hello! Welcome back.
In our last lesson, we learned how to use HTTP status codes to give clients clear, immediate feedback on the outcome of their requests. A 201 Created tells us we succeeded, while a 400 Bad Request tells us the client made a mistake. However, this is only part of the story. A status code alone often isn't enough information. Why was the request bad? What is the URL of the newly created resource?
This is where the response body, or payload, comes in. Today, we'll focus on how to design consistent and predictable JSON payloads for both successful requests and error responses. A well-designed payload makes your API intuitive, robust, and much easier for client developers to work with.
1. The Principle of Consistency
Before we dive into specifics, the single most important principle in API design is consistency. If a client developer understands how one of your endpoints works, they should be able to predict how all your other endpoints will work. This applies to URI naming, HTTP methods, status codes, and especially, the structure of your JSON responses.
To get a quick overview of why consistency is so crucial and to set the stage for our discussion, please watch the first part of the following video.
8 Pragmatic REST API Design Tips (From Real Projects)
In this video, Milan Jovanović, a software architect, shares pragmatic API design tips from real-world projects. This first clip emphasizes the foundational role of consistency.
Watch from 00:49 to 01:32. Pay attention to the two main benefits of being consistent in your API design.
With this principle in mind, let's look at how to structure our success and error responses.
2. Structuring Successful Responses: The Envelope Pattern
When a request is successful, it's tempting to just return the requested data directly. For example, a GET /users/123 might return:
{
  "id": 123,
  "name": "Alex",
  "email": "alex@example.com"
}
This works, but it's not very flexible. What if you later need to add metadata, like pagination information for a list of users, or the version of the API that served the request? If you return a raw JSON object or array, adding this extra information later becomes a breaking change for your clients.
A more robust solution is the envelope pattern. This pattern involves wrapping your main data within a consistent parent object (the "envelope"). A common approach is to have a data property for the resource itself and an optional meta property for additional information.
Mastering REST API Design: Essential Best Practices for ...
This article from Medium provides a concise overview of API design best practices, including a clear example of the envelope pattern.
Read the short section titled 'Structured and Predictable Responses' under the first main heading. Note the simple but powerful structure proposed: { "data": ..., "meta": ... }.
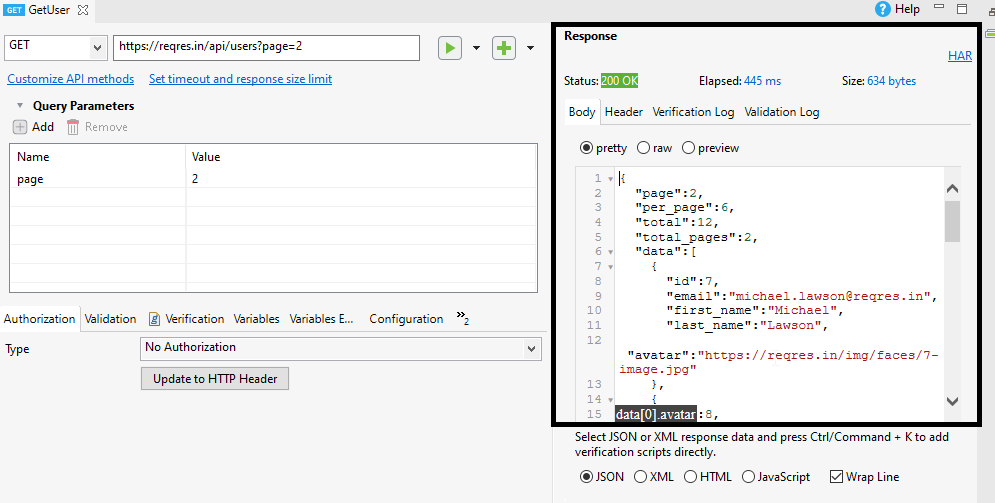
Using this pattern, our response for GET /users/ (a list of users) would look like this:
Why is this better?
The main benefit is extensibility. You can add new metadata properties (e.g., a request trace ID for debugging) to the envelope without breaking existing clients who only care about the data field.
The next video segment explains this advantage clearly.
8 Pragmatic REST API Design Tips (From Real Projects)
Let's return to Milan Jovanović's video, where he explains the benefits of wrapping collection responses in an envelope.
Watch from 05:41 to 06:44. He discusses how this pattern provides 'optionality' and allows the API to evolve easily, for example, to add pagination or hypermedia links.
3. Implementing a Custom Response Envelope in Spring Boot
Now for the practical part. How do we build these enveloped responses in our Spring Boot application? While you could manually create Map objects in every controller method, a cleaner approach is to create a reusable utility class.
The following video tutorial provides a step-by-step guide to creating a ResponseHandler class that builds a consistent, enveloped JSON response. This is a great hands-on exercise that aligns perfectly with your goal of learning practical backend technologies.
Java Spring Boot REST API JSON Response Handling Tutorial with Demonstration
This tutorial from Think Constructive demonstrates how to implement custom JSON response handling in a Spring Boot REST API.
Watch the full video, but focus on these key stages: The Goal (00:41 - 01:56): Understand the difference between a generic response and the desired custom response with data, httpStatus, and message fields. The 'Before' State (03:42 - 05:27): See the simple, non-enveloped response the API currently returns. Creating the ResponseHandler (05:42 - 10:15): This is the core of the lesson. Pay close attention to how a static responseBuilder method is created using a Map<String, Object> to construct the JSON structure. Using the ResponseHandler (10:15 - 13:30): Observe how the controller code is changed to call this new static method, wrapping the original data. The 'After' State (14:15 - 15:00): See the final result in Postman, which now matches the desired enveloped format.
This ResponseHandler approach gives you a centralized place to define your API's response structure, ensuring all your endpoints return JSON in a predictable format.
4. Structuring Error Responses
Consistent payloads are even more critical for errors. A 400 Bad Request status code tells a client that something is wrong, but a well-structured error payload tells them what is wrong so they can fix it.
A minimal error response should include a machine-readable error code and a human-readable message.
Mastering REST API Design: Essential Best Practices for ...
Let's revisit the Medium article, which also proposes a standard structure for error responses.
Read the small section titled 'Standardize Error Responses'. Notice the proposed structure with a nested error object containing a code, message, and details.
This is a good start, but we can do even better by adopting a formal standard. RFC 9457: Problem Details for HTTP APIs defines a standard JSON object for reporting errors.
A Problem Details object includes fields like:
type: A URI that identifies the specific error type (and can link to documentation).title: A short, human-readable summary of the problem.status: The HTTP status code.detail: A longer, human-readable explanation.instance: The specific resource/endpoint where the error occurred.
Responses Best Practices in REST API Design - Speakeasy
This article from Speakeasy explains the importance of detailed errors and introduces the Problem Details standard (RFC 9457).
Read the section '3. Return detailed errors'. Compare the simple { "error": ... } format to the much richer Problem Details example. You don't need to memorize the RFC, just understand the value of a standardized, detailed error format.
Adopting a standard like Problem Details makes your API highly professional and easier to integrate with, as clients can build generic error-handling logic that works across all your endpoints. In a future lesson, we'll cover how to implement this globally in Spring Boot using @ControllerAdvice.
Test your understanding!
You are designing an API for an e-commerce site. A client makes a request: GET /products?category=electronics&min_price=-10.
- This request is invalid because
min_pricecannot be negative. Design a400 Bad RequestJSON error payload using the Problem Details format. - Now, imagine the request was valid:
GET /products?category=electronics. Design a successful JSON response payload using the envelope pattern. Assume it returns two products.
Show answer
-
Error Payload (400 Bad Request):
{
  "type": "https://api.example.com/probs/invalid-parameter",
  "title": "Invalid Request Parameter",
  "status": 400,
  "detail": "The 'min_price' parameter cannot be a negative value.",
  "instance": "/products?category=electronics&min_price=-10"
}
This response is excellent. It tells the client the HTTP status, provides a human-readable message, a stable
typefor programmatic handling, and shows the exact request that caused the error. -
Success Payload (200 OK):
{
  "data": [
    {
      "id": 54,
      "name": "Super-Fast Laptop",
      "price": 1299.99,
      "category": "electronics"
    },
    {
      "id": 82,
      "name": "Wireless Headphones",
      "price": 199.50,
      "category": "electronics"
    }
  ],
  "meta": {
    "apiVersion": "1.0",
    "timestamp": "2023-10-27T10:00:00Z"
  }
}
This response cleanly separates the product data from the metadata, making it easy for the client to parse and easy for you to extend later.
Conclusion
You've now learned one of the most important practical skills in API design. A beautiful API isn't just about clean URLs and correct status codes; it's about providing data and feedback in a way that feels predictable and helpful to the consumer.
Key Takeaways:
- Consistency is paramount: Design your payloads so that clients can predict their structure across all endpoints.
- Use the Envelope Pattern for success: Wrap your main data in an object (e.g., in a
datafield) to allow for non-breaking addition of metadata in the future. - Use a Structured Format for errors: Provide machine-readable error details. The Problem Details (RFC 9457) standard is a professional best practice.
- In Spring Boot, you can create a reusable
ResponseHandlerclass to enforce your consistent payload structure.
What's Next?
Our API design is becoming quite robust! We have clear resource names, correct HTTP methods, meaningful status codes, and now, well-structured payloads. But what happens when we need to change things? How do we add a new field to our product response without breaking the mobile app that's already using it?
In the next lesson, we will tackle this exact problem by exploring strategies for versioning your REST API, a crucial practice for managing the evolution of your backend services over time.