Hello! Welcome back to the Capstone Project.
In our last lesson, we architected our Micro-Blog API, creating a clean project skeleton based on the service and repository patterns. We now have a solid foundation. Today, we're building the security infrastructure on top of it.
This lesson focuses on one of the most critical aspects of any web application: implementing user registration, JWT-based login, and role-based access control (RBAC). By the end, you'll have a complete authentication and authorization system, enabling users to sign up, log in, and access protected resources based on their roles.
Coming from Django, you're familiar with its powerful, built-in authentication system. Here, we'll build a similar system from scratch, giving you a deeper understanding of the mechanics and more granular control, all while leveraging FastAPI's modern features.
Let's start with a high-level overview of the flow we're about to build.
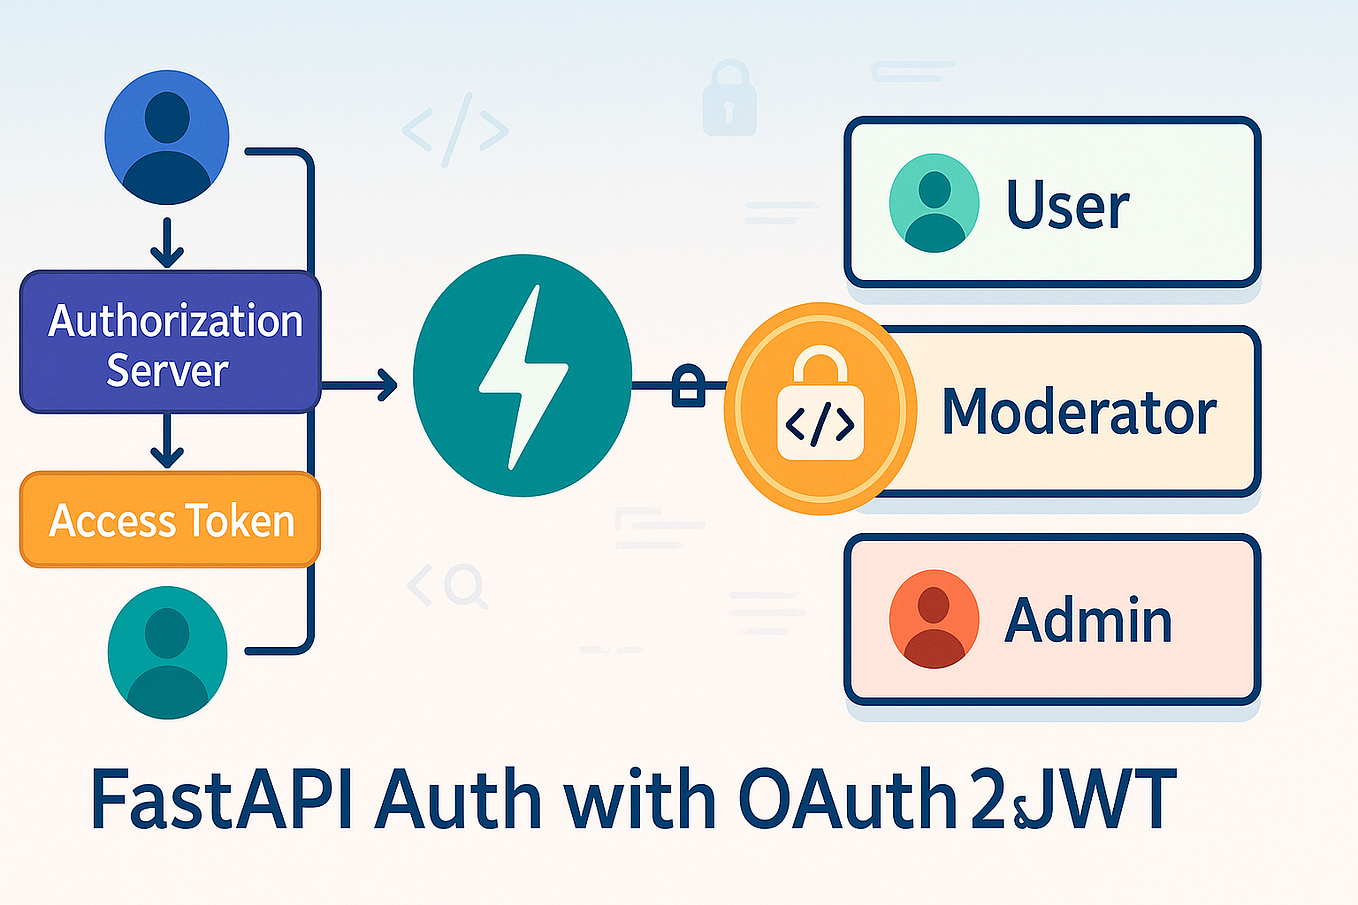
1. User Registration and Password Security
The first step is allowing users to create an account. A non-negotiable rule of web security is to never store passwords in plain text. We'll use a strong, one-way hashing algorithm to protect user credentials.
In Django, this is handled by functions like make_password and check_password. In the Python ecosystem, the go-to library for this is passlib. We'll use it with Argon2, the current best-practice algorithm for password hashing.
First, let's install the necessary packages. In your terminal, run:
uv pip install "passlib[argon2]" "python-jose[cryptography]" pydantic-settings
passlib[argon2]: For password hashing and verification.python-jose: For creating and verifying JSON Web Tokens (JWTs).pydantic-settings: A robust way to manage application configuration and secrets, which we'll need for our JWT secret key.
Now, let's create the utility functions for our authentication logic. We'll create a new file app/core/security.py to house them.
app/core/security.py
from datetime import datetime, timedelta, timezone
from passlib.context import CryptContext
from jose import JWTError, jwt


# We'll get these from a config file shortly
SECRET_KEY = "your-super-secret-key-that-is-long-and-random" # Replace with a real secret key!
ALGORITHM = "HS256"
ACCESS_TOKEN_EXPIRE_MINUTES = 30


# 1. Password Hashing Context
pwd_context = CryptContext(schemes=["argon2"], deprecated="auto")

def verify_password(plain_password: str, hashed_password: str) -> bool:
    return pwd_context.verify(plain_password, hashed_password)

def get_password_hash(password: str) -> str:
    return pwd_context.hash(password)


# 2. JWT Creation and Decoding
def create_access_token(data: dict, expires_delta: timedelta | None = None):
    to_encode = data.copy()
    if expires_delta:
        expire = datetime.now(timezone.utc) + expires_delta
    else:
        expire = datetime.now(timezone.utc) + timedelta(minutes=15)
    to_encode.update({"exp": expire})
    encoded_jwt = jwt.encode(to_encode, SECRET_KEY, algorithm=ALGORITHM)
    return encoded_jwt

def decode_access_token(token: str):
    try:
        payload = jwt.decode(token, SECRET_KEY, algorithms=[ALGORITHM])
        return payload
    except JWTError:
        return None
This file establishes our two core security functions: one for password management and one for JWT management.
The following video provides a great hands-on walkthrough of setting up these utilities. While the video places them in a single auth.py file, we've organized them into app/core/security.py and will soon create an AuthService.
Python FastAPI Tutorial (Part 10): Authentication - Registration and Login with JWT
The video 'Python FastAPI Tutorial (Part 10): Authentication' by Corey Schafer is an excellent resource. We'll watch a segment that covers password hashing and setting up JWT utilities.
Watch from 19:13 to 26:24. This section explains how to create utility functions for hashing passwords with pwdlib and for creating and verifying access tokens. Pay attention to how he sets up the pwd_context and the token helper functions.
Now, let's integrate password hashing into the UserService we designed in the last lesson.
app/services/user_service.py (Updated)
from fastapi import HTTPException, status
from app.repositories.user_repository import UserRepository
from app.schemas.user import UserCreate
from app.models.user import User


# Import our new security utility
from app.core.security import get_password_hash

class UserService:
    def __init__(self, user_repo: UserRepository):
        self.user_repo = user_repo

    async def create_new_user(self, user_data: UserCreate) -> User:
        db_user_by_email = await self.user_repo.get_user_by_email(email=user_data.email)
        if db_user_by_email:
            raise HTTPException(
                status_code=status.HTTP_400_BAD_REQUEST,
                detail="Email already registered",
            )

        db_user_by_username = await self.user_repo.get_user_by_username(username=user_data.username)
        if db_user_by_username:
            raise HTTPException(
                status_code=status.HTTP_400_BAD_REQUEST,
                detail="Username already taken",
            )


        # Hash the password before creating the user data object
        hashed_password = get_password_hash(user_data.password)


        # Create a new dictionary for user creation data
        user_in_db = {
            "username": user_data.username,
            "email": user_data.email,
            "hashed_password": hashed_password,
        }

        return await self.user_repo.create_user(user_data=user_in_db)
Notice the only major change: we now call get_password_hash before passing the data to the repository. The repository layer remains clean; it doesn't know or care about hashing. This is a perfect example of separation of concerns.
2. JWT Login and Authentication Service
With user registration in place, the next step is login. The standard flow for token-based authentication is:
- The client sends a
POSTrequest with the user's credentials (username/password) to a/tokenendpoint. - The server validates the credentials.
- If valid, the server generates a JWT and sends it back to the client.
FastAPI provides a dependency, OAuth2PasswordRequestForm, which makes handling the incoming login form data trivial. This is analogous to how DRF's TokenObtainPairView handles the login request.
To encapsulate the logic, let's create a new AuthService.
app/services/auth_service.py
from fastapi import Depends, HTTPException, status
from fastapi.security import OAuth2PasswordRequestForm

from app.repositories.user_repository import UserRepository
from app.core.security import verify_password, create_access_token

class AuthService:
    def __init__(self, user_repo: UserRepository):
        self.user_repo = user_repo

    async def login_for_access_token(self, form_data: OAuth2PasswordRequestForm = Depends()):


        # In OAuth2, the 'username' field is used for the identifier. We'll use email.
        user = await self.user_repo.get_user_by_email(email=form_data.username)

        if not user or not verify_password(form_data.password, user.hashed_password):
            raise HTTPException(
                status_code=status.HTTP_401_UNAUTHORIZED,
                detail="Incorrect email or password",
                headers={"WWW-Authenticate": "Bearer"},
            )

        access_token = create_access_token(
            data={"sub": user.email, "role": user.role} # We'll add 'role' soon
        )

        return {"access_token": access_token, "token_type": "bearer"}
This service depends on the UserRepository to find the user and uses our security utilities to verify the password and create a token.
Now, let's create the router for this.
app/routers/auth_router.py
from fastapi import APIRouter, Depends
from app.services.auth_service import AuthService
from app.dependencies import get_auth_service # We will create this dependency

router = APIRouter(prefix="/auth", tags=["Authentication"])

@router.post("/token")
async def login_for_access_token(
    auth_service: AuthService = Depends(get_auth_service)
):
    return await auth_service.login_for_access_token()
The article "Structuring FastAPI Project Using 3-Tier Design Pattern" provides another excellent example of implementing this logic within a service layer, reinforcing the pattern we are using.
Structuring FastAPI Project Using 3-Tier Design Pattern | Medium
Let's read a section of this article to see another example of implementing the authentication logic within a service class.
Read the section 'Generating token'. Notice how the authenticate method within the AuthService class is responsible for fetching the user, verifying the password, and creating the token. This cleanly separates the logic from the router.
3. Protecting Routes and Role-Based Access Control (RBAC)
Now that we can issue tokens, we need to protect our endpoints so that only authenticated (and authorized) users can access them.
Authentication: Who are you?
In FastAPI, this is achieved with a dependency that validates the token from the Authorization header. This dependency will:
- Use
OAuth2PasswordBearerto extract the token. - Decode the token using our
decode_access_tokenutility. - Fetch the user from the database based on the token's payload (
subclaim). - Return the user object, making it available to the endpoint.
This single dependency, which we'll call get_current_user, acts like a combination of Django's AuthenticationMiddleware (which populates request.user) and DRF's IsAuthenticated permission class.
The next video walks through creating this exact dependency.
Python FastAPI Tutorial (Part 11): Authorization - Protecting Routes and Verifying Current User
In Part 11 of his series, Corey Schafer builds a reusable get_current_user dependency. This is the cornerstone of protecting routes in FastAPI.
Watch from 01:50 to 07:08. Pay close attention to how he combines OAuth2PasswordBearer, the token verification logic, and a database query into a single, powerful dependency.
Let's implement this in our app/dependencies.py file.
app/dependencies.py (extended)
# ... other imports
from fastapi import Depends, HTTPException, status
from fastapi.security import OAuth2PasswordBearer
from sqlalchemy.ext.asyncio import AsyncSession

from app.core.security import decode_access_token
from app.repositories.user_repository import UserRepository
from app.services.auth_service import AuthService
from app.models.user import User


# OAuth2 scheme
oauth2_scheme = OAuth2PasswordBearer(tokenUrl="/auth/token")


# ... other dependency functions like get_db, get_user_repository, etc.

def get_auth_service(user_repo: UserRepository = Depends(get_user_repository)) -> AuthService:
    return AuthService(user_repo)

async def get_current_user(
    token: str = Depends(oauth2_scheme),
    user_repo: UserRepository = Depends(get_user_repository)
) -> User:
    credentials_exception = HTTPException(
        status_code=status.HTTP_401_UNAUTHORIZED,
        detail="Could not validate credentials",
        headers={"WWW-Authenticate": "Bearer"},
    )
    payload = decode_access_token(token)
    if payload is None:
        raise credentials_exception

    email: str = payload.get("sub")
    if email is None:
        raise credentials_exception

    user = await user_repo.get_user_by_email(email=email)
    if user is None:
        raise credentials_exception

    return user
To use it, you simply add it as a dependency to any endpoint you want to protect:
from app.models.user import User

@router.get("/users/me")
async def read_users_me(current_user: User = Depends(get_current_user)):
    return current_user
Any request to /users/me without a valid Bearer token will now automatically receive a 401 Unauthorized response.
Authorization: What are you allowed to do?
Role-based access control is about checking permissions. Let's add a role to our User model. We'll use a simple string field, but in a real application, an Enum is a better choice.
First, update your User model in app/models/user.py:
class User(Base):


    # ... other columns
    role = Column(String, nullable=False, server_default="user") # 'user' or 'admin'
(Remember to run an Alembic migration to apply this change to your database!)
Now, let's create a dependency that requires a user to be an admin. This is analogous to a custom Django permission class like IsAdminUser.
app/dependencies.py (extended)
# ...

async def require_admin(current_user: User = Depends(get_current_user)) -> User:
    if current_user.role != "admin":
        raise HTTPException(
            status_code=status.HTTP_403_FORBIDDEN,
            detail="The user does not have administrative privileges",
        )
    return current_user
This new dependency, require_admin, is beautifully simple. It chains dependencies: it first runs get_current_user to ensure the user is authenticated, and then it performs its own check on the user's role.
You can now protect an admin-only endpoint like this:
@router.get("/admin/dashboard")
async def get_admin_dashboard(admin_user: User = Depends(require_admin)):
    return {"message": f"Welcome to the admin dashboard, {admin_user.username}!"}
Conclusion
Congratulations! You have successfully implemented a complete, modern authentication and authorization system in your FastAPI project. You've built it from the ground up within the service-oriented architecture we established, giving you full control and a deep understanding of the mechanics.
Key Takeaways:
- Password Hashing:
passlibis used to securely hash and verify passwords, a crucial first step in user security. - JWT for Stateless Auth: We use JWTs for stateless authentication, creating tokens upon successful login at a
/tokenendpoint that leveragesOAuth2PasswordRequestForm. - Service Layer for Logic: All authentication logic (credential verification, token creation) is encapsulated within an
AuthService, keeping your routers thin and clean. get_current_userDependency: This is the cornerstone of route protection, ensuring a user is authenticated by validating their JWT.- RBAC with Chained Dependencies: We implemented role-based access control by creating a simple
require_admindependency that builds uponget_current_user, demonstrating the power of FastAPI's dependency injection system.
Preview of the Next Lesson:
With a robust authentication and authorization system in place, we're ready to build the core functionality of our Micro-Blog API. In the next lesson, we will implement all the CRUD endpoints for the "Post" resource. We will protect these endpoints using the dependencies we created today, ensuring, for example, that only an authenticated user can create a post and only the original author can update or delete it.