Welcome to the first lesson in our module on building a body of work with intent. In our last session, you did the foundational work of creating a "Project Scope Document." This document is your project's constitution, defining its theme, boundaries, and visual signature. Now, we will build directly on that blueprint to answer the practical question: "What do I actually go out and photograph?"
This lesson is dedicated to developing a shooting plan that is aligned with your project concept. For an artistic project, a shooting plan is not a rigid set of instructions but a guide for intentional creation. It's the crucial link between your abstract ideas and the concrete images you will make. Your background in fine arts and design has prepared you to think systematically about translating a concept into a tangible form; we'll apply that same thinking to planning your photography sessions.
Why Plan When You Can Discover?
A common concern in artistic photography is that planning can stifle the serendipity and discovery that often lead to the most powerful images. However, a good plan doesn't prevent discovery; it enables it. By setting a clear direction, you free up your mental energy on location to observe more deeply and react more creatively to unexpected opportunities.
Let's begin with a video from photographer and educator Adam Marelli. He tells two powerful stories: one about a project that failed due to a lack of a clear plan, and another that succeeded because it was built on a structured framework.
Developing Your Photo Projects | Adam Marelli
This excerpt from "Developing Your Photo Projects" makes a compelling case for intentionality and planning.
Please watch these two segments: First, watch the story of the Vanuatu project. Notice how a vague brief and the lack of a personal guiding question led to a collection of pictures that missed the project's most profound moment. Then, watch the introduction to his Japan project, where he took a completely different approach, starting with specific questions and a clear framework before he even began shooting.
Marelli's experience highlights a key principle: a project begins with an idea that's "too big to fit into a single photograph." Your shooting plan is the strategy you devise to capture the many facets of that big idea.
From Emotion to a Visual Metaphor
Your Project Scope Document defined your theme and visual approach. The first step in building a shooting plan is to translate that theme's core emotion into tangible, photographable ideas. Conceptual photography isn't about finding interesting scenes; it's about building images from an idea outwards.
The following article from Fstoppers provides an excellent, step-by-step guide for this translation process.
Building a Photograph From an Idea, Not a Scene - Fstoppers
This article breaks down how to build a photograph from an abstract concept, which is the heart of creating a meaningful shooting plan.
Please read the following sections: Start with the introduction to understand the mindset: conceptual photographers start with a question. Read Step One: Start with Emotion. This connects directly to the mood and feeling you've already considered for your project. Continue with Step Two: Translate Emotion Into a Metaphor. This is the crucial step of turning abstract feelings into concrete symbols, objects, and environments you can photograph.
As the article suggests, the process starts with the feeling you want to evoke (e.g., isolation, nostalgia, tension) and then brainstorms the visual language—the metaphors, symbols, and objects—that can communicate that feeling. A project about "the fragility of memory" might lead you to photograph wilting flowers, cracked glass, or out-of-focus portraits. These are the beginnings of your shot ideas.
Creating a Flexible "Shot List"
Once you have brainstormed these visual metaphors, you can begin to structure them into a "shot list." For an artistic project, this is less a rigid checklist and more a menu of possibilities. It’s your guide on location, reminding you of the story you want to tell while leaving room for improvisation.
Joris Hermans' video on creating a photo series offers a very practical take on what this kind of shot list looks like and how to use it.
How to create an AWARD-WINNING PHOTO SERIES | Tell A Story With Photography
In "How to create an AWARD-WINNING PHOTO SERIES," Hermans explains the purpose and creation of a shot list for a personal project.
Watch the section on creating a shot list. Pay close attention to his description of the list's level of detail—it's more than "a portrait," it's "close-up of a man's beard." Also, note his insight that about half the images come from the list, and the other half are discovered on location.
This approach provides the perfect balance. The shot list ensures you capture the core components of your narrative, while the freedom to explore allows you to capture the unexpected moments that bring a project to life.
Organizing Your Plan
With your background in graphic design, you'll appreciate the value of organizing your ideas visually. A simple document can work, but a visual planning board allows you to group ideas, add inspirational images, and see the structure of your plan at a glance.
The Fstoppers article mentioned Milanote, a popular tool for this purpose. The image below shows a generic photoshoot plan created in such a tool.
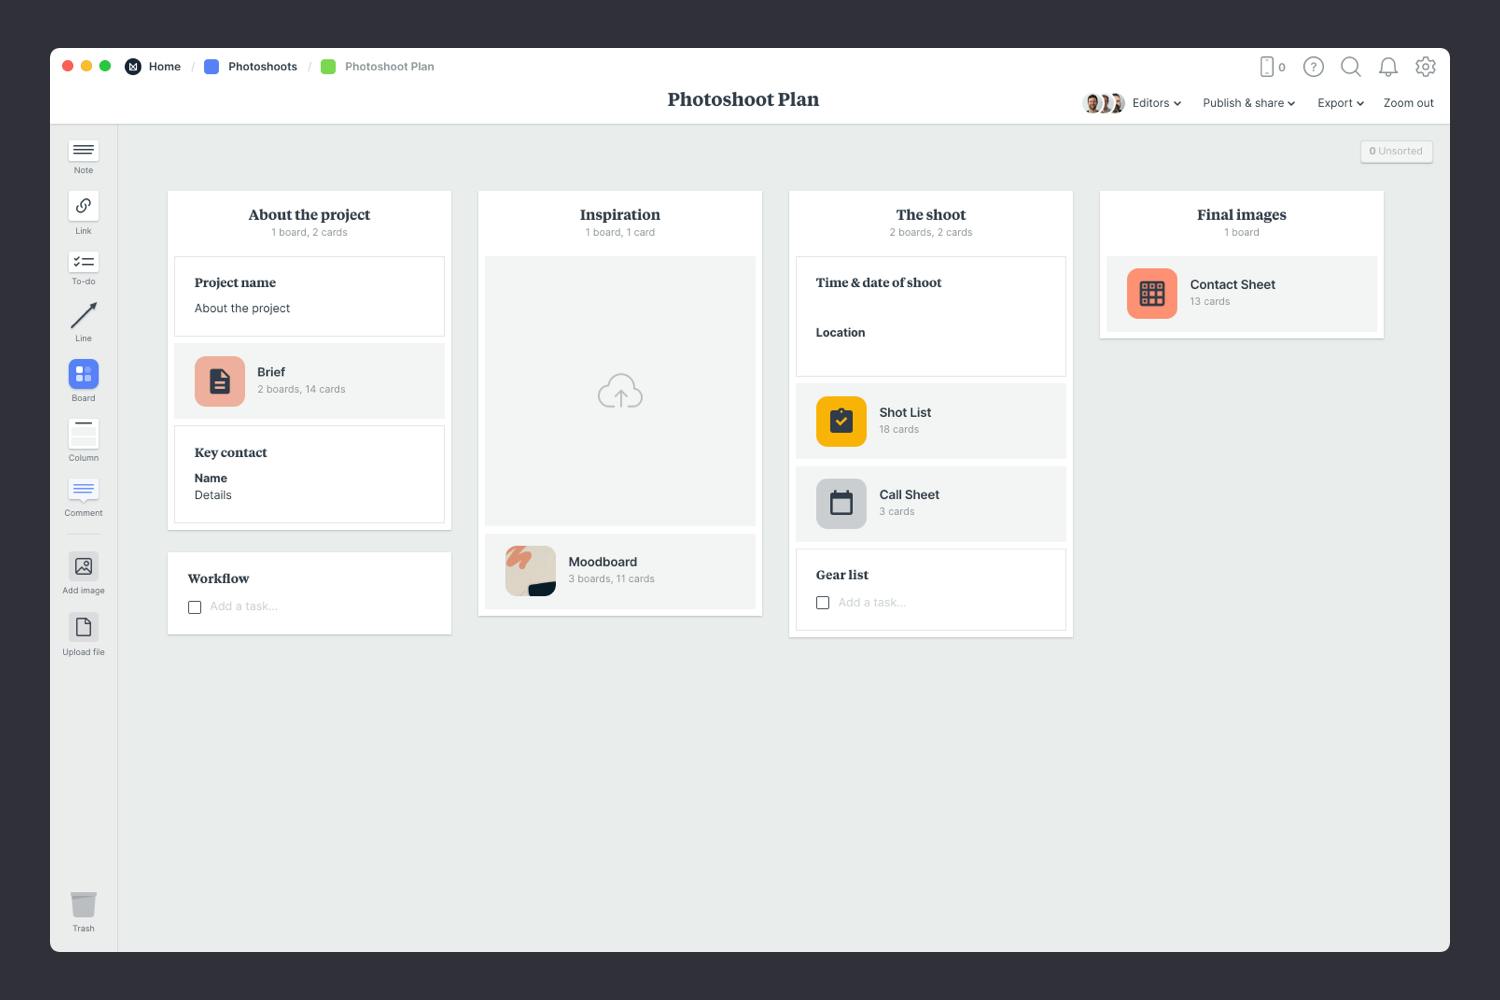
This method of organization allows you to create columns or sections for:
- Core Concept: Your artist statement and keywords.
- Inspiration: Images from your mood board or other visual references.
- Shot List: Cards for each specific shot idea, which you can move and rearrange.
- Logistics: Notes on locations, potential models, props, and ideal time of day for certain shots.
Your Turn: Develop Your Shooting Plan
Now it's time to create the shooting plan for your photo book project. This task will synthesize the concepts from this lesson and build directly upon your Project Scope Document. Create a new document or a visual board and structure it with the following components.
1. Emotional Core & Visual Metaphors (The "Why")
- Start by re-stating the core theme and emotion of your project.
- Brainstorm a list of at least 10-15 words, symbols, objects, or types of environments that you feel represent this core emotion, as described in the Fstoppers article. This is your raw material.
2. The Shot List (The "What")
- From your brainstormed list, create a "shot list" with 10 to 15 specific and descriptive shot ideas.
- Follow the model from Joris Hermans' video. Instead of "a landscape," write "A wide, empty landscape with a single dead tree, shot on an overcast day." Instead of "a portrait," write "A portrait of a subject looking away from the camera, with their face partially obscured by shadow."
- Remember, these are starting points, not final commands.
3. Logistics & Pre-visualization (The "How, Where, and When")
- For each shot idea (or for groups of related ideas), add notes on the practical details.
- Location: Where could you capture this shot? Be specific if possible (e.g., "the old industrial park on the east side of town"), or describe the type of location ("a cluttered antique shop").
- Light: What kind of light does this shot need? Refer back to the choices you made in your Project Scope Document (e.g., "harsh midday sun," "soft twilight," "artificial light from a single window").
- Props/Subjects: What objects, people, or specific elements are needed in the frame?
Organize this information in a way that is clear and useful to you. A visual board is highly recommended, but a well-structured document is also perfectly effective.
Conclusion
You have now translated your project's high-level concept into an actionable plan. This shooting plan gives you intent and direction, ensuring that when you pick up your camera, you are not just making pictures, but actively building a cohesive body of work. It is your roadmap for the creative journey ahead—one that provides structure but leaves plenty of room for discovery along the way.
In our next lesson, we will focus on the "in the field" process. Armed with your plan, you'll learn how to apply intentional shooting strategies to ensure that every image you create serves your project's larger narrative.