Introduction
In our last lesson, you made a crucial decision, selecting the binding method for your first prototype and outlining the tools and materials needed. You now have a complete digital blueprint for your photo book, from the curated sequence of images to the design of its cover and the plan for its physical construction. Today, we bring that blueprint to life. This lesson is a hands-on workshop where you will produce the physical book dummy, the first tangible version of your project.
The objective is to create a functional prototype, or maquette, that you can hold, navigate, and evaluate. For this first iteration, we prioritize function over finish. Think of it not as a final, precious object, but as a three-dimensional sketch—a critical tool for analysis. This process directly connects your expertise in graphic design with the principles of form and materiality you've worked with in sculpture, transforming a sequence of flat images into a physical, experiential object.
The Value of the Physical Dummy
Before you pick up a knife or ruler, it's worth revisiting why this step is so vital. A digital layout, no matter how precise, cannot replicate the tactile and spatial experience of a physical book. The weight of the paper, the sound of a page turning, the way a spread sits open in your hands—these are all fundamental aspects of the reader's experience that can only be assessed with a physical object.
The article "How To Make A Photo Book Dummy" by Wesley Verhoeve offers an excellent perspective on this. He distinguishes between high-end, professionally made dummies and the more accessible, DIY approach we are taking, emphasizing the value of a hands-on prototype for experimentation.
145 How To Make A Photo Book Dummy (+ a title reveal!)
This article clearly explains the purpose of a book dummy and demonstrates a practical, hands-on approach to creating one.
Read the introduction and the sections "Creating a Dummy" and "DIY approach". Pay close attention to the rationale for using inexpensive test prints and the freedom this method provides for experimentation. Also, read the final section, "Edit and Revise," which highlights why a tangible object is superior to a digital file for making key creative decisions.
Step 1: Preparing Your Components (Approx. 10 minutes)
With the purpose of the dummy clear, let's gather and prepare the necessary parts.
1. Printing Your Pages
The first step is to get your images onto paper. Remember, these are "work prints" for a prototype. They do not need to be on expensive, archival paper. The goal is to have a good-enough representation of the images to judge sequence and flow.
The video "How to Sequence Photos for a Photobook" reinforces this practical mindset.
How to Sequence Photos for a Photobook
In this video, photographer Aaron Hardin discusses the importance of working with physical prints.
Watch the section from 00:54 to 02:56. The key takeaway here is the recommendation to print your photos cheaply. Using an office inkjet printer or a local drug store's photo service is perfectly acceptable for this stage. This frees you to cut, tape, and handle the prints without hesitation.
Based on your design and chosen binding method:
- For folded bindings (saddle/pamphlet stitch): Print your pages as spreads (e.g., page 48 next to page 1, page 47 next to page 2, etc.) so they can be folded and nested. Your graphic design background should make this imposition process straightforward.
- For single-sheet bindings (screw post, stab, concertina): Print each page individually. You can print two images per sheet of paper and cut them down to size.
2. Gathering Your Tools
Now, assemble the tools and materials you listed in the previous lesson's exercise. A typical setup for DIY bookmaking will look something like this:
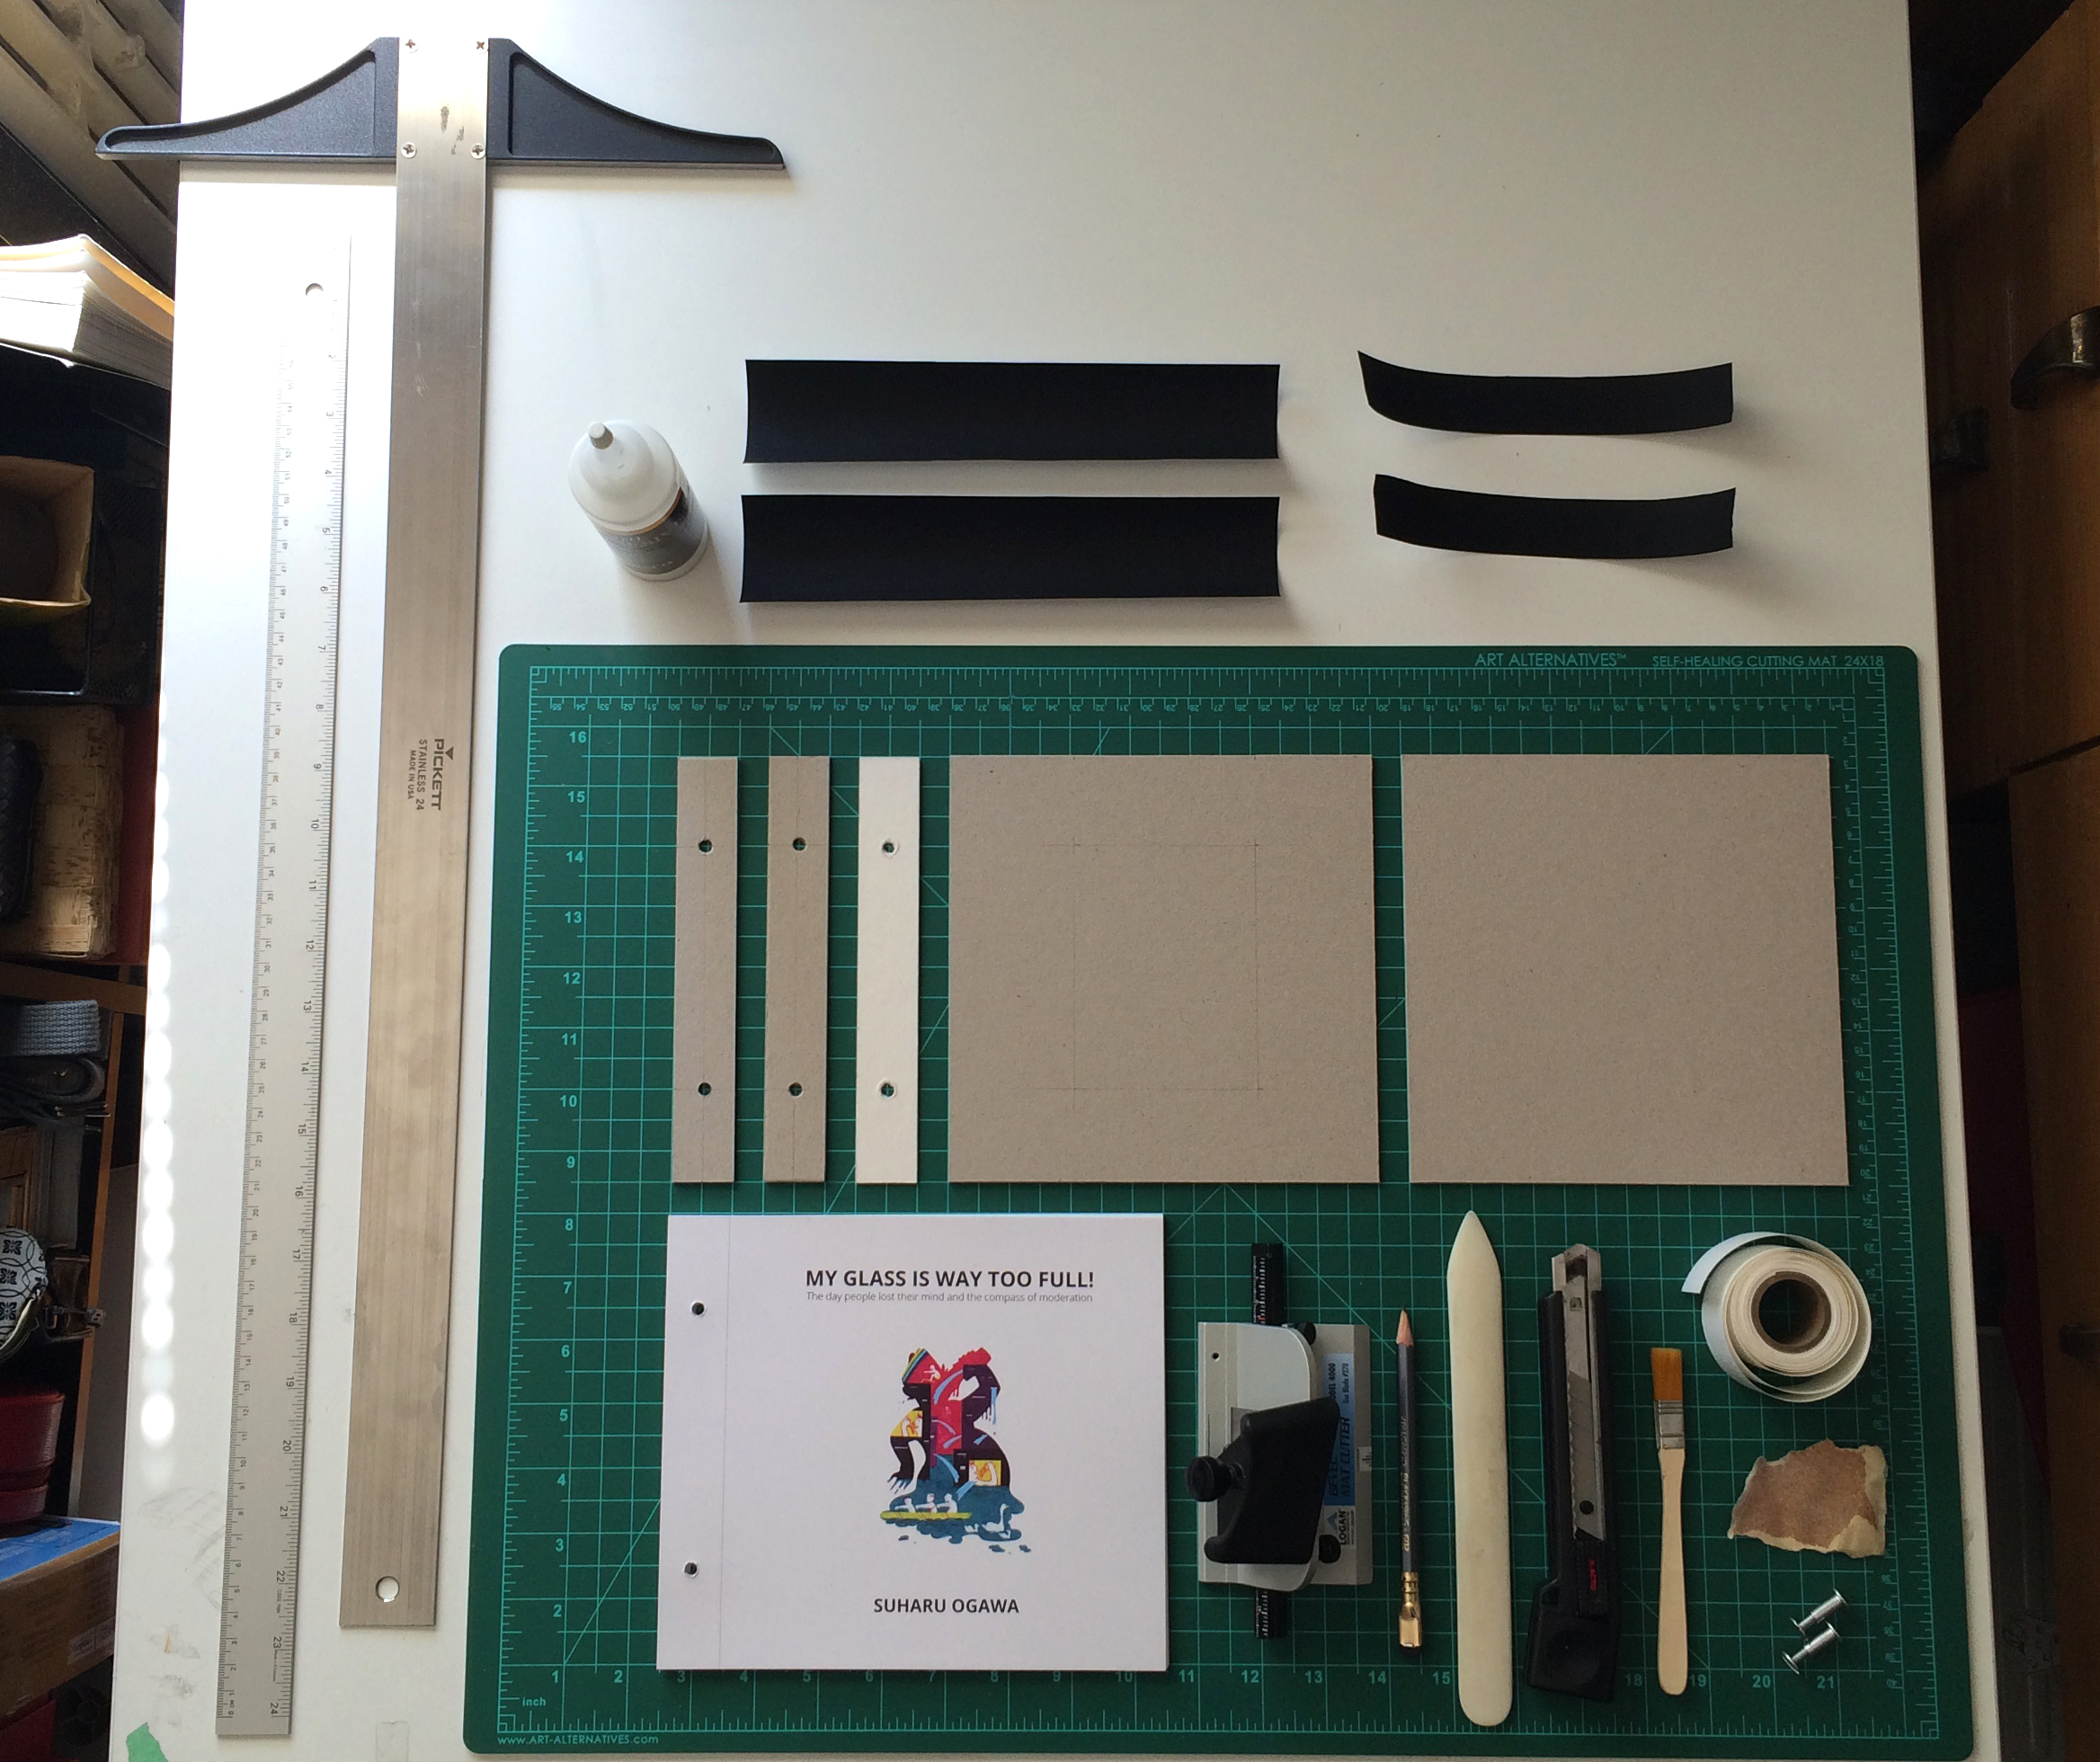
Your core toolkit should include:
- A self-healing cutting mat
- A sharp craft knife or X-Acto blade
- A heavy metal ruler for guiding cuts
- A bone folder for sharp, clean creases
- The specific materials for your chosen binding (e.g., thread and awl for a pamphlet stitch; screw posts; or tape for a concertina).
Step 2: Assembling the Book Dummy (Approx. 40 minutes)
This is your main workshop activity. The following video provides a start-to-finish demonstration of one specific DIY method—the lay-flat concertina binding. While your chosen method might differ, the principles of precise cutting, folding, and assembly are universal. Watch the video to see a complete process in action, then adapt the steps to your own project.
From Instagram to Print: Why Every Photographer Should Make a Handmade Photo Book
This video, "From Instagram to Print," offers a complete walkthrough of making a handmade photo book, from the basic tools to the final assembly.
This video is a comprehensive guide. We will break it down into key stages. Tools and Preparation: Watch the overview of the tools and printing process. This will confirm the setup you've prepared. Assembling the Book Block: The core of this video demonstrates a clever concertina method. Watch from 08:59 to 11:00 to see how individual folded sheets are taped together to form a block. Then, see how this concertina is transformed into a lay-flat book by taping the alternate pages from 12:44 to 15:01. Even if you're using a different binding, notice the emphasis on careful alignment. Making the Covers: The segment from 16:17 to 24:14 is a fantastic tutorial on making simple, professional-looking hardcovers. It covers cutting the board, wrapping it in paper, and attaching it to the book block. This technique is applicable to almost any binding style.
Your Assembly Workflow
Now, it's time to build your dummy. The article "How to Create a DIY Photobook" provides a useful, text-based checklist for the overall process.
How to Create a DIY Photobook: Step-by-Step Guide for 2026
This guide from Ex Why Zed printing offers a structured workflow for creating a DIY photobook.
Review the main steps listed under the heading "What’s the Step-by-Step Process". Use this as a mental checklist as you work: Plan -> Assemble Pages -> Construct Spine -> Make Covers -> Attach. Then, quickly read the section on "Final Finishing Touches" for tips on inspection and pressing.
Follow these general steps, adapting them to your specific binding method:
- Cut and Trim: Using your metal ruler and sharp blade, carefully cut your printed pages to their final size. Precision here will pay off in the final assembly.
- Fold and Crease (if applicable): If your binding uses folded signatures, fold each sheet carefully. Use a bone folder to create a sharp, defined crease down the spine.
- Assemble the Book Block:
- For sewn bindings, nest your folded signatures in the correct order.
- For single-sheet bindings, stack your pages neatly and clamp them.
- For other methods like the concertina, follow the specific assembly instructions.
- Bind the Pages: Execute the binding method you selected in the previous lesson (e.g., stitch the spine, insert the screw posts, or weave the thread for a stab binding).
- Construct and Attach the Covers: If your design includes separate hardcovers, follow the process shown in the "From Instagram to Print" video to create and attach them to your book block.
- Final Trim (optional): For some binding types, a final trim on a guillotine cutter can create perfectly flush edges. For a first dummy, this is not essential, but it's an option if you have access to the equipment.
Take your time and work methodically. The physical act of making is part of the creative process; you may notice things about your project's scale or pacing simply by handling the materials.

Conclusion
Congratulations. You have now translated your project from a collection of digital files and ideas into a physical object. You are holding the first version of your photo book. This is a significant milestone in the creative process.
Key Takeaways:
- The book dummy is a physical thinking tool, a maquette for evaluation and refinement.
- The process of making—of cutting, folding, and binding—is an integral part of understanding your project as a three-dimensional object.
- Perfection is not the goal of this first dummy; its value lies in its ability to reveal strengths and weaknesses in your sequence, pacing, and design that were invisible on a screen.
Now, the most important step: put the dummy aside. Place it on a shelf or coffee table and don't scrutinize it for at least a day. As Wesley Verhoeve's article suggested, "let the dummy float around your house and take it in for a little while." This period of rest allows you to approach it later with fresh eyes.
In our next lesson, we will do just that. You will critically analyze your book dummy, evaluating its flow, rhythm, and physical presence to identify what works and what needs revision.