Introduction
In the last two lessons, you installed the necessary Swagger packages, defined the core metadata for your API in the info and servers objects, and even created a reusable schema for your data model. You have all the configuration pieces ready.
This lesson is about putting those pieces together and making your documentation live. We will focus on the final step: telling your Express application to take the Swagger configuration you've built and serve it as an interactive web page. This directly addresses the learning outcome of serving documentation at the /api-docs endpoint. By the end of this brief but critical lesson, you will be able to access your API's documentation in your browser.
The Two Key Players: swagger-jsdoc and swagger-ui-express
You've already installed these two packages, but let's quickly clarify their distinct roles in this final step:
-
swagger-jsdoc: Its job is to read yourswaggerOptionsconfiguration object and scan your code files (e.g., in./src/routes/*.js) for special JSDoc comments (/** @swagger ... */). It then combines all this information into a single, large JSON object that conforms to the OpenAPI specification. We'll call this theswaggerSpec. -
swagger-ui-express: This package takes theswaggerSpecJSON object generated byswagger-jsdocand renders it as a beautiful, interactive HTML interface. It provides the Express middleware necessary to host this interface.
Implementing the Documentation Endpoint
To serve the documentation, we need to add a few lines to your main server file (e.g., app.js or src/server.js). This involves generating the specification and then creating a new route to serve the UI.
The following video provides a clear, step-by-step walkthrough of this exact process.
NodeJS Swagger API Documentation Tutorial Using Swagger JSDoc
Watch this section from Maksim Ivanov's tutorial. It perfectly demonstrates how to require the necessary packages, generate the specification from your options, and use app.use() to serve the documentation UI.
Watch from 09:47 to 12:27. Pay close attention to these three key actions: Requiring swagger-ui-express and swagger-jsdoc. Calling swaggerJSDoc(options) to create the specification. Using app.use('/api-docs', ...) to set up the endpoint.
Your Turn: Add the Code
Based on the video and the summary below, let's add the necessary code to your project.
-
Locate your main server file (e.g.,
app.jsorsrc/server.js). This is the file where you create your Express app (const app = express();). -
Add the necessary
requirestatements at the top with your other imports:const swaggerUi = require('swagger-ui-express'); const swaggerJSDoc = require('swagger-jsdoc'); -
Generate the
swaggerSpec. Immediately after yourswaggerOptionsobject, add this line to generate the full specification:const swaggerSpec = swaggerJSDoc(swaggerOptions); -
Set up the middleware. This is the most important part. You must place this code before your API routes (e.g.,
app.use('/api/items', itemRoutes);) to ensure the documentation endpoint is registered correctly.// Serve Swagger documentation app.use('/api-docs', swaggerUi.serve, swaggerUi.setup(swaggerSpec));Let's break down this line:
app.use('/api-docs', ...): This tells Express that any request to the/api-docspath should be handled by the middleware that follows.swaggerUi.serve: This is the first piece of middleware. It provides all the static assets (HTML, CSS, JS) needed for the Swagger UI page.swaggerUi.setup(swaggerSpec): This second piece of middleware takes your generatedswaggerSpecand uses it to create the HTML for the documentation page.
Putting it all together, the relevant part of your server file should now look something like this:
// src/server.js or app.js

const express = require('express');
const dotenv = require('dotenv');
const swaggerUi = require('swagger-ui-express'); // Added
const swaggerJSDoc = require('swagger-jsdoc');   // Added

// ... other imports like your database connection and routes

dotenv.config();
const app = express();

app.use(express.json());

// --- Swagger Configuration ---
const swaggerOptions = {
  definition: {
    openapi: '3.0.0',
    info: {
      title: process.env.API_TITLE,
      version: process.env.API_VERSION,
      description: process.env.API_DESCRIPTION,
    },
    servers: [
      {
        url: `http://localhost:${process.env.PORT}`,
        description: 'Development server',
      },
      // Add production server later
    ],
    components: {
        schemas: {
            // Your schema from the previous lesson
        }
    }
  },
  apis: ['./src/routes/*.js'],
};

// Generate Swagger Spec
const swaggerSpec = swaggerJSDoc(swaggerOptions); // Added

// --- Middleware ---
// Serve Swagger Docs - MUST BE BEFORE YOUR API ROUTES
app.use('/api-docs', swaggerUi.serve, swaggerUi.setup(swaggerSpec)); // Added

// --- API Routes ---
// app.use('/api/v1/items', yourItemRoutes);

// ... 404 handler, global error handler, and app.listen()
For an alternative perspective and a clean code structure example, you can also refer to the "Quick Setup" section of the OneUptime blog post (How to Create Swagger Documentation for Node.js APIs). It reinforces the same pattern of generating the spec and using app.use to serve it.
Verification
You're all set. Let's see the result.
- Restart your development server (
npm run dev). - Open your web browser and navigate to
http://localhost:<YOUR_PORT>/api-docs. For example:http://localhost:5001/api-docs.
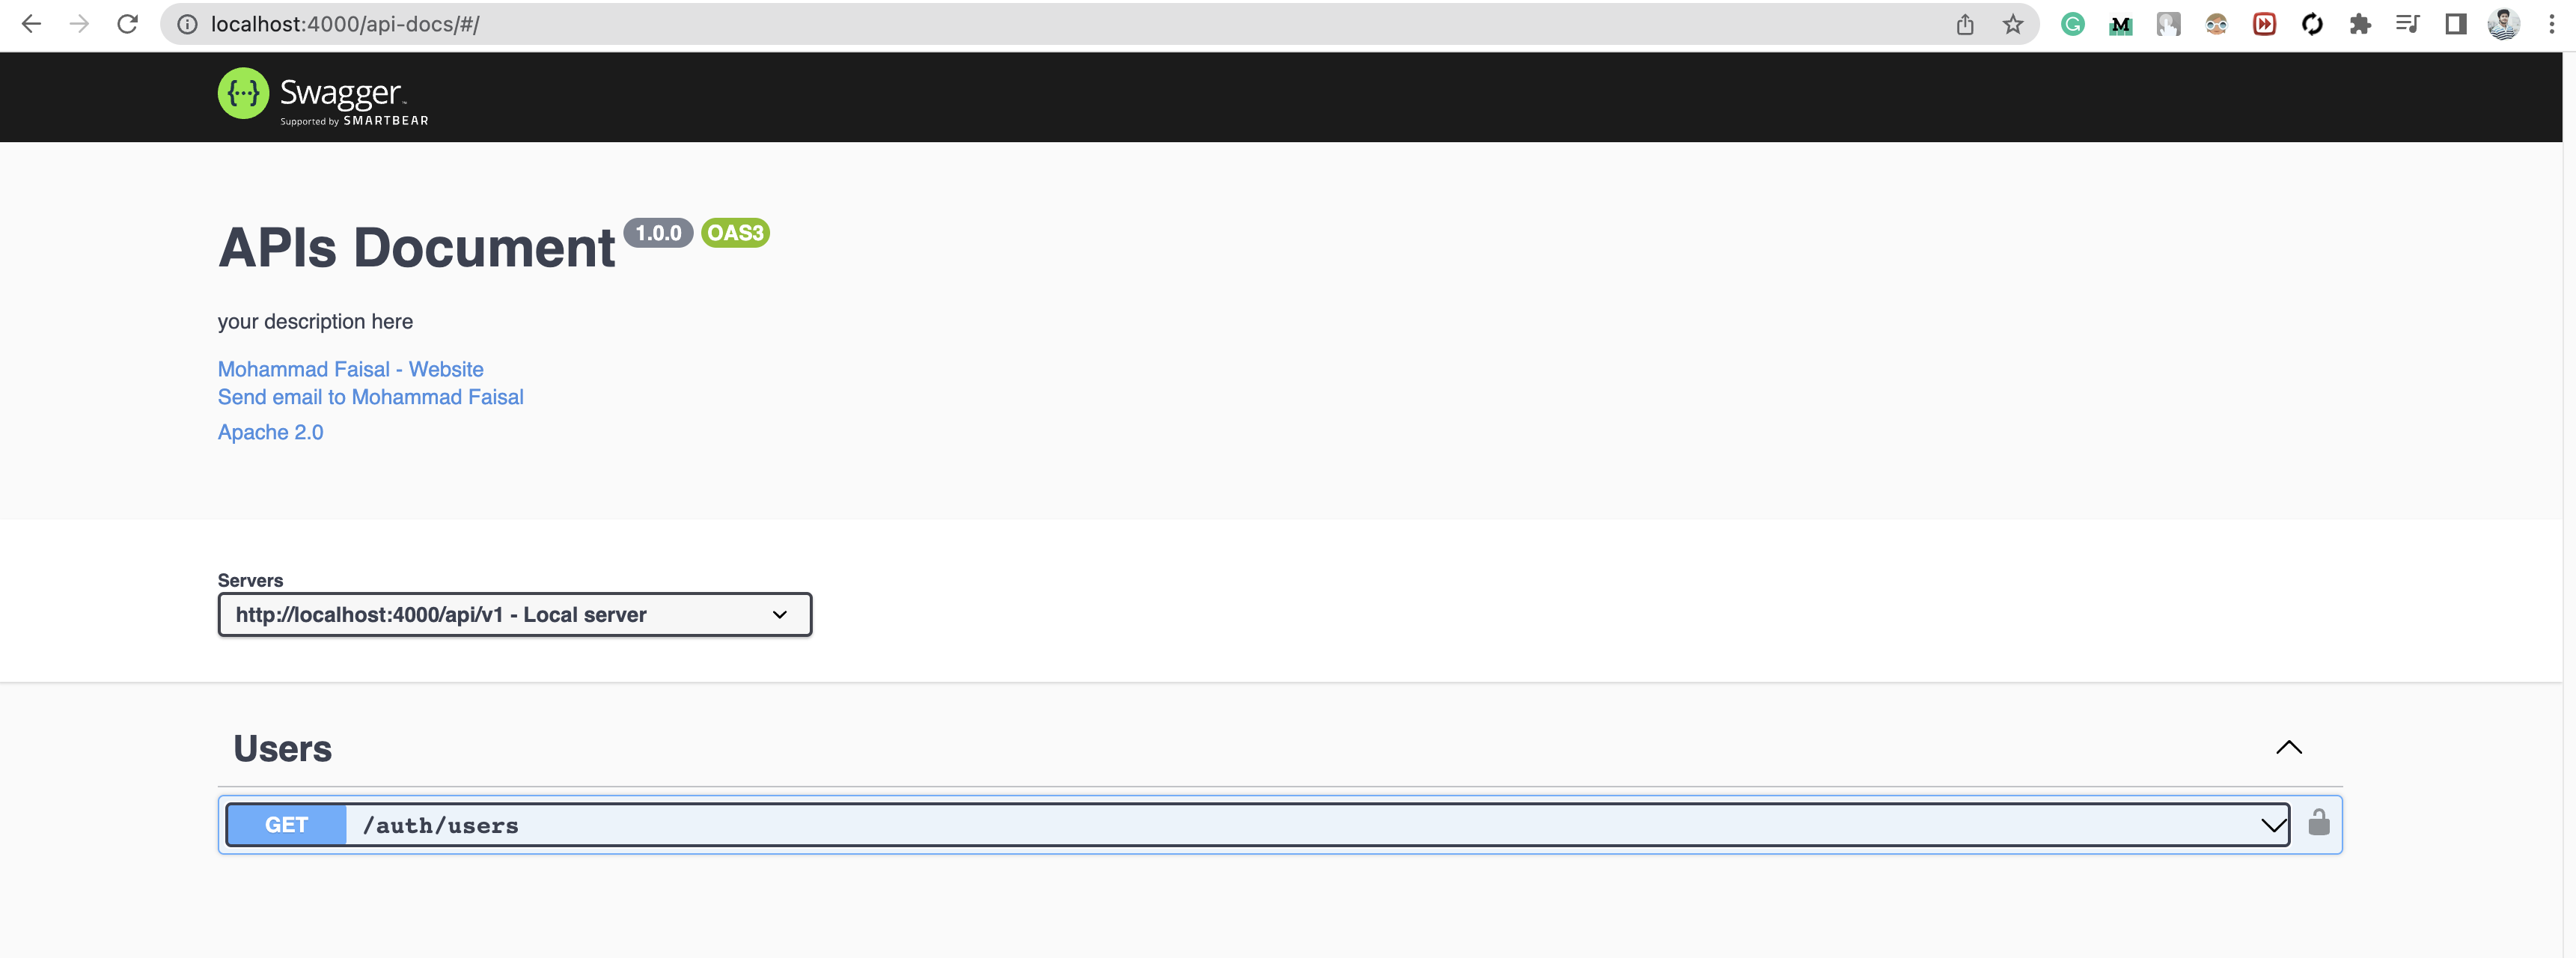
You should now see the interactive Swagger UI page, populated with the title, description, and server information from your configuration. It will state "No operations defined in spec" because we haven't documented any routes yet, but the UI itself is now live.
Conclusion
Congratulations! You have successfully configured your Express application to serve live, interactive API documentation. This is a foundational step for any professional backend project and a key requirement for your exam.
Key Takeaways:
swagger-jsdoccompiles your configuration and JSDoc comments into a single specification object (swaggerSpec).swagger-ui-expressprovides the middleware to serve thisswaggerSpecas an interactive HTML page.- The documentation endpoint is set up using
app.use('/api-docs', swaggerUi.serve, swaggerUi.setup(swaggerSpec)). - This middleware must be placed before your API routes in your main server file.
Next Up:
The documentation page is live, but it's empty. In the next lesson, we will start breathing life into it by documenting our first API endpoints. We'll begin with the GET (read) operations, adding JSDoc comments directly above the route handlers to make them appear in the Swagger UI.