Introduction
In the previous lesson, you built a professional-grade, environment-aware error handling system. Your API can now distinguish between operational errors and programming bugs, sending detailed information to you during development and clean, secure responses in production. This makes your application robust and secure.
With a solid functional and error-handling foundation in place, the next step is to make your API understandable and usable for others—including your exam evaluator. An API without documentation is like a library with no card catalog; the content is there, but nobody can find it.
In this lesson, you will set up live, interactive API documentation using Swagger (also known as the OpenAPI Specification). You'll learn to:
- Install and configure the necessary packages:
swagger-jsdocandswagger-ui-express. - Set up the basic configuration for your API documentation.
- Serve the interactive documentation page from your Express server.
- Define a reusable schema for your data model, which is a critical step for keeping your documentation clean and maintainable.
By the end of this lesson, you will have a live documentation endpoint ready for you to start documenting your CRUD operations.
1. Installing Swagger Dependencies
First, you need to add two packages to your project:
swagger-jsdoc: This package reads JSDoc comments (which you'll write in a specific format) from your code and generates a JSON file that describes your API according to the OpenAPI specification.swagger-ui-express: This package takes the JSON file generated byswagger-jsdocand creates a beautiful, interactive HTML interface for you to explore and test your API.
Action: Install Packages
In your project's terminal, run the following command:
npm install swagger-jsdoc swagger-ui-express
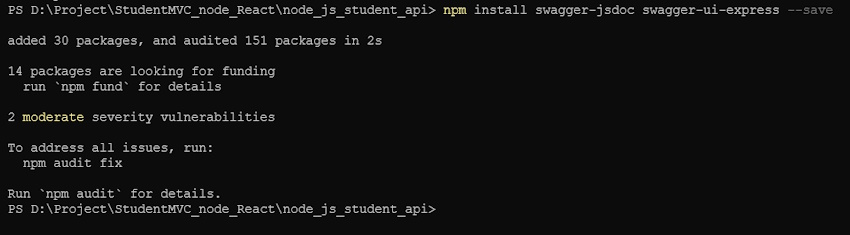
After the installation completes, your terminal output should look similar to this, confirming the packages were added.
2. Configuring Swagger in Your Application
Now that the packages are installed, let's integrate them into your Express application. All the configuration will happen in your main server file (likely src/app.js or src/server.js).
The process involves three parts:
- Defining the options: You'll create an object that tells
swagger-jsdocbasic information about your API (like its title and version) and where to find the documentation comments. - Generating the spec: You'll pass these options to
swagger-jsdocto generate the full API specification. - Serving the UI: You'll use
swagger-ui-expressto create a new route (e.g.,/api-docs) that serves the interactive documentation.
This video provides a clear, practical demonstration of this exact setup process.
NodeJS Swagger API Documentation Tutorial Using Swagger JSDoc
Watch this segment from Maksim Ivanov's tutorial to see how to import the packages and create the configuration objects needed to serve the Swagger UI.
Watch from 09:47 to 12:27. Focus on: How swagger-ui-express and swagger-jsdoc are imported. The structure of the options object, particularly the definition and apis properties. How app.use() is called with swaggerUi.serve and swaggerUi.setup to create the documentation endpoint.
Action: Add Swagger Configuration to Your Server File
Open your main server file (e.g., src/server.js) and add the following code. Make sure to place it after you've initialized your app variable but before your 404 handler and global error handler middleware.
// src/server.js or src/app.js

// ... other imports
const swaggerUi = require('swagger-ui-express');
const swaggerJSDoc = require('swagger-jsdoc');
// ... other imports

const app = express();

// ... existing middleware like express.json(), cors(), etc.

// --- Swagger Configuration ---
const swaggerOptions = {
  definition: {
    openapi: '3.0.0',
    info: {
      title: 'CRUD API for Certification Exam', // Customize this
      version: '1.0.0',
      description:
        'This is a simple CRUD API application made with Express and documented with Swagger', // Customize this
    },
    servers: [
      {
        url: `http://localhost:${process.env.PORT || 5001}`,
        description: 'Development server',
      },
    ],
  },
  apis: ['./src/routes/*.js'], // Path to the files containing API definitions
};

const swaggerSpec = swaggerJSDoc(swaggerOptions);

// --- Routes ---
// Serve Swagger documentation
app.use('/api-docs', swaggerUi.serve, swaggerUi.setup(swaggerSpec));

// Your API routes
// app.use('/api/items', itemRoutes); // Your existing routes

// ... 404 Handler and Global Error Handler
// app.use(notFound);
// app.use(errorHandler);

// ... app.listen(...)
A few key points about this configuration:
info: This object contains metadata about your API. You should customize thetitleanddescription.servers: This array tells Swagger where your API is hosted. We've set it up to dynamically use your server's host and port.apis: This is crucial. It's an array of file paths thatswagger-jsdocwill scan for documentation comments. We've used a wildcard (*.js) to include all files in yoursrc/routes/directory.
3. Verifying the Setup
With the configuration in place, you can now check if it works.
- Start your server with
npm run dev. - Open your browser and navigate to
http://localhost:5001/api-docs(adjust the port if yours is different).
You should see the Swagger UI page, displaying the title and description you defined. Since we haven't documented any endpoints yet, it will show a "No operations defined in spec!" message. This is expected and confirms your setup is correct.

4. Defining a Reusable Schema Component
Before we document individual routes, let's define a "schema" for our main data model (e.g., your Item or Product model). A schema is a reusable definition of a data structure. By defining it once, you can reference it in multiple places (e.g., the response for "GET all items" and the request body for "create item") without repeating code. This is a core principle of good API documentation.
We will write this schema definition as a JSDoc comment block directly in the relevant route file.
The next video clip demonstrates how to create such a reusable schema using YAML syntax inside a JSDoc comment.
NodeJS Swagger API Documentation Tutorial Using Swagger JSDoc
This clip shows how to use @swagger comments to define a reusable schema for a 'Book' model. You will use the exact same pattern for your own model.
Watch from 12:27 to 14:45. Pay close attention to the YAML structure: The top-level components and schemas keys. The definition of the Book schema, including its type, required fields, and properties. How each property is defined with a type and description.
Action: Create Your Model Schema
Now, open your main route file (e.g., src/routes/item.routes.js). At the very top of the file, add the following JSDoc block. You'll need to customize it to match the fields in your Mongoose model.
// src/routes/item.routes.js

/**
 * @swagger
 * components:
 *   schemas:
 *     Item:
 *       type: object
 *       required:
 *         - name
 *         - price
 *       properties:
 *         _id:
 *           type: string
 *           description: The auto-generated id of the item
 *         name:
 *           type: string
 *           description: The name of your item
 *         price:
 *           type: number
 *           description: The price of the item
 *         description:
 *           type: string
 *           description: A brief description of the item
 *         createdAt:
 *           type: string
 *           format: date-time
 *           description: The date the item was created
 *         updatedAt:
 *           type: string
 *           format: date-time
 *           description: The date the item was last updated
 *       example:
 *         _id: 60d0fe4f5311236168a109ca
 *         name: "Sample Item"
 *         price: 29.99
 *         description: "This is a sample item for demonstration purposes."
 *         createdAt: "2023-01-01T12:00:00.000Z"
 *         updatedAt: "2023-01-01T12:30:00.000Z"
 */

const express = require('express');
const router = express.Router();
// ... rest of your file
Important: YAML is very sensitive to indentation. Make sure your indentation is correct, exactly as shown above. After adding this block and restarting your server, refresh the /api-docs page. You won't see new endpoints, but if you look at the bottom of the page, you should now see a "Schemas" section with your Item schema defined.
Conclusion
Excellent work. You have successfully installed and configured a live, interactive documentation system for your API. This is a massive step towards creating a professional, exam-ready project.
Key Takeaways:
swagger-jsdocandswagger-ui-expresswork together to generate API documentation from comments in your code.- The initial setup happens in your main server file, where you define API metadata and point
swagger-jsdocto your route files. - The documentation is served at a dedicated endpoint, which we've configured as
/api-docs. - Defining a reusable
schemaundercomponentsis the standard, efficient way to describe your data models for your documentation.
Next Up:
With the foundation now firmly in place, the next lesson is all about putting it to use. You will write the JSDoc/YAML comments for each of your five CRUD endpoints, referencing the Item schema you just created. You'll see your Swagger UI page come to life with fully documented, testable API operations.