Introduction
In our last lesson, you successfully brought the Open5GS core network online. All the essential services that form the Evolved Packet Core (EPC)—the MME, HSS, gateways, and more—are now running and communicating with each other. Your core network is effectively a brain waiting for its senses.
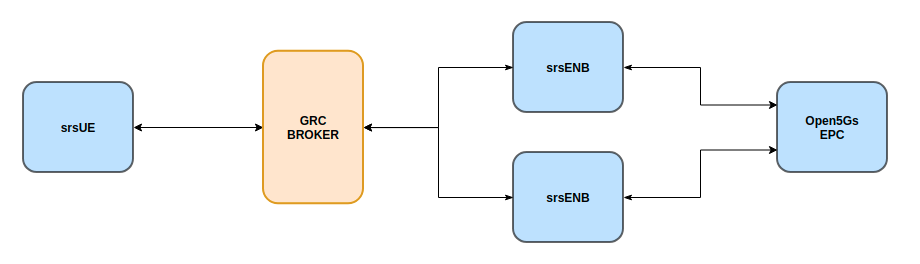
Today's learning outcome is to start the srsENB base station and confirm its connection to the core network. This is the critical step where we connect the Radio Access Network (RAN), represented by our srsENB software, to the EPC you just activated. This connection, known as the S1 link, is the bridge between the radio world and the core network's management and data-handling functions.
By the end of this lesson, you will have a fully functional 4G network backbone, with a base station actively connected to a core network, ready to serve subscribers.
Pre-launch Checklist
Before starting the base station, it's vital to ensure its configuration is correct and that the underlying network environment is ready. Mismatches here are the most common source of issues.
1. Network Sanity Check
From our previous setup, a few system settings are crucial for communication between the core network and the base station components:
- IP Forwarding: Ensure IP forwarding is enabled on your Linux system.
- Firewall: Ensure your firewall is not blocking the traffic between
srsENBandOpen5GS. The S1 link uses the Stream Control Transmission Protocol (SCTP), which might be blocked by default. For a lab environment, a simple approach is to disable the firewall, as shown in thesrsRAN 4G (with 5G SA/NSA)guide you've seen previously (sudo ufw disable).
2. The enb.conf Configuration
The srsENB needs to know where to find the MME. This is configured in the enb.conf file. Let's verify the three most important parameters:
mme_addr: This must be set to the IP address of the machine running Open5GS, where the MME service is listening.gtp_bind_addr: This is for the GTP-U tunnel endpoint and should be the IP address of the machine runningsrsENB.s1c_bind_addr: This is for the S1-MME control plane interface and should also be the IP address of the machine runningsrsENB.
The following resource provides a very clear example of these changes.
srsRAN 4G ZMQ RAN Configuration
This GitHub repository with sample configurations shows the exact changes needed in enb.conf to bridge the gap between the default localhost settings and a functioning network setup. Please review the 'diff' to ensure your own configuration is correct.
In the linked document, find the section titled 'Changes in configuration files of RAN'. Focus on the diff for srsRAN_4G/build/srsenb/enb.conf. Notice how mme_addr, gtp_bind_addr, and s1c_bind_addr are changed from 127.0.x.x addresses to specific network IPs. Your file should reflect this logic, using the IP addresses of your Open5GS and srsRAN machines.
Make sure your enb.conf file accurately reflects the IP addresses of your lab setup before proceeding.
Launching the srsENB
With the configuration confirmed, you can now start the eNodeB. You will execute the srsenb binary from within its build directory, passing your configuration file as an argument.
You'll need sudo privileges because srsenb needs to configure network interfaces and interact with the radio hardware (or the ZeroMQ virtual radio).
In your terminal, navigate to the srsenb directory and run:
cd /path/to/srsRAN_4G/build/srsenb
sudo ./srsenb enb.conf
If the launch is successful, you will see a series of log messages in your terminal as srsenb initializes the radio, sets the frequencies, and prepares to connect to the MME. The output should conclude with a line like ==== eNodeB started ==== without any fatal errors.
Verifying the S1 Connection
Launching the process is one thing; confirming the connection to the core network is the real goal. We'll use logs from both sides—the srsENB and the Open5GS MME—to get a complete picture.
Method 1: Check the Open5GS MME Log
This is the most definitive check. The MME must log that it has accepted a connection from your eNodeB. Just as you did in the last lesson, you can "follow" the MME log file to see this happen in real-time.
In a separate terminal, run:
sudo tail -f /var/log/open5gs/mme.log
or sudo journalctl -u open5gs-mmed -f
After starting srsenb, you should see new lines appear in the MME log almost immediately. Look for a message indicating that an eNB S1 connection has been accepted. The guide from the s5uishida GitHub repository shows exactly what this looks like:
11/09 01:24:56.954: [mme] INFO: eNB-S1 accepted[192.168.0.121]:48452 in s1_path module
11/09 01:24:56.954: [mme] INFO: [Added] Number of eNBs is now 1
(Log snippet from the "Run srsRAN 4G ZMQ RAN" resource)
Seeing this message confirms the core network has successfully established the S1 link with your base station.
Method 2: Check the srsENB Live Logs
The srsenb terminal output will also confirm the connection. The following video shows a practical demonstration of starting the eNodeB and then checking the logs for confirmation.
Broadcasting my own cellular - The Setup | PLTE w/ Open5GS and B210
This video from LAN Ranger demonstrates the process of starting the srsENB and immediately verifying its status. Pay attention to the specific log message that confirms the S1 link is up.
Watch the segment from 14:05 to 15:15. The presenter starts the srsENB with a simple script. He then reviews the logs and points out the key message: 'our eNB is connected to the S1'. This is the confirmation you are looking for on the srsRAN side.
The combination of the confirmation log from the MME and the corresponding message from the srsenb gives you complete confidence that the connection is active.
Method 3: Protocol-Level Analysis (Optional)
Your background in network analysis with tools like Wireshark gives you an opportunity to go a layer deeper. The S1 link is established using the S1 Application Protocol (S1AP), which runs over SCTP. You can capture this handshake.
The key exchange to look for is:
- S1 Setup Request: Sent from the eNodeB (
srsenb) to the MME (open5gs-mmed). - S1 Setup Response: Sent from the MME back to the eNodeB.
This video demonstrates a Wireshark analysis of this exact process.
To connect this process to your existing skills, this video walks through a packet capture of the S1AP handshake. It's a great way to visualize the underlying protocol that establishes the eNodeB-MME connection.
Watch from 15:40 to 18:30. The presenter analyzes a Wireshark capture of the S1AP protocol. Focus on how he identifies the 'S1 Setup Request' and the corresponding 'S1 Setup Response'. This handshake is the low-level mechanism that brings the S1 link to life.
If you run tcpdump on the network interface connecting your srsENB and Open5GS machines while starting srsenb, you can capture this handshake yourself and analyze it in Wireshark.
Conclusion
Congratulations! You have successfully started your srsENB software base station and verified its connection to the Open5GS core network. You now have a live, end-to-end 4G network infrastructure running in your lab.
Key Takeaways:
- The connection between the eNodeB (RAN) and the MME (Core) is called the S1 link.
- Correctly configuring the IP addresses (
mme_addr,s1c_bind_addr) inenb.confis critical for the connection to be established. - Verification is a two-sided process: you must check the logs on both the
srsenbapplication and theopen5gs-mmedservice to confirm theeNB-S1 acceptedmessage. - The underlying protocol, S1AP, uses a
S1 Setup Request/Responsehandshake to formalize the connection.
Preview of the Next Lesson:
Your network is now broadcasting and is ready for its first user. In the next lesson, you will initiate an attach with the srsUE software client and confirm its successful registration. This will complete the loop, connecting a subscriber device through your base station to your core network.