Introduction
Hello! In our last lesson, you did a fantastic job refining your abstract blockout model. You learned the core sculpting rhythm of adding form with the Clay Strips brush, creating planes with the Scrape brush, and blending your work with the Smooth brush. This gave your sculpture its initial organic flow and volume.
Today, we're going to introduce a powerful element of contrast. While your form is currently soft and flowing, great sculptures often play with the juxtaposition of organic and geometric elements. This lesson is all about creating that contrast by carving sharp, clean features into your model.
Specifically, we will cover how to use the Flatten and Trim brushes to introduce sharp planes and cuts into your organic form. This is a crucial step that will not only add visual interest to your current abstract piece but will also serve as a direct bridge to the hard-surface sculpting techniques you're interested in exploring.
1. From Scraping to Flattening
In the last lesson, you used the Scrape brush to shave down high points on your mesh. Now, we'll introduce a related but distinct tool: the Flatten brush.
While Scrape primarily removes material, the Flatten brush works by averaging the vertices under your cursor to a single plane. This means it will both push down high points and pull up low points to create a flat surface. It’s less about shaving and more about pressing the surface into a plane.
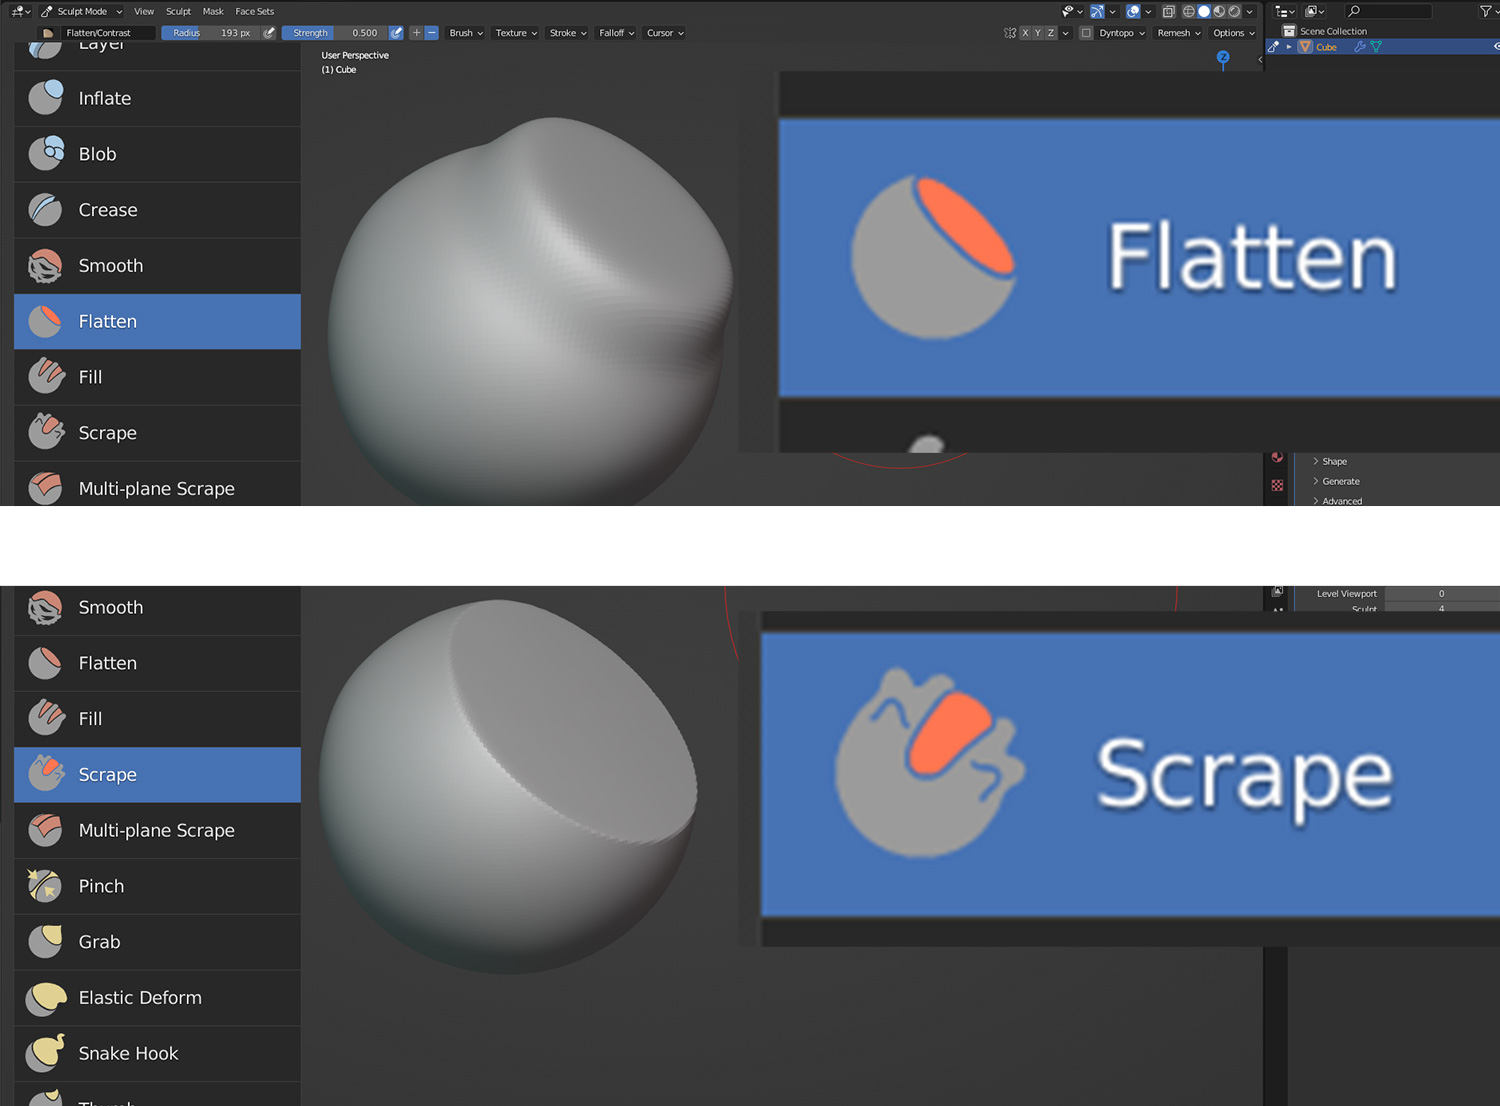
To see a clear demonstration of the Flatten brush and a preview of the Trim brush we'll discuss next, let's watch a short video.
Master Blender Sculpting: Every Brush Explained
Grant Abbitt's 'Master Blender Sculpting' video provides a clear look at both the Flatten brush and a different tool also called 'Trim'—a brush that digs into the mesh.
Please watch two short segments. First, from 00:15:08 to 00:15:57 for the Flatten brush. Then, watch from 00:18:32 to 00:19:47 for the Trim brush. Note how the Flatten brush creates planes, while the Trim brush carves into the surface indiscriminately.
As you saw, the Trim brush behaves quite differently. It's a simple, effective tool for carving away material with a sharp falloff, making it excellent for creating chiseled or damaged effects.
2. Making Decisive Cuts with Trim Tools
The Trim brush you just saw is great for smaller-scale effects. But for creating large, clean, geometric cuts—the kind you see in machined parts or minimalist sculpture—Blender has a more powerful set of Trim gesture tools.
These are not "brushes" in the traditional sense. Instead of painting on a surface, you draw a shape (a box, a line, or a freeform lasso), and Blender performs a Boolean operation, effectively using that shape as a cookie-cutter to slice away parts of your model.

To understand how these work, let's consult the official Blender documentation.
Trim Gesture Tools - Blender Manual
The Blender Manual gives a precise overview of the Trim gesture tools. This will introduce the core concept before we see it in action.
Read the short introduction and the section on 'Lasso Trim'. The key concept to grasp is that you are drawing a shape to define a volume for cutting, not painting a brush stroke.
Now, let's see how this is applied in a practical context. The following clip is from a hard-surface sculpting tutorial and shows the Lasso Trim tool being used to define major forms.
Hard Surface Sculpting Tips, Brushes & Techniques
This clip from 'Hard Surface Sculpting Tips' by MWSculpts shows how effective the Lasso Trim tool is for defining shapes in a hard-surface context.
Watch from 02:06 to 02:30. See how drawing a freehand lasso shape cuts a clean, new form into the object. This is a very powerful and direct way to create hard-surface planes.
Quick Clarification: Trim Brush vs. Trim Tools
It's important to distinguish between the two "Trim" methods we've just discussed:
- Trim Brush: This is a normal sculpting brush (like Clay Strips or Draw). You use it to make strokes that carve or chip away at the surface. It's good for adding texture and smaller details.
- Trim Tools (Lasso, Box): These are gesture-based tools. You draw a shape to perform a large-scale cut. They are ideal for defining silhouettes and creating large, clean planes.
3. Hands-On Practice: Introducing Geometric Contrast
It's time to apply these new tools to your abstract sculpture. The goal is to create an interesting dialogue between the soft, organic forms you've already made and the sharp, geometric cuts you're about to introduce.
- Open your abstract sculpture project file from the last lesson.
- Enter Sculpt Mode.
Step 1: Flattening Planes
- Select the Flatten brush (you can find it in the toolbar).
- Find a few curved areas on your model. Use the Flatten brush to press them into distinct planes. Experiment with different brush sizes. A large brush will create a large, dominant plane, while a smaller brush can create more subtle facets.
Step 2: Making Bold Cuts
- Now for the dramatic part. Select the Lasso Trim tool from the toolbar (it looks like a lasso with a minus sign).
- From a side or three-quarter view, draw a lasso shape that cuts across a portion of your model. When you release the mouse button, that part will be sliced away, leaving a perfectly flat surface.
- Try this a few times. Make a large, sweeping cut that changes the main silhouette. Then try a smaller, more contained cut to create an interesting notch or inlay. Don't be afraid to be bold; you can always undo with
Ctrl + Z.
Step 3: Cleaning Up with Remesh
- This is a critical step. Boolean operations, like those used by the Trim tools, can sometimes result in messy geometry along the cut edge.
- After you make a cut you're happy with, press
Ctrl + Rto Remesh your object. This will instantly regenerate the mesh with clean, uniform topology, giving you a perfect surface to continue sculpting on. It's good practice to remesh after every major trim operation.
Spend the rest of your session experimenting with this interplay. Use the Flatten brush to create planes, use the Lasso Trim to make bold cuts, and don't forget to use the Smooth brush (Shift) to soften the transitions where desired.
Conclusion
You've now added a powerful new set of tools to your digital sculpting arsenal. By learning to create sharp planes and clean cuts, you can now introduce a new visual language into your work, creating a dynamic contrast between the organic and the geometric.
Key Takeaways:
- The Flatten brush creates planar surfaces by averaging vertices under the brush.
- The Trim brush is a stroke-based tool for creating chiseled or carved details.
- Trim gesture tools (like Lasso Trim) perform large-scale Boolean cuts, perfect for defining hard-surface forms.
- It is essential to Remesh (
Ctrl + R) after using Trim tools to clean up the mesh topology. - Artistically, the contrast between soft, organic curves and sharp, geometric planes can make a sculpture much more compelling.
Next Steps
In the last few lessons, you have focused intensely on the craft of shaping a single object. You've blocked it out, refined its organic form, and now added sharp, geometric details. In our next lesson, we will zoom out. You will learn how to arrange multiple sculpted objects into a balanced composition, moving from the creation of an object to the art of composing a scene. This will directly engage your existing skills in fine art and sculpture composition.