Introduction
Welcome back. In our last lesson, we established how Access Control Lists (ACLs) function as security checkpoints on Switched Virtual Interfaces (SVIs), allowing us to filter traffic as it's routed between our VLANs. We covered the fundamental laws of ACL processing: top-down order, first-match-wins, and the implicit deny all.
So far, we've focused on creating single rules to block or permit specific traffic. In a real-world network, security requirements are rarely that simple. You'll be handed a document outlining a complete security policy with multiple, sometimes overlapping, requirements.
This lesson focuses on the core skill of a network security professional: translating a written security policy into a precise sequence of ACL permit and deny statements. We will move beyond single rules to constructing comprehensive access lists that enforce complex security logic for your enterprise network.
A Systematic Approach to ACL Design
Before writing any commands, it's crucial to have a structured process. Haphazardly adding rules is a recipe for security holes and network outages. A professional approach involves methodically analyzing the requirements and translating them into a logical, ordered list.
The first step is to understand what traffic is necessary and what is explicitly forbidden.
Transit Access Control Lists: Filtering at Your Edge
This Cisco document, while focused on internet-edge security, outlines a professional methodology for creating ACLs that is highly relevant to our task of internal segmentation. It emphasizes a structured approach to identifying traffic requirements.
Read the section titled 'How to Develop a Transit ACL'. Focus on the initial steps: 'Identify Required Protocols' and 'Identify Invalid Traffic'. We will adapt this same systematic thinking for our inter-VLAN security policies.
As the document suggests, the process starts by deconstructing the policy. For any given rule, you need to identify four key components:
- Source: Who or what is initiating the traffic? (e.g., the Sales subnet, a specific management PC)
- Destination: Who or what is the target? (e.g., the Server Farm subnet, a specific payroll server)
- Service: What protocol and port is being used? (e.g., ICMP for ping, TCP port 443 for HTTPS, UDP port 53 for DNS)
- Action: What should happen to this traffic? (Permit or Deny)
Every line in your security policy can be broken down this way, and each of these components maps directly to a part of a Cisco IOS ACL command.
Case Study: Translating a Multi-Part Policy
Let's watch this process in action. The following video demonstrates how to translate a series of evolving security requirements into functional ACLs on a Layer 3 switch.
The policies being implemented are:
- Policy 1: Block the entire Sales VLAN from accessing the Server Farm VLAN.
- Policy 2 (Modification): Create an exception to Policy 1, allowing the Sales VLAN to access a specific web server.
- Policy 3 (New): Block the IT VLAN from initiating traffic to the Sales VLAN.
Network#20: Control Inter-VLAN routing by ACLs
This video from SASiteNet provides an excellent walkthrough of translating security policies into extended ACLs to control inter-VLAN routing.
Watch the following sections carefully, noting how each policy is converted into CLI commands: Blocking a Subnet (2:34 - 7:11): Observe how the policy 'Block Sales VLAN from the Server Farm' is translated. The deny statement targets the specific traffic, and the permit ip any any statement allows all other traffic. Creating an Exception (7:11 - 10:22): This is a critical section. See how a new, more specific permit statement is inserted with a lower sequence number (sequence 5) to override the broader deny statement (sequence 10). This reinforces the 'top-down, first match' rule we learned previously. Implementing a Second Policy (10:22 - 13:43): Watch as a completely new ACL is created to block the IT department from accessing the Sales department, showing how multiple, independent policies can coexist on different SVIs.
Breaking Down the ACL Syntax
The video shows the complete configuration, but let's pause and dissect the command syntax. Mastering this is key to translating policies accurately. An extended ACL statement generally follows this structure:
{permit|deny} <protocol> <source-ip> <source-wildcard> <destination-ip> <destination-wildcard> [operator port]
permit | deny: The action.protocol:ip(any IP protocol),tcp,udp,icmp, etc.source-ip source-wildcard: Identifies the source. Can be a single host (usinghost 1.2.3.4or a wildcard of0.0.0.0) or a whole subnet (e.g.,192.168.10.0 0.0.0.255).destination-ip destination-wildcard: Identifies the destination.operator port: Optional. Used with TCP/UDP to specify a service. The operator can beeq(equals),gt(greater than),lt(less than), orrange. The port can be a number (e.g.,80) or a keyword (e.g.,www).
For a quick refresher on the syntax for the most common statements, review these short clips.
How to Set up Extended ACLs on a Cisco L3 Switch | CCNA Security | Access Control List Configuration
This video from Paolo Reyes provides a clear, step-by-step breakdown of the command structure for individual ACL entries.
Please watch these short clips: Permitting a Protocol (6:09 - 7:16): Focus on the base structure: permit <protocol> <source> <destination>. Denying a Service (7:16 - 8:21): Note how to specify a protocol (TCP) and a destination port (eq 22 for SSH). The 'Permit All Else' Rule (8:21 - 8:33): Understand why permit ip any any is critical to avoid the implicit deny blocking all other traffic.
A Note on Editing ACLs
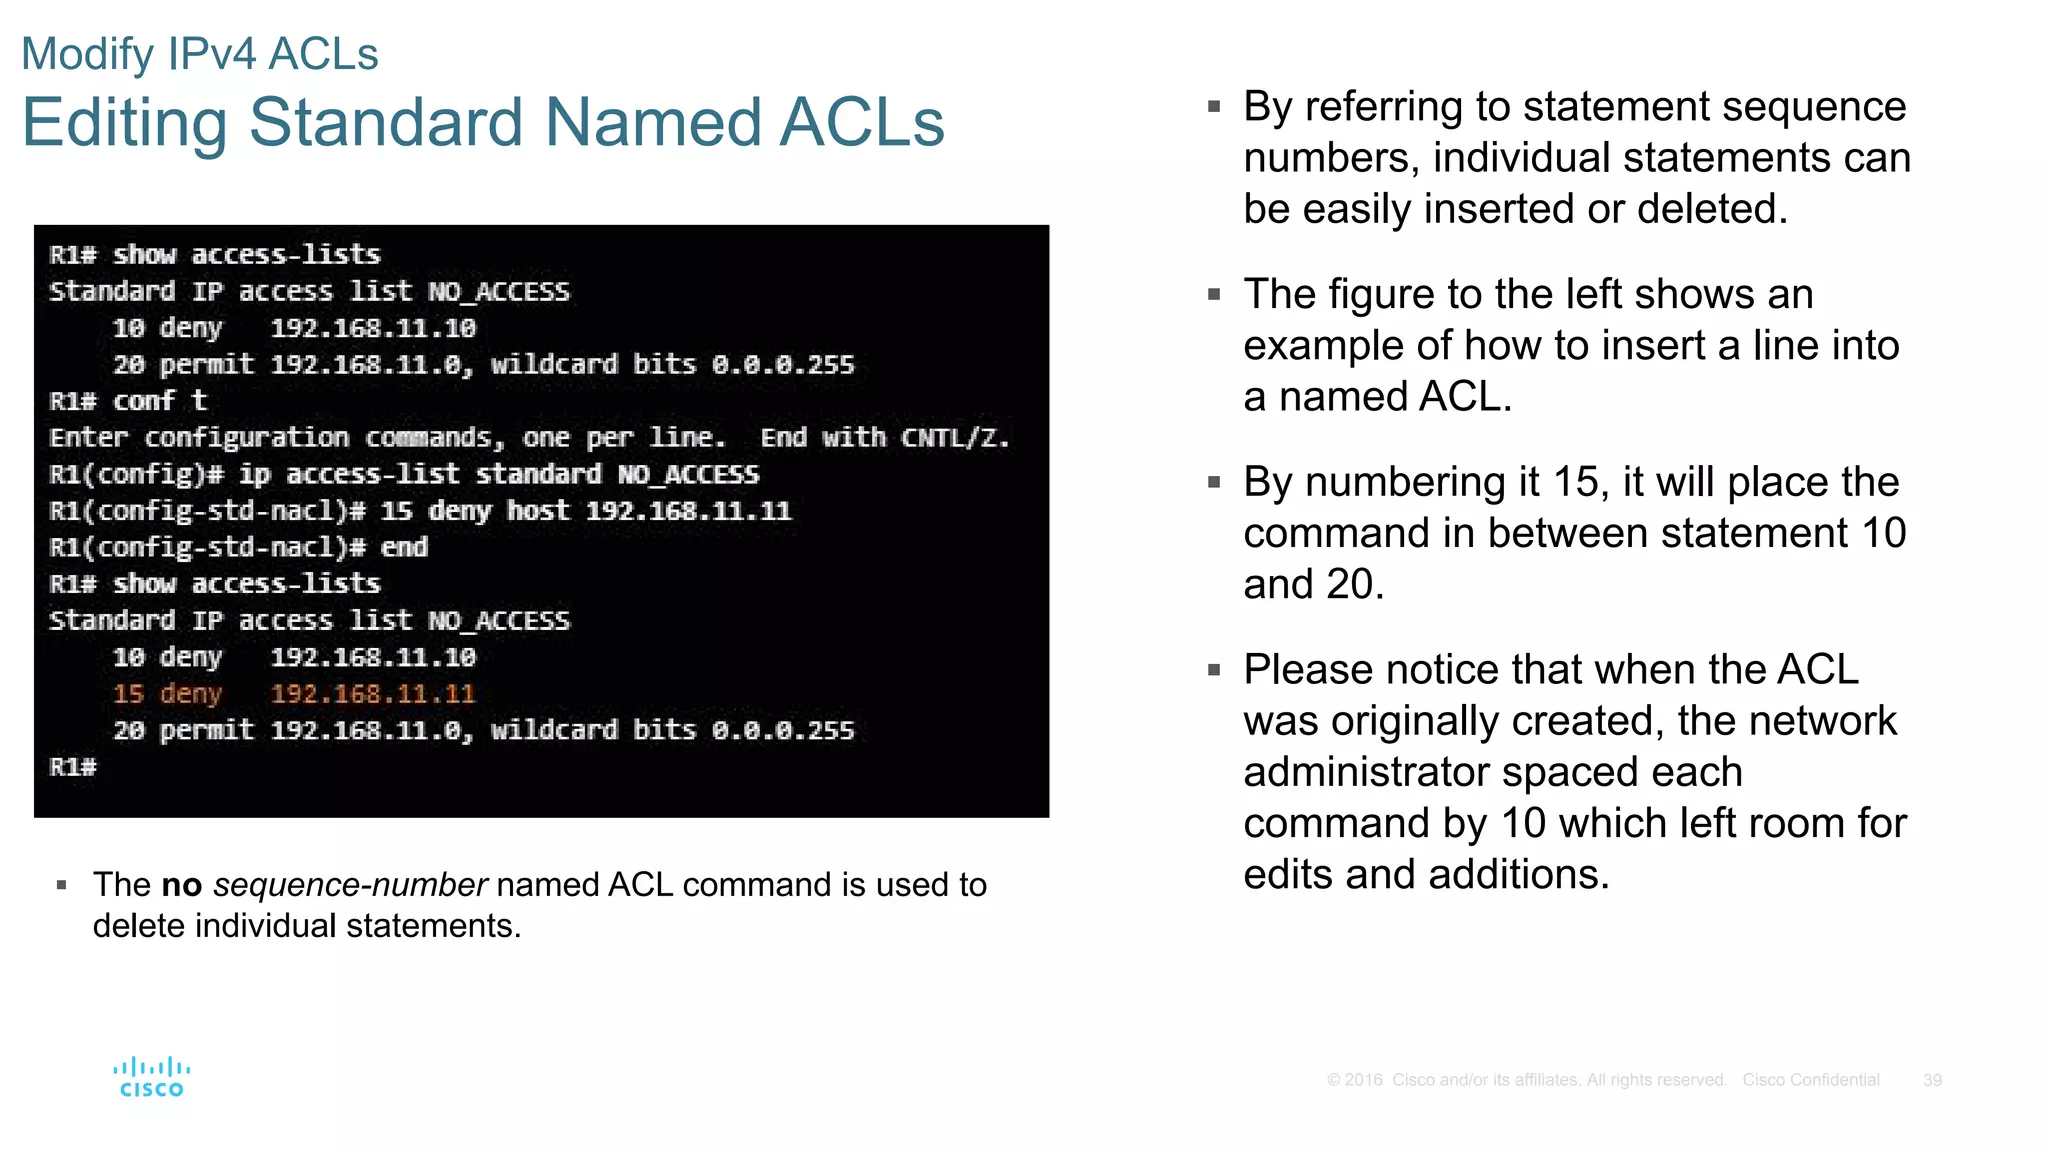
As we saw in the first video, security policies evolve. You will frequently need to add or remove rules from an existing ACL. Instead of deleting and recreating the entire list, you can edit it using sequence numbers.
Practical Exercise
Now it's your turn to be the network architect. You are given a network plan and a security policy. Your task is to translate the policy into the exact Cisco IOS commands.
Scenario
- VLANs & Subnets:
- VLAN 10 (Management):
10.10.10.0 /24 - VLAN 20 (Finance):
10.10.20.0 /24 - VLAN 99 (Servers):
10.10.99.0 /24
- VLAN 10 (Management):
- Key Servers:
- File Server:
10.10.99.10 - Payroll Server:
10.10.99.30
- File Server:
- L3 Switch SVIs:
interface Vlan10,interface Vlan20,interface Vlan99
Written Security Policy
- The Finance department must be able to access the Payroll Server and the File Server.
- The Finance department is explicitly blocked from all other devices in the Server VLAN.
- The Management department can access the File Server but must be blocked from the Payroll Server.
- For now, all other inter-VLAN traffic is permitted.
Your Task
Write the full, named extended ACLs required to implement this policy. Follow the best practice of applying the ACL inbound on the SVI of the source traffic.
- Write the ACL named
FINANCE_POLICYto be applied to the Finance VLAN's SVI. - Write the ACL named
MGMT_POLICYto be applied to the Management VLAN's SVI.
Remember to consider the statement order and the implicit deny.
Click to see the solution
Here are the complete ACLs based on the security policy.
1. ACL for the Finance Department
This ACL will be applied inbound on interface Vlan20.
ip access-list extended FINANCE_POLICY
 10 permit ip 10.10.20.0 0.0.0.255 host 10.10.99.30
 20 permit ip 10.10.20.0 0.0.0.255 host 10.10.99.10
 30 deny ip 10.10.20.0 0.0.0.255 10.10.99.0 0.0.0.255
 40 permit ip any any
-
interface Vlan20 -
ip access-group FINANCE_POLICY in -
Analysis:
- Line 10: Fulfills the first part of Rule #1. It specifically permits traffic from the entire Finance subnet to the Payroll Server.
- Line 20: Fulfills the second part of Rule #1, permitting access to the File Server.
- Line 30: Fulfills Rule #2. After allowing the specific servers, this rule denies traffic from Finance to any other device in the Server VLAN. This is crucial for security.
- Line 40: Fulfills Rule #4. This statement overrides the implicit deny and allows all other traffic (e.g., from Finance to Management) to pass.
2. ACL for the Management Department
This ACL will be applied inbound on interface Vlan10.
ip access-list extended MGMT_POLICY
 10 permit ip 10.10.10.0 0.0.0.255 host 10.10.99.10
 20 deny ip 10.10.10.0 0.0.0.255 host 10.10.99.30
 30 permit ip any any
-
interface Vlan10 -
ip access-group MGMT_POLICY in -
Analysis:
- Line 10: Fulfills the first part of Rule #3 by permitting access from the Management subnet to the File Server.
- Line 20: Fulfills the second part of Rule #3 by explicitly denying access to the sensitive Payroll Server.
- Line 30: Fulfills Rule #4, permitting all other traffic from the Management VLAN.
Conclusion
You have now learned the systematic process for deconstructing a written security policy and translating it into a precise sequence of ACL statements. This is a foundational skill for building secure, segmented networks.
Key Takeaways:
- Deconstruct the Policy: Before writing code, break down each requirement into Source, Destination, Service, and Action.
- Translate to Syntax: Each component of the policy maps directly to a part of the extended ACL command syntax.
- Order is Everything: Place more specific rules (like
permit host ...) before more general rules (likedeny ... subnet ...). The first rule that a packet matches is the only one that applies. - Don't Forget
permit ip any any: Unless your policy is to deny everything by default, you must end your ACL with a statement to permit legitimate traffic that wasn't explicitly denied. - Use Sequence Numbers: Use sequence numbers to insert, delete, and reorder ACL entries without having to re-type the entire list.
In the next lesson, we will continue our deep dive into ACLs, focusing on the critical importance of statement order and the implicit 'deny all'. We will analyze scenarios where incorrect ordering can lead to major security flaws or unintended network outages.