Hello! Welcome to your next lesson.
In the previous lessons, you've done some impressive work with the Django Object-Relational Mapper (ORM). You've defined models, managed database schema changes with migrations, and learned to perform both basic CRUD operations and advanced queries directly from the Django shell. You now have a solid command of how to talk to your database using Python code.
While the shell is powerful for testing and debugging, it's not a very user-friendly way to manage your application's data day-to-day. This is where Django's "killer feature" comes in: the admin interface.
In this lesson, you will learn how to interact with your application's data using Django's automatic admin site. This is a ready-to-use, web-based interface that Django builds for you based on your models. It's an invaluable tool for developers to quickly add, edit, and inspect data without writing any custom front-end code.
By the end of this lesson, you'll be able to:
- Activate the admin interface for your models.
- Create an administrator account.
- Log in and perform Create, Read, Update, and Delete (CRUD) operations on your data through a web browser.
- Make basic customizations to improve the admin's usability.
This will be our bridge from managing data in the terminal to building a full-fledged web application for end-users.
What is the Django Admin?
The Django admin is an automatically generated web application that provides a user interface for managing your database models. Think of it as a powerful, internal tool that lets you and your team manage the content of your site. It reads the metadata from your models to provide a complete, production-ready interface for data management.
For a quick overview of the purpose and benefits of the admin site, the MDN Web Docs provide an excellent introduction.
Django Tutorial Part 4: Django admin site
Read the "Overview" section of the Django admin site tutorial from MDN Web Docs to understand why the admin is such a useful feature for development and internal data management.
Just read the introductory "Overview" section. It perfectly summarizes what the admin application is and why it's so helpful.
Step 1: Create a Superuser and Log In
To access the admin site, you need a user account with special permissions. Django calls this a "superuser". A superuser has all permissions and can see and do anything on the admin site.
To create one, you'll use a manage.py command. Stop your development server if it's running (with Ctrl+C) and run the following in your terminal:
python manage.py createsuperuser
Django will prompt you to enter a username, an email address (optional), and a password. Make sure to choose a password you can remember.
Now that you have a superuser account, let's log in.
- Start the development server again:
python manage.py runserver - Open your web browser and go to
http://127.0.0.1:8000/admin. - You'll see a login page. Use the credentials you just created to log in.
The following video provides a clear walkthrough of creating a superuser and logging in for the first time.
Watch this segment from Dave Gray's tutorial to see the superuser creation and login process in action.
Watch the parts where he runs create super user (02:29 - 04:33) and then logs into the admin panel (04:33 - 05:49). Pay attention to the password validation feedback, which is a common point of confusion.
Step 2: Register Your Models
After logging in, you'll see the admin homepage. You'll probably see sections for Authentication and Authorization (with Groups and Users), but your own Task model will be missing.
By default, models are not visible in the admin. You must explicitly "register" each model you want to manage. This is done in the admin.py file inside your application directory (e.g., tasks/admin.py).
Open tasks/admin.py and add the following code:
from django.contrib import admin
from .models import Task # Import your Task model

# Register your models here.
admin.site.register(Task)
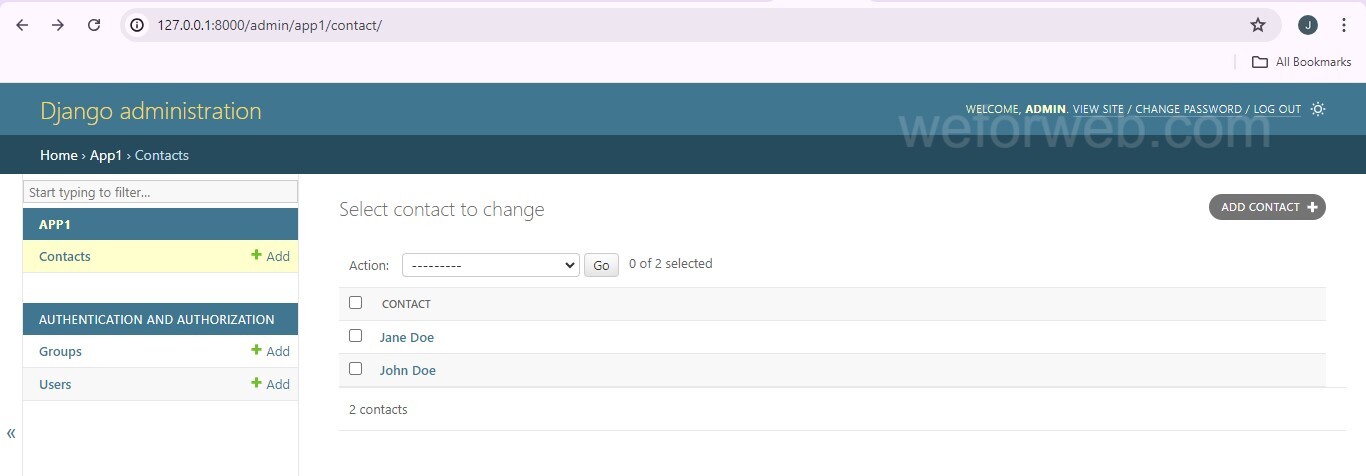
That's it! Save the file, and your development server will restart. Now, refresh the admin page in your browser. You should see a new section for your Tasks app with your Task model listed.
Django Tutorial Part 4: Django admin site
The MDN guide explains this registration process clearly and concisely.
Read the short section "Registering models". It shows the exact code needed and explains the purpose of admin.site.register().
Step 3: Performing CRUD Operations in the Admin
Now that your Task model is registered, you can manage your tasks directly through the browser. This provides a visual way to perform the same CRUD operations you practiced with the ORM in the shell.
- Read: Click on the "Tasks" link to see a list of all task objects. Django uses the
__str__method of your model to display each object, which is why defining it is so important. - Create: Click the "Add task +" button. Django will display a form with all the fields from your
Taskmodel (title,description,completed, etc.). Fill it out and click "Save". - Update: In the task list, click on the title of any task. This will take you to its "change" form, where you can edit its details and save the changes.
- Delete: From the task list, you can select tasks using the checkboxes and choose the "Delete selected tasks" action from the dropdown menu. Alternatively, from a task's change form, you can click the "Delete" button.
This video demonstrates these CRUD actions visually.
Watch this clip to see how to add, view, and edit model instances through the admin interface.
Watch the segment from 07:00 to 08:46. It shows how to navigate to a model's list, click on an item to edit it, and use the 'Add' button to create a new one.
Test your understanding!
Now it's your turn to practice. Using the Django admin interface for your project, perform the following actions:
- If you haven't already, register your
Taskmodel intasks/admin.py. - Log into the admin panel and navigate to the
Taskslist. - Add two new tasks:
- One task titled "Set up user authentication".
- Another task titled "Design the dashboard page".
- Find the "Design the dashboard page" task and edit its description to add "Include a sidebar for navigation".
- Now, delete the "Set up user authentication" task.
Show answer
There's no code for this one! The goal is to successfully use the web interface. After you're done, you should see only the "Design the dashboard page" task in your list, and when you click on it, its description should be updated. This exercise confirms you can use the admin for all core CRUD operations.
Step 4: Customizing the Admin Display
The default admin is functional, but we can make it much more useful. For example, the task list only shows the task title. It would be better to see the completion status and due date at a glance.
You can customize the admin display by creating a ModelAdmin class. This is a class where you define configuration for how a model should appear in the admin.
Let's make two improvements:
list_display: Controls which model fields are shown as columns in the list view.list_filter: Adds a sidebar to filter the list by certain fields.
Update your tasks/admin.py file to look like this:
from django.contrib import admin
from .models import Task

# Define a ModelAdmin class for Task
class TaskAdmin(admin.ModelAdmin):
    list_display = ('title', 'user', 'completed', 'created_at') # Fields to display in the list
    list_filter = ('completed', 'user') # Fields to create filters for
    search_fields = ('title', 'description') # Fields to include in the search bar

# Register the Task model with the TaskAdmin class
admin.site.register(Task, TaskAdmin)
Save the file and refresh your tasks list page in the admin. You'll see a much-improved interface with more columns, a filter sidebar, and a search bar.
This is just the beginning of admin customization. The MDN guide offers a fantastic walkthrough of the most common options.
Django Tutorial Part 4: Django admin site
To dive deeper into customization, read the "Advanced configuration" section of the MDN guide. This is highly recommended as it unlocks the true power of the admin site.
Read through the sections on advanced configuration: Register a ModelAdmin class: Understand the basic pattern for customization. Configure list views: Focus on list_display. Add list filters: See how list_filter works. Organize detail view layout: Learn about fields and fieldsets to clean up your forms. Try applying list_display and list_filter to your own Task model as shown in the code example above.
Conclusion
You've now learned how to leverage one of Django's most powerful built-in features. The admin site is an indispensable tool that saves you countless hours of development, especially when starting a project or for internal data management.
Key Takeaways:
- The Django admin is an auto-generated web interface for managing your database models.
- Access is controlled via superuser accounts created with
python manage.py createsuperuser. - Models must be registered in their app's
admin.pyfile usingadmin.site.register()to appear in the admin. - The admin provides a full CRUD interface out of the box.
- You can significantly enhance the admin's usability by creating and customizing
ModelAdminclasses with attributes likelist_display,list_filter, andsearch_fields.
Preview of the Next Lesson:
We've seen how Django can automatically generate forms for us in the admin panel. But what about forms for our end-users, like a form to create a new task directly on our website? In the next lesson, we'll dive into Django's powerful form handling capabilities. You'll learn how to create your own Form classes from scratch to handle user input, validate it, and process the data, giving you full control over the user experience.