Hello! Welcome back.
In our last lesson, we put a professional build automation system in place with a Makefile. This allows us to build, run, lint, and cross-compile our simple-bank application with simple, standardized commands. We now have a reproducible build process.
Today, we'll address another critical aspect of reproducibility: dependency management. By default, Go downloads dependencies to a global cache on your machine. What happens if a dependency is removed from the internet, or if you need to build in a secure environment with no network access? We'll solve this by creating a fully self-contained project.
Today's Learning Outcome: Create a vendored copy of project dependencies using 'go mod vendor' and configure the build to use it.
This process, known as vendoring, involves storing all of your project's dependencies directly within your project's directory tree. For someone with your software engineering background, this is analogous to concepts like npm's node_modules directory, providing a path to hermetic, reliable builds.
The Why: Module Cache vs. Vendoring
Before we start, it's important to understand the default behavior and why we might want to change it. By default, when you run go build or go get, Go downloads the required modules into a global cache, typically located at $GOPATH/pkg/mod.
This is efficient for development, as multiple projects can share the same downloaded modules. However, it introduces external dependencies on the network and the source repositories (like GitHub).
Vendoring shifts the dependency source from the global cache to a local vendor directory inside your project.
How to Use Vendoring in Go - OneUptime
The article 'How to Use Vendoring in Go' provides an excellent overview of the rationale behind vendoring. Please read the introductory sections to understand its benefits.
Read the vendoring overview right below the title, the 'Why Use Vendoring?' section, and pay close attention to the table under 'Vendor vs Module Cache'. This will solidify the trade-offs between the two approaches.
The key takeaways are that vendoring provides:
- Reproducible Builds: The build is self-contained. It doesn't depend on a network connection or the availability of external repositories.
- Offline Development: You can build and test your project without an internet connection once dependencies are vendored.
- Control and Security: You have an exact copy of the code being compiled into your application, which can be audited and is immune to upstream changes or deletions (a "left-pad" scenario).
Step 1: Adding a Dependency to Vendor
Our simple-bank project currently has no external library dependencies in its source code. To demonstrate vendoring, let's add one. We'll add the popular gorilla/mux router, which we'll use in a future lesson to build our REST API.
-
Update
main.go:
Modify yourcmd/api/main.goto import and perform a trivial initialization of the router. This makes Go aware that we have a new dependency.File:
cmd/api/main.gopackage main import ( "fmt" "net/http" "github.com/gorilla/mux" ) // version is a variable that will be set at build time var version = "development" func main() { fmt.Printf("Starting Simple Bank API server (Version: %s)\n", version) // Initialize the router to make Go aware of the dependency. // We will build on this in future lessons. r := mux.NewRouter() r.HandleFunc("/", func(w http.ResponseWriter, r *http.Request) { fmt.Fprintln(w, "Welcome to Simple Bank!") }) } -
Tidy the Modules:
Now, rungo mod tidyfrom your terminal. This command will find the new import, downloadgorilla/mux(and any of its dependencies), and update yourgo.modandgo.sumfiles.go mod tidyYou should see
github.com/gorilla/muxadded to yourgo.modfile'srequireblock.
Step 2: Creating the Vendor Directory
With our dependencies now defined in go.mod, we can create the vendored copy. This is done with a single command.
go mod vendor
After running this, you'll see a new vendor/ directory in your project root.
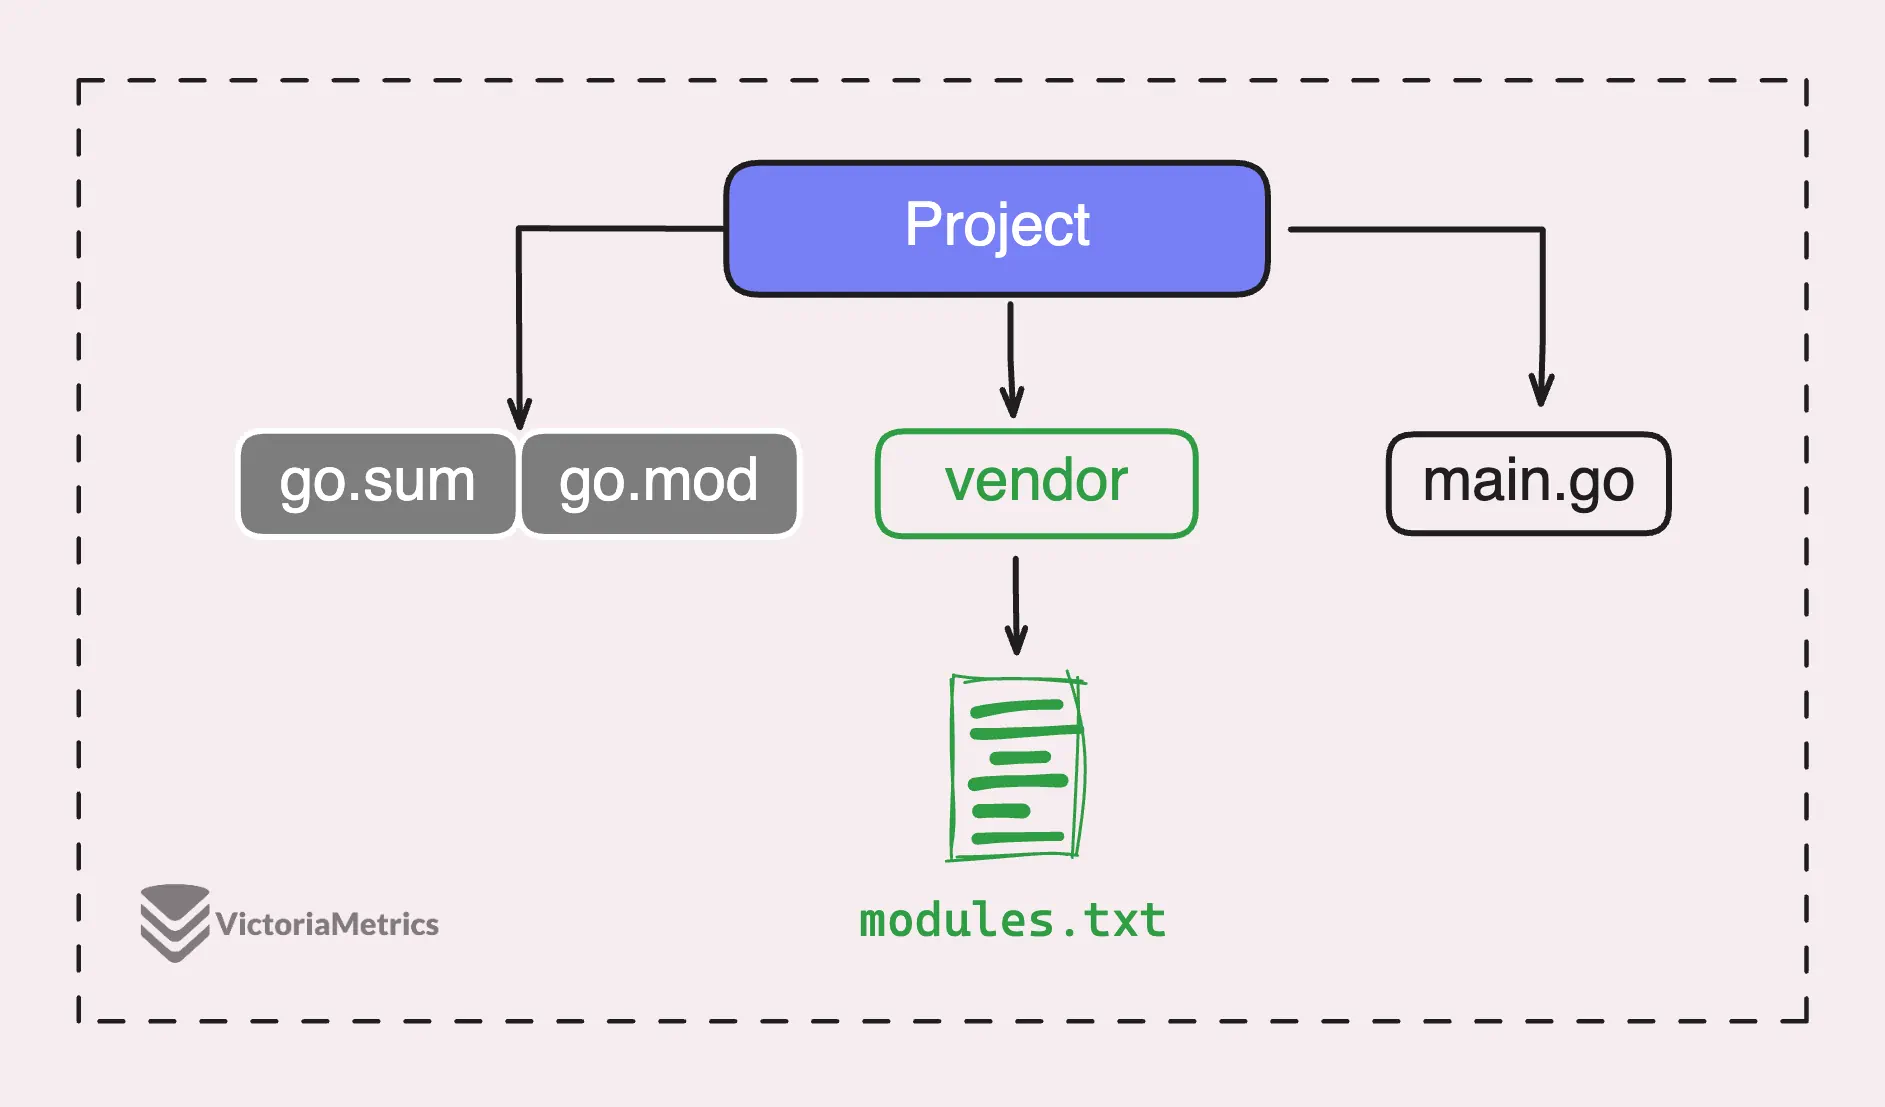
Inside this vendor directory, you'll find:
- The complete source code for all your project's dependencies (
gorilla/muxin this case). - A
modules.txtfile, which acts as a manifest, listing the exact versions of the modules that have been copied into the directory. The Go toolchain uses this file to ensure consistency withgo.mod.
This short video provides a crisp demonstration of this process.
Master Go Modules in under 13 minutes - Go / Golang Module Tutorial
The video 'Master Go Modules in under 13 minutes' clearly shows the go mod vendor command in action and the resulting directory structure.
Starting about nine and a half minutes in, watch the section on vendoring dependencies. The presenter explains the use case for vendoring and then demonstrates the go mod vendor command, showing the resulting directory structure.
Step 3: Configuring the Build to Use the Vendor Directory
Creating the vendor directory is only half the process. By default, Go might still use the global module cache. We must explicitly tell the build tools to use our new vendor directory.
This is done using the -mod=vendor build flag.
For example, to build using the vendored dependencies, you would run:
go build -mod=vendor ./cmd/api
This flag instructs the Go toolchain to look for packages in the vendor directory first, instead of searching the module cache.
Note on Go Versions: Since Go 1.14, if a vendor directory exists in the module root and the go.mod file specifies go 1.14 or higher, the Go command will automatically use -mod=vendor by default. However, explicitly setting the flag in your build scripts is a robust practice that makes the build intention clear and ensures consistent behavior across different environments and Go versions.
Step 4: Integrating Vendoring into the Makefile
Manually typing -mod=vendor for every build is tedious and error-prone. This is a perfect opportunity to update the Makefile we created in the previous lesson.
Let's modify our Makefile to use vendored dependencies for our builds. We can add -mod=vendor to our LDFLAGS variable, but it's more idiomatic to create a dedicated GOFLAGS variable.
- Add
vendorto.PHONY: Thevendortarget will be an action. - Create a
vendortarget: This target will rungo mod vendorto ensure the directory is up-to-date. We can makebuilddepend on it. - Update Build Commands: Add
-mod=vendorto allgo buildandgo testcommands.
Here is the updated Makefile:
File: Makefile
# Makefile

BINARY_NAME=simple-bank
VERSION := $(shell git describe --tags --always --long --dirty)


# Add -mod=vendor to GOFLAGS to ensure vendored dependencies are used.
GOFLAGS=-mod=vendor


# Keep linker flags separate.
LDFLAGS := -ldflags="-s -w -X 'main.version=${VERSION}'"


# Phony targets are actions, not files.
.PHONY: all build run clean lint build-all vendor help


# The default target executed when you just run `make`.
all: build


# Vendor dependencies.
vendor:
	@echo "Vendoring dependencies..."
	@go mod vendor


# Builds the binary. Depends on `vendor` to ensure dependencies are present.
build: vendor
	@echo "Building binary (Version: ${VERSION})..."
	@go build ${GOFLAGS} ${LDFLAGS} -o ./bin/${BINARY_NAME} ./cmd/api


# Runs the application.
run:
	@echo "Starting server (Version: ${VERSION})..."
	@./bin/${BINARY_NAME}


# Removes build artifacts.
clean:
	@echo "Cleaning up..."
	@rm -f ./bin/${BINARY_NAME}*
	@rm -rf ./vendor


# Runs the linter.
lint:
	@echo "Running linter..."
	@go run github.com/golangci/golangci-lint/cmd/golangci-lint@latest run ./...


# Builds the binary for all platforms. Depends on `vendor`.
build-all: vendor
	@echo "Building for all platforms (Version: ${VERSION})..."
	@GOOS=linux GOARCH=amd64 go build ${GOFLAGS} ${LDFLAGS} -o ./bin/${BINARY_NAME}_linux_amd64 ./cmd/api
	@GOOS=windows GOARCH=amd64 go build ${GOFLAGS} ${LDFLAGS} -o ./bin/${BINARY_NAME}_windows_amd64.exe ./cmd/api
	@GOOS=darwin GOARCH=amd64 go build ${GOFLAGS} ${LDFLAGS} -o ./bin/${BINARY_NAME}_darwin_amd64 ./cmd/api


# Self-documenting Makefile.
help:
	@echo "Usage: make [target]"
	@echo ""
	@echo "Targets:"
	@grep -E '^[a-zA-Z_-]+:.*?## .*$$' $(MAKEFILE_LIST) | awk 'BEGIN {FS = ":.*?## "}; {printf "\033[36m%-20s\033[0m %s\n", $$1, $$2}'
With this change, running make build will now automatically ensure the vendor directory is created and then use it during compilation. Your build is now self-contained.
To Commit or Not to Commit vendor/?
The final question is whether you should add the vendor directory to your .gitignore file. There are two schools of thought:
-
Don't Commit
vendor/: Addvendor/to.gitignore.- Pros: Keeps the repository size small.
- Cons: Your CI/CD pipeline and other developers must run
go mod vendorafter cloning the repository. The build is not truly hermetic from a version control perspective, as it depends on a build step (go mod vendor) which itself may require network access.
-
Commit
vendor/: Do not addvendor/to.gitignore.- Pros: The repository is completely self-contained. Anyone can clone it and run
go build -mod=vendorimmediately, even offline. This guarantees that every build, everywhere, uses the exact same source files. - Cons: Can significantly increase the size of the repository. Pull requests with dependency changes will include thousands of changed files in the
vendordirectory, making code reviews more difficult.
- Pros: The repository is completely self-contained. Anyone can clone it and run
For our project, and for many production systems where build reliability is paramount, we will commit the vendor directory. This aligns with the goal of creating a fully reproducible and auditable artifact from scratch.
Conclusion
You have now mastered a critical technique for creating robust, production-ready Go applications. By vendoring dependencies, you eliminate reliance on the network and external services during your build, leading to faster, more reliable, and more secure build pipelines.
Key Takeaways:
- Vendoring is the process of storing project dependencies in a
vendor/directory within your project. - The
go mod vendorcommand populates this directory based on yourgo.modfile. - Builds can be configured to use these local dependencies with the
-mod=vendorflag. - Integrating vendoring into your
Makefileautomates the process and ensures consistency. - Committing the
vendordirectory to version control creates a fully self-contained, hermetic repository.
Next Up
This lesson concludes our first module on project bootstrapping and dependency management. You have successfully initialized a Go project from scratch, organized its file structure, created a powerful Makefile for automation, and now, made your build process fully self-contained with vendoring.
In the next module, "Interface-Driven Design and PostgreSQL Integration," we will begin building the core functionality of our simple-bank API. We'll start by designing a flexible storage layer using one of Go's most powerful features: interfaces.