Hello! Welcome to the final lesson of our module on designing core business systems.
In our last session, you designed a master project template to standardize your client delivery process. This was a crucial step in codifying your best practices. Today, we will bring that template to life by automating its creation, fully connecting your client relationship management (CRM) system to your project management workflow.
Your learning outcome is to configure automated triggers that generate new client projects from master templates, linking them to CRM entries. By the end of this lesson, you will be able to design a seamless, automated handoff from a "deal won" in your CRM to a fully provisioned project, ready for kickoff. This is a significant process improvement that enhances efficiency and scalability for any consulting business.
1. The Engine of Automation in Notion
Before we build, let's understand the engine: Notion's native database automations. From a process design perspective, these are simple but powerful "if this, then that" rules that you can build directly into your databases without any code.
An automation consists of two parts:
- A Trigger: The event that starts the automation. This is typically a page being added to a database or a property being edited.
- An Action: The task(s) the automation performs. This can include adding or editing pages in any database, or sending a Slack notification.
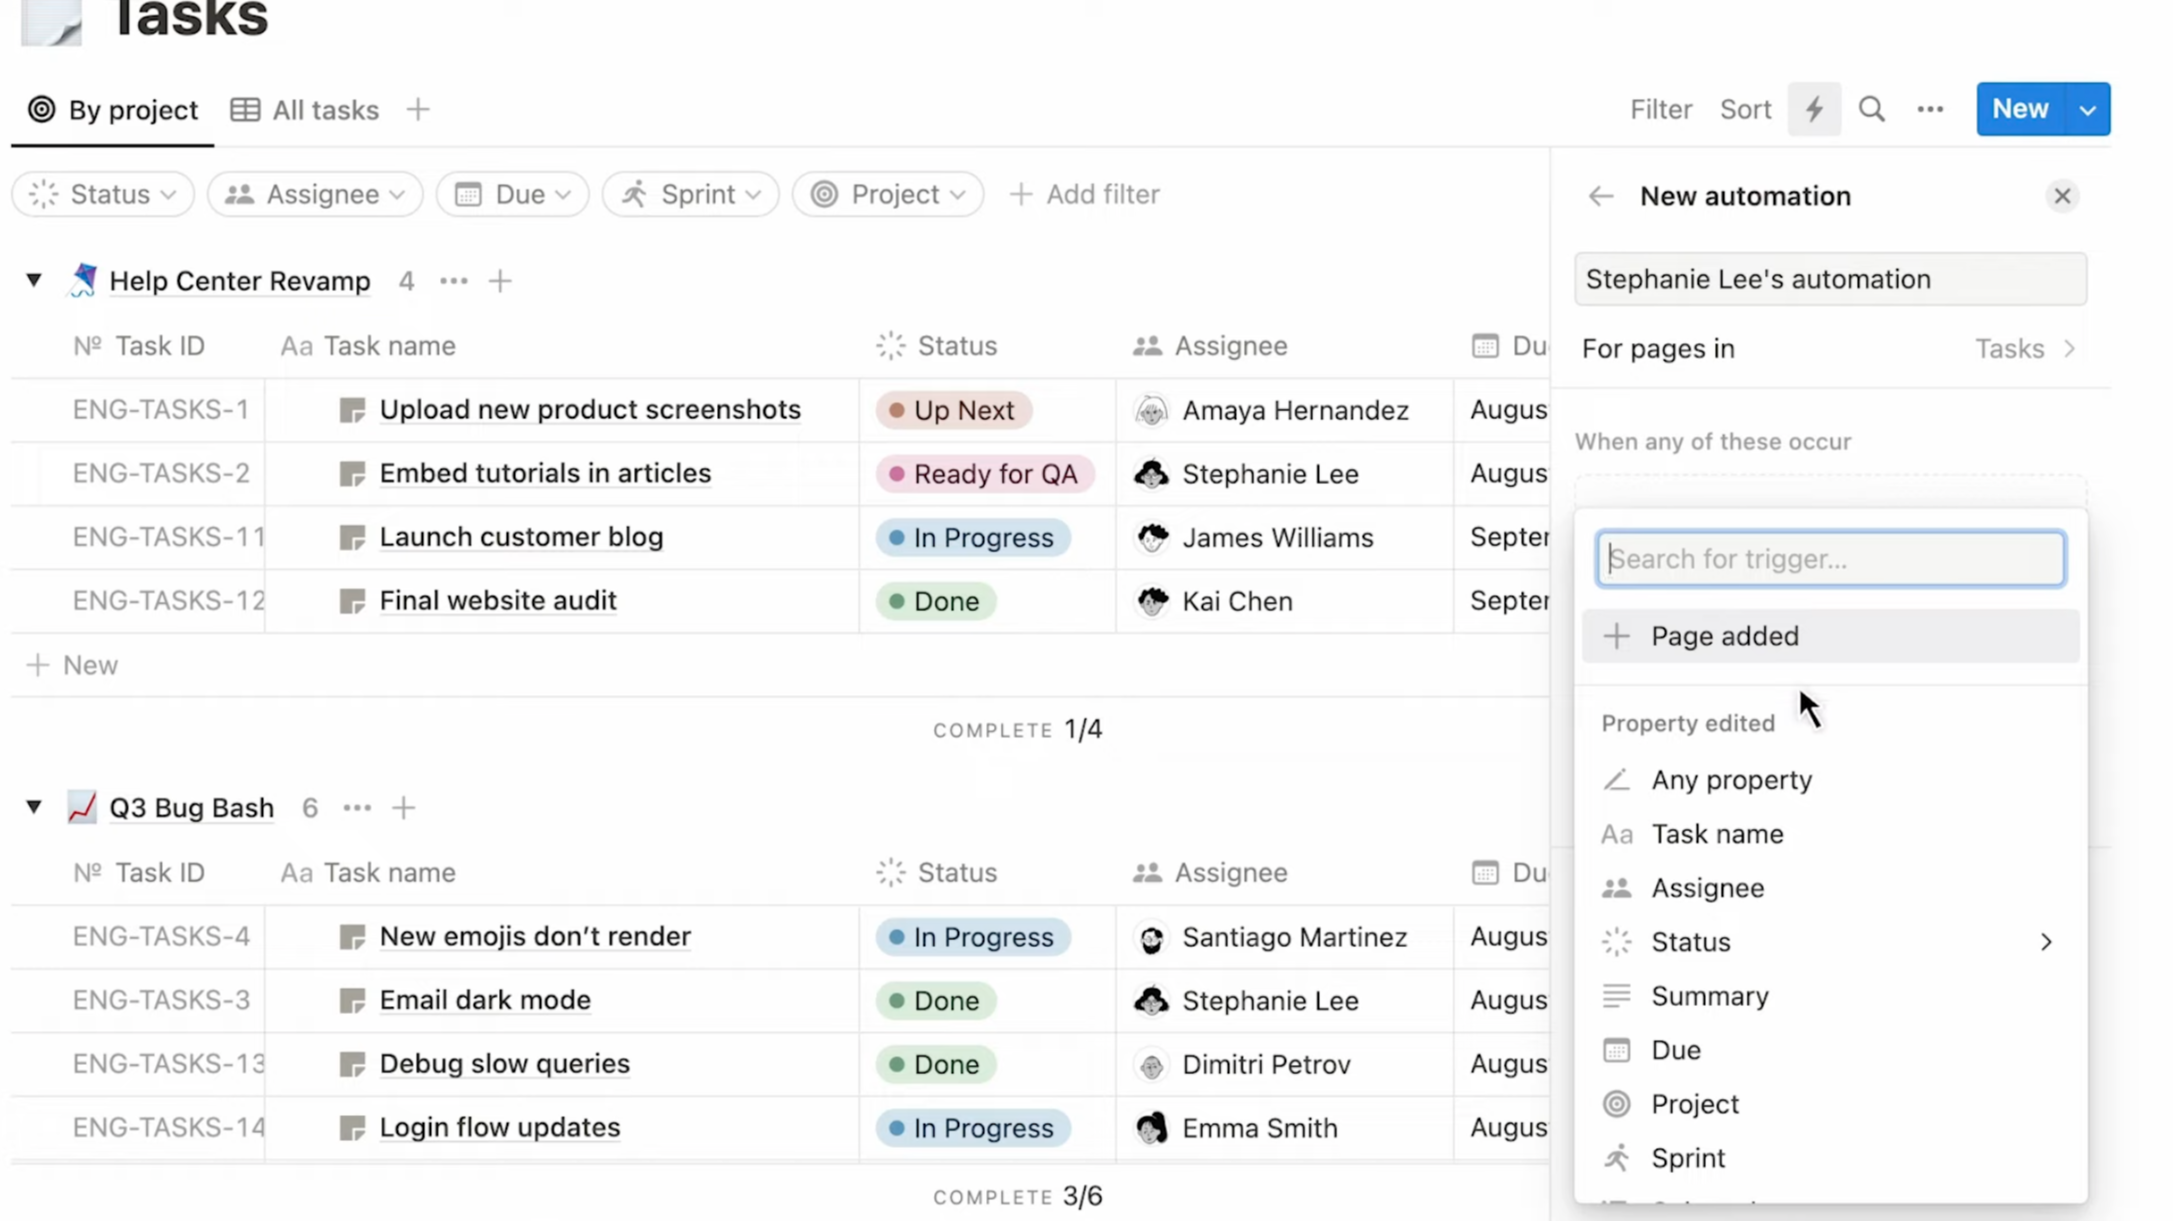
To get a feel for the user interface and the core logic, please watch this short introductory segment.
Notion's New Automations Feature is a Game-Changer
The video 'Notion's New Automations Feature is a Game-Changer' by Thomas Frank Explains provides a clear and concise overview of the trigger and action system.
Watch from 01:24 to 03:21. Focus on understanding the two types of triggers ('Page added', 'Property edited') and the different available actions. This will be the foundation for the system we're about to design.
2. Architectural Decision: Automating Project & Task Creation
In the last lesson, you embedded a pre-filtered list of standard tasks within your master project template. This is a simple and effective method. However, for a more robust and scalable system, we can use automations to generate new task pages for every new project.
Let's compare the two architectures:
| Method | Template-Embedded Tasks (Previous Lesson) | Automation-Generated Tasks (This Lesson) |
|---|---|---|
| How it Works | A linked view inside the project template uses a self-referential filter to show relevant tasks. | An automation runs when a new project is created, adding a new page to the Tasks database for each standard task. |
| Pros | Simple to set up; tasks are visible immediately within the template. | Creates independent task records for each project, which is better for detailed tracking, reporting, and property modification. More flexible. |
| Cons | Tasks are not new database entries but a filtered view of all tasks. Less granular control over individual project tasks. | More complex setup, as each task requires its own action step in the automation. |
For building truly scalable systems, automation-generated tasks are the superior architectural choice. We will proceed with this design.
3. Step-by-Step: Building the CRM-to-Project Automation
Our goal is to click a button on a Client page in our CRM and have it automatically create a new project with all its standard tasks. This involves a clever two-part automation chain.
Step 3.1: The "Create Project" Button in your CRM
First, we will add a button to our Clients (or Companies) database that initiates the entire workflow. A button provides manual control, ensuring projects are only created when you are ready.
How to automate project setups in Notion (auto-tasks/ ...
The article 'How to automate project setups in Notion' by Simone Smerilli outlines a practical button-based approach. We will follow this logic for our trigger.
Read the sections 'Step 1 - Create a Button on the Clients database' and 'Step 2 - Create Automation(s) on the Projects database'. Pay close attention to how the button is configured to 'Add a Project' and, most importantly, pre-fill the client relation using 'this page'. This is the key to linking the new project back to the CRM entry.
To summarize the steps from the article:
- Navigate to your
Clientsdatabase and edit its template (or an existing client page). - Add a
Buttonproperty. - Configure the button with an action step: "Add page to...". Select your
Projectsdatabase. - Within this action, pre-fill the properties of the new project. The most critical one is the
Clientrelation property. Set its value to "This page". This dynamically links the new project to the client page where the button was clicked. - Optionally, add a second action step to the button: "Open page..." and select the "New page added" from the first step. This provides a smooth user experience by immediately taking you to the new project.
Step 3.2: The Task Generation Automation in your Projects Database
Now for the second part of the chain. The button we just created manually adds a page to the Projects database. This "Page added" event will be the trigger for our second automation, which will generate the standard tasks.
This is a key architectural pattern: native automations cannot trigger other native automations, but a manual action (like a button click) can trigger an automation.
The following video demonstrates exactly how to build this task-generation workflow.
Notion's New Automations Feature is a Game-Changer
In 'Notion's New Automations Feature is a Game-Changer', Thomas Frank builds the precise automation we need. He shows how a new project triggers the creation of multiple, linked tasks.
Watch from 13:31 to 19:02. This is the core practical guide for this lesson. Observe carefully how he sets up the 'Add page to' action for the Tasks database. The crucial step is setting the 'content relation' (your 'Project' relation) to 'This page', which links each new task to the project that triggered the automation.
Here's a breakdown of the process shown in the video:
- Go to your
Projectsdatabase and open the automations menu (⚡ icon). - Create a new automation with the trigger: "Page added".
- Add an action: "Add page to..." and select your
Tasksdatabase. - Configure the action:
- Name: Give the task a name (e.g., "Schedule Kickoff Meeting").
- Edit another property: Select your
Projectrelation property. - Set the value to "This Page". This is the magic link.
- Click the
+icon to add another action step and repeat the process for every standard task in your project plan (e.g., "Draft System Architecture," "Client Handover Session").
Once saved, this automation will run every time a new project is created, populating it with a complete, linked set of tasks.
Test your understanding!
You've set up the automation to create tasks. However, you notice the tasks appear in a random order inside your new project page. From a systems design perspective, how would you solve this to ensure the tasks are always displayed in a logical sequence (e.g., chronologically)?
Show answer
There are two primary ways to solve this, as hinted at in the video (at 18:25):
- Add a "Due Date" or "Timeline" property to your tasks and pre-fill them in the automation with relative dates (e.g., Day 1, Day 5, Day 10). Then, sort the tasks view in your project template by this date property in ascending order.
- Add a "Sort Order" number property to your tasks. In the automation, set this number sequentially for each task you create (1, 2, 3...). Then, sort the tasks view by this number property.
- A simpler, but less robust method is to sort by "Created time" in ascending order. As the automation creates tasks sequentially, this often results in the correct order.
The key is that the display order is controlled by the sorting rules on the linked view within your project template, not the automation itself.
4. Strategic Governance and Advanced Applications
As a consultant designing systems for others, it's not enough for an automation to work; it must also be robust and scalable.
Governance and Risk
Automations are powerful, but they can cause significant issues if misconfigured. The edit pages in action, for example, can accidentally overwrite data across an entire database if not filtered correctly.
Notion's New Automations Feature is a Game-Changer
The 'Danger Zone' segment of the Thomas Frank video discusses the risks associated with the 'edit pages in' action. While we are using 'add page to', the strategic lesson about careful design, testing, and permission management is critical for any consultant.
Watch from 19:30 to 21:55. Absorb the core message: unrestricted automations are dangerous. As a system architect, you must always define clear filter criteria and educate your clients on the potential impact of modifying automations.
Your key takeaway as a system designer is to always build with constraints in mind. Test automations in a safe environment and ensure your workspace permissions prevent unauthorized users from creating potentially destructive workflows.
Advanced Application: Automating Client Access
The CRM-to-Project link you just built is the foundation for more advanced systems. For example, you can extend this logic to automatically manage what a client can see in their client portal.
Notion FINALLY Made Client Portals Possible
To see where these concepts can lead, review this video from Sam at WorkflowLab. It demonstrates a sophisticated client portal where automations control access to projects and tasks based on properties linked back to the company's CRM entry.
Watch from 21:00 to 25:27 and 26:12 to 29:54. You don't need to memorize the exact setup. Instead, focus on the architectural strategy: an automation in the Tasks database checks a 'Share to portal' box, which then uses the project's link to the Company CRM entry to find out who to share the task with. This is a perfect example of a scalable, interconnected system built on the principles you've learned.
Conclusion
Congratulations on completing this module! You have now designed and automated a complete, scalable workflow from CRM to project management. By connecting these core business systems, you have laid the groundwork for a truly efficient and data-driven consulting operation.
Key Takeaways:
- Automation Connects Systems: Notion's native automations are the glue that links your CRM, Projects, and Tasks databases into a cohesive workflow.
- The Button-Trigger Pattern is Key: Using a button to initiate an automation chain provides user control and circumvents the limitation of automations not being able to trigger each other.
This Pageis the Magic Link: TheThis Pagedynamic variable is the fundamental mechanism for creating relationships between database entries during an automation.- Design for Scale and Safety: Always consider the architectural implications of your automations, including error potential, user permissions, and how they can be extended for future needs like client portals.
In our next module, Enterprise Workspace Architecture & Governance, we will zoom out from individual systems like CRM and Project Management. You will learn how to design the high-level structure for an entire company's Notion workspace, tackling the challenges of teamspace hierarchies, permissions, and long-term governance for large organizations.