Welcome back. In our last lesson, we constructed a sophisticated communication protocol for the tour scenario, designing scheduled touchpoints that reinforce trust while consciously avoiding a dynamic of surveillance. This balanced the husband's need for connection with the wife and bull's need for autonomy.
Now, we shift our focus from the relational dynamics of the tour to the narrative engineering of the photoshoot. This lesson directly addresses your next operational challenge: determining the shot allocation and pacing for the photoshoot, defining the ratio of 'modest' vs. 'revealed' shots to maximize the contrast payoff. Your causal analysis identified "persona subversion" as a key driver of success. Our task is to operationalize this insight. From an efficiency perspective, this is an allocation problem: with a finite amount of time and a finite number of deliverable images, how do we distribute our shots across the narrative arc to achieve the greatest possible impact?
1. Beyond Static Images: Engineering a Narrative Flow
A common mistake in planning a photoshoot is to simply collect a series of beautiful, but disconnected, images. A mood board is a starting point, but it doesn't tell a story. To maximize the "persona subversion" effect, we must think like a cinematographer, considering how each shot flows into the next to build a cohesive narrative.
This short video from cinematographer Mark Bone explains why pre-visualizing the sequence of shots is critical.
how cinematographers shot list
This video explains why thinking about how shots will edit together is more important than just collecting static reference images. It emphasizes the importance of motion and flow, which is central to our task of pacing the saree-to-bra transformation.
Watch the introduction to understand the pitfalls of a static mood board and the key things it overlooks. Then, see how a cinematographer begins to build a sequence to see if the ideas flow together. Finally, absorb the key message about how thorough pre-production creates freedom and ensures the final shots combine effectively.
The key insight here is that the value of each shot is determined by its position in the sequence. The impact of the final "revealed" shot in the plunge bra is directly proportional to how well you've established the "modest" persona at the beginning. This brings us to the core of our optimization problem: defining the structure of this narrative.
2. The Three-Phase Narrative Structure
To engineer the persona subversion, we will break the photoshoot down into three distinct phases, each with a specific objective.
-
Phase 1: The 'Modest' Baseline (The Setup)
- Objective: To firmly establish the initial persona: traditional, modest, and fully composed. This is the "before" state that makes the "after" so powerful.
- Execution: The model is fully dressed in the saree, elegantly draped. Poses are graceful and relatively conservative. The focus is on the beauty of the garment and the model's poised demeanor.
-
Phase 2: The Transition (The Build-up)
- Objective: To create anticipation and intrigue through a series of "micro-reveals." This is the most dynamic part of the story, where the transformation occurs.
- Execution: This involves the process of undraping the saree. Each step is a shot: the pallu (decorative end-piece) slipping from the shoulder, a glimpse of the bare back, the fabric unwrapping from the waist. The image below captures the essence of this phase—a partial reveal that implies sensuality without showing everything, creating powerful intrigue.

- Phase 3: The 'Revealed' Payoff (The Climax)
- Objective: To deliver the narrative climax and showcase the hero product—the plunge bra—and the model's physique, which you identified as a key causal factor.
- Execution: The saree is gone. The model is now in the plunge bra and thong. The posing becomes bolder and more confident, directly showcasing the figure and the product.
3. The Optimal Shot Allocation Ratio
Now for the core allocation question. What is the optimal ratio of shots across these three phases? A common error would be to dedicate most of the time to the final "revealed" state. However, to maximize contrast, the build-up is paramount.
Drawing from principles of narrative structure, a highly effective allocation is a 40-30-30 split:
- 40% Modest Shots: This may seem high, but this allocation front-loads the narrative, firmly cementing the "before" persona in the viewer's mind. Without a strong baseline, the transformation has no power.
- 30% Transition Shots: This is the heart of the story. This phase is where the "persona subversion" mechanism is actively working, building tension and curiosity with each micro-reveal.
- 30% Revealed Shots: This is the payoff. This allocation is sufficient to provide a variety of powerful final images showcasing the product and figure, without over-saturating the viewer and diminishing the impact of the reveal.
Let's assume a target of 20 final images for the campaign. This ratio translates to:
- 8 Modest Shots (in full saree)
- 6 Transition Shots (undraping process)
- 6 Revealed Shots (in plunge bra)
To develop an intuition for the pacing of the transition phase, it's useful to see it in motion.
This Pinterest board is a collection of short videos showcasing the 'saree transition' trend. It provides a rich visual library for understanding the pacing and rhythm of the transformation we are engineering.
Explore the various videos on this board. You don't need to analyze every single one. Instead, watch 5-6 different examples and pay attention to the pacing. Notice how some transitions are quick and sudden, while others are slower and more drawn out. Observe which techniques seem most effective at creating a sense of surprise and transformation. This will inform how we sequence our 6 "Transition Shots."
4. Pacing and Sequencing the Shot List
With our ratio defined, we can now outline the sequence, or pacing, of the photoshoot. This is the blueprint for the photographer and model. A shot list, like the example below, provides the necessary structure for an efficient shoot.
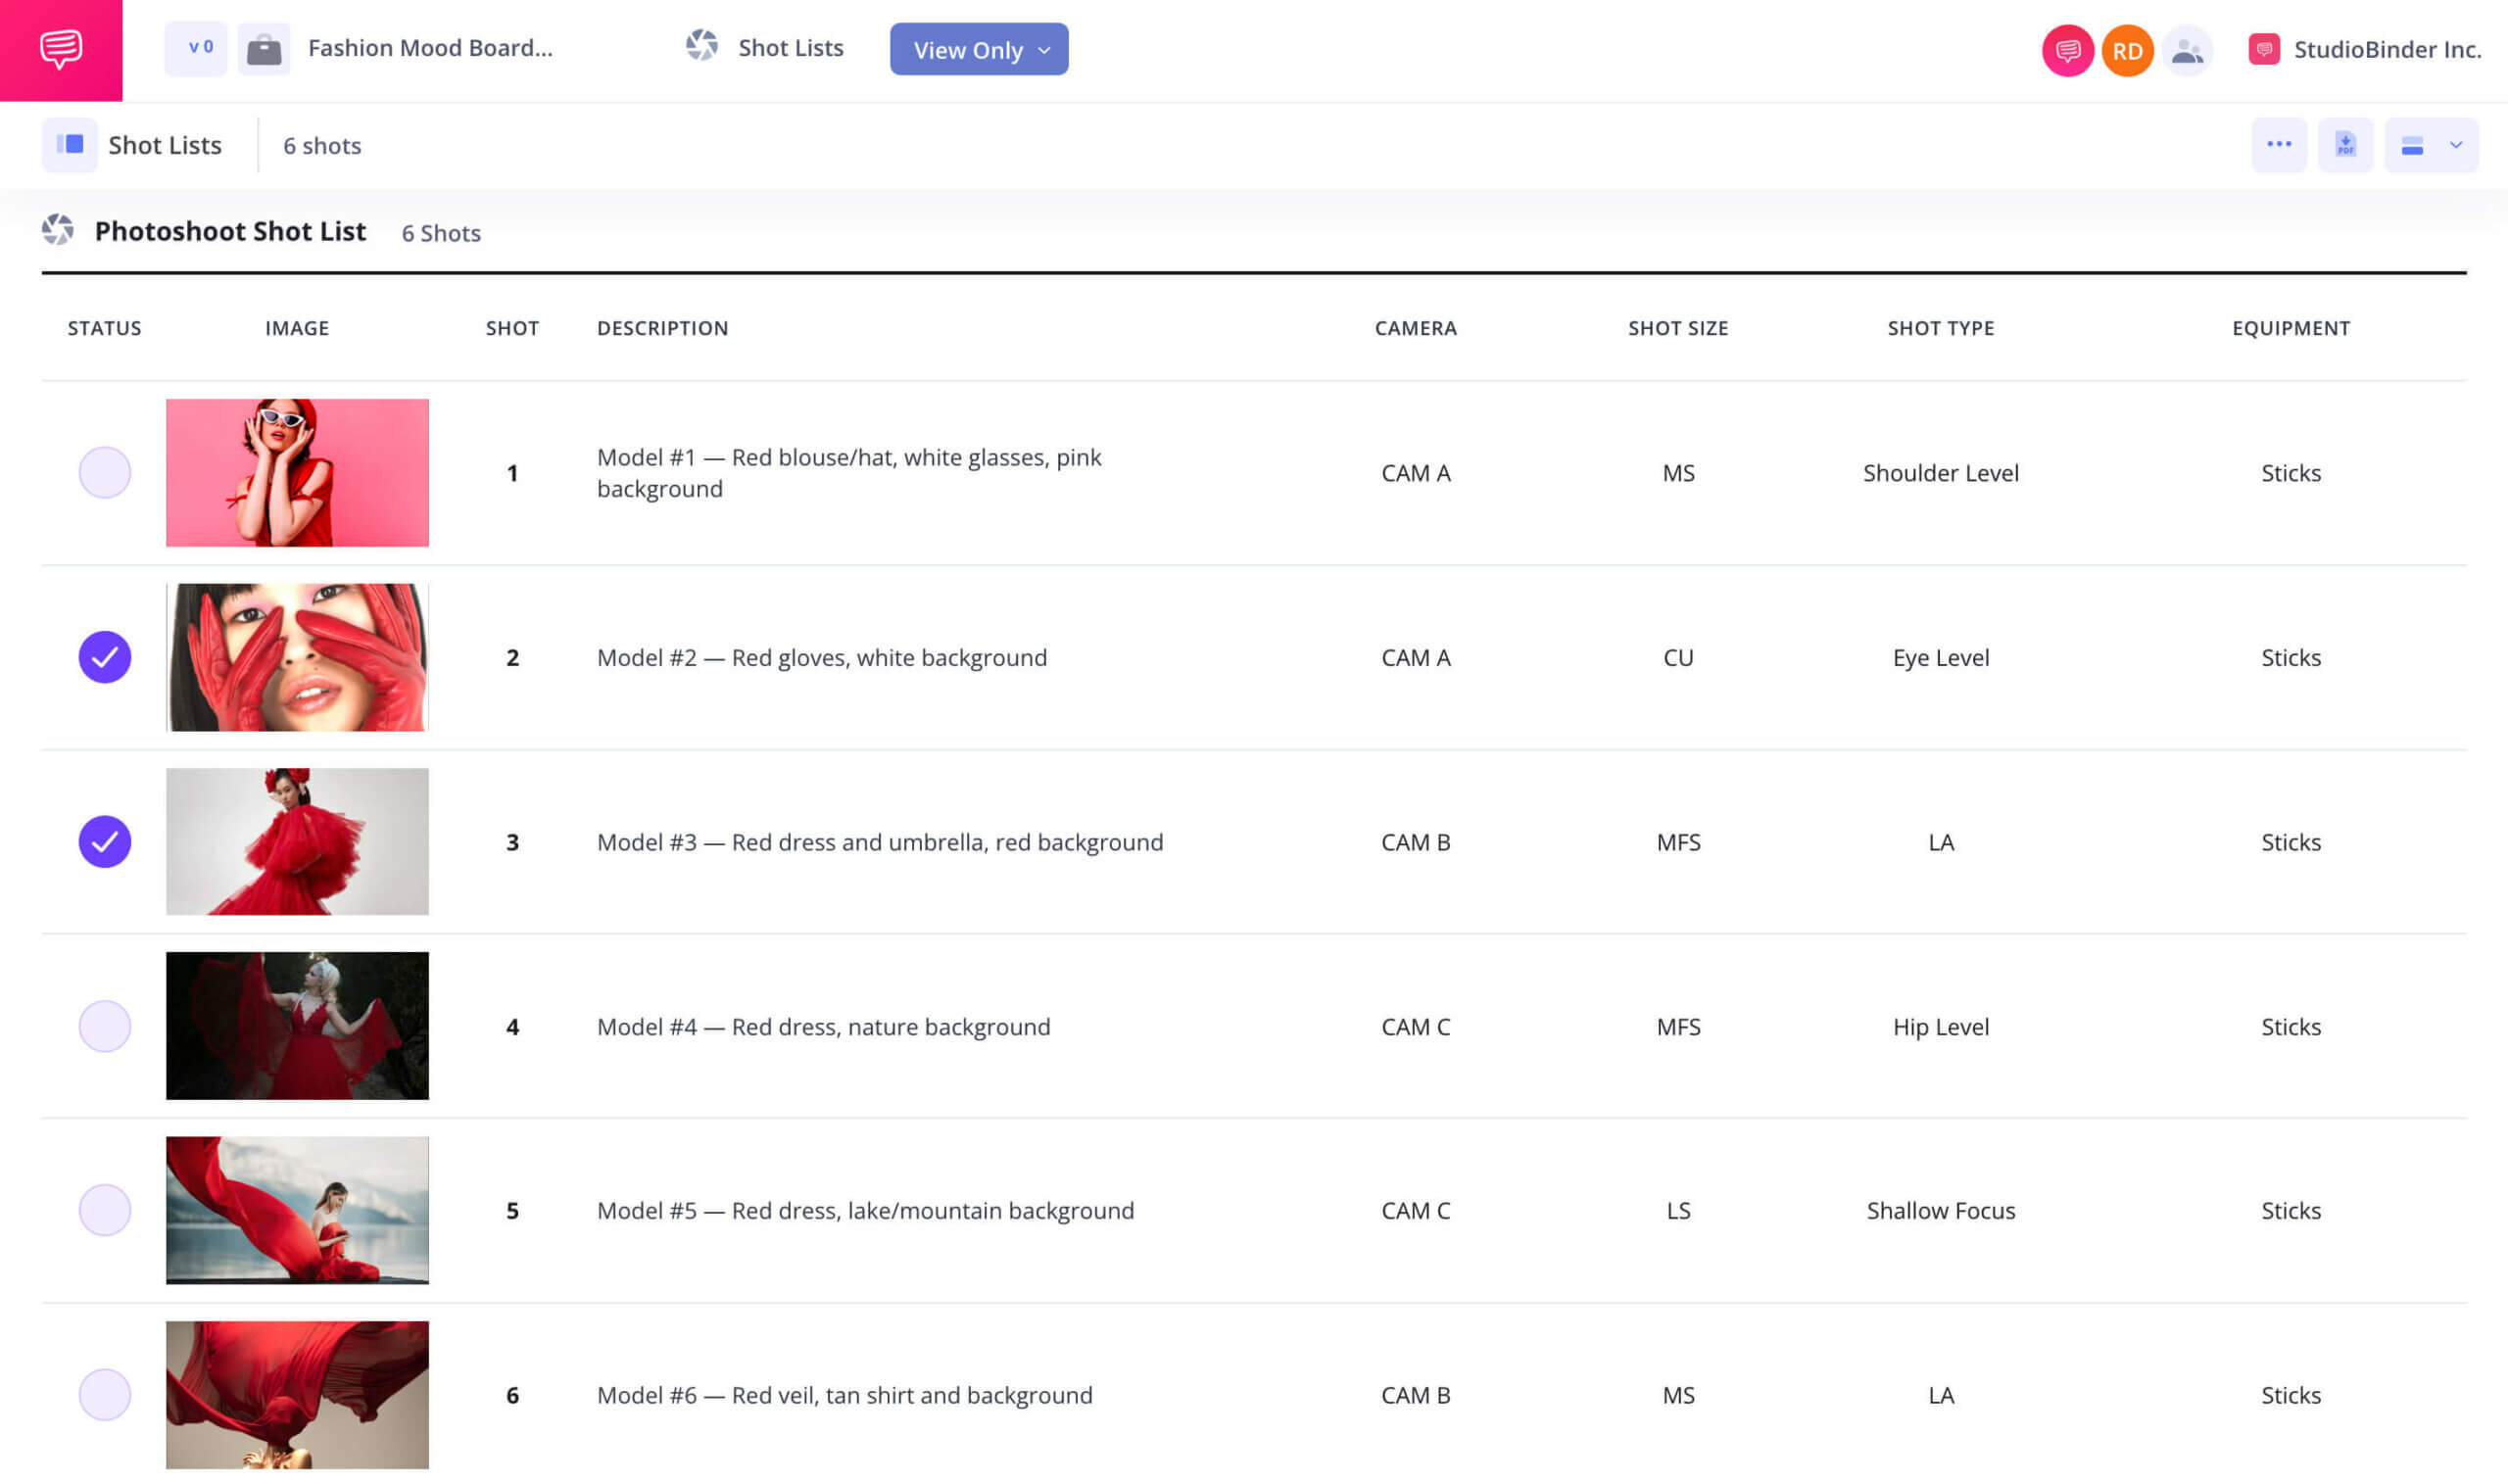
Here is a proposed sequence based on our 40-30-30 allocation for 20 shots:
Phase 1: Modest Baseline (Shots 1-8)
- Shots 1-2 (Wide): Full body shots establishing the setting and the elegance of the fully draped saree.
- Shots 3-5 (Medium): Closer shots focusing on posture, expression, and details of the saree fabric. Persona is poised, perhaps even shy.
- Shots 6-8 (Close-up): Details of hands, face, jewelry. Gaze might be directed away from the camera. The modest persona is now fully established.
Phase 2: Transition (Shots 9-14)
- Shot 9 (Tipping Point #1): The pallu drops from the shoulder, revealing the back and blouse. This is the first break in the modest facade.
- Shots 10-11: Model begins to unpin and unwrap the saree from her waist. These shots capture movement and the texture of the fabric loosening.
- Shot 12 (Tipping Point #2): The saree is unwrapped to the point where the plunge bra is partially visible through the remaining fabric, or the silhouette is clearly defined. This is a moment of high intrigue.
- Shots 13-14: The final moments of the saree being removed. One shot could be the model letting the fabric fall away.
Phase 3: Revealed Payoff (Shots 15-20)
- Shot 15: The first full shot in the plunge bra. The pose is still relatively soft, marking the immediate aftermath of the transformation.
- Shots 16-20: Poses become progressively bolder and more confident, leveraging the techniques you've previously researched. This is where you deploy poses that accentuate the "busty, toned figure." The article on fluid boudoir posing offers excellent, concrete techniques for these final shots.
Maximize Boudoir Posing: Fluid Movements Without Ever ...
This article from Fstoppers provides specific, actionable posing instructions that are perfect for our 'Revealed' phase. It also reinforces the idea of creating a narrative through fluid movement and maximizing the number of usable shots from a single setup—a key optimization principle.
Read the section on "Fluid Movements," paying close attention to the descriptions of arching the back and body positioning. Then, study the advice on transitioning between poses, such as the sequence of movements on the floor. Finally, note the efficiency tip about getting "two shots in one" by simply changing the model's gaze. These are the specific "hacks" that will make your 'Revealed' shots compelling and varied.
By applying these specific posing techniques to Shots 16-20, you ensure the final payoff is as powerful as possible, validating the entire narrative sequence.
Conclusion
In this lesson, you have moved from a high-level causal insight—"persona subversion creates impact"—to a precise, operational plan. You have defined a narrative structure, allocated resources to maximize its effect, and designed the pacing to guide the viewer through a compelling transformation.
Your key takeaways are:
- Structure the Narrative: A three-phase structure (Modest, Transition, Revealed) is a robust framework for engineering a persona-subversion photoshoot.
- Optimize the Ratio: A 40-30-30 shot allocation dedicates sufficient resources to the build-up, maximizing the contrast and impact of the final reveal.
- Pace the Transformation: Sequencing is critical. A gradual progression with specific "tipping points" creates a story that is more engaging than a simple before-and-after.
- Maximize Shot Efficiency: Employing techniques like fluid posing and varying gaze allows you to extract maximum value and variety from your 'Revealed' shot allocation.
You now have a clear blueprint for what to shoot and in what order. In our next lesson, we will build directly on this by storyboarding the photoshoot's logistical flow. We will translate this shot list into a concrete plan for set changes, wardrobe transitions, and lighting adjustments to ensure the shoot itself is executed with maximum efficiency.