Hello! Welcome to your first lesson in the UI/UX design course.
This lesson marks the beginning of your journey into professional design tools, starting with the most important one: Figma. While your experience with Canva and your creative business has given you a fantastic eye for aesthetics, this module is about translating that intuition into the structured environment of a professional-grade tool.
Today, we'll focus on the absolute fundamentals. The goal is to get you comfortably oriented within the Figma interface so you can move around with confidence. By the end of this session, you will be able to navigate the four core areas of Figma: the canvas, the layers panel, the toolbar, and the properties panel. This is the essential first step toward mastering the visual design skills you'll need for your first freelance projects.
Let's begin.
Getting the Lay of the Land
Before diving into creating anything, the first step with any new tool is to understand its layout. Think of it like walking into a new workshop: you want to know where the workbench is, where the tools are kept, and where you can see the specifications for what you're building.
Figma's interface can be broken down into four main regions. Take a look at the image below for a quick visual map.
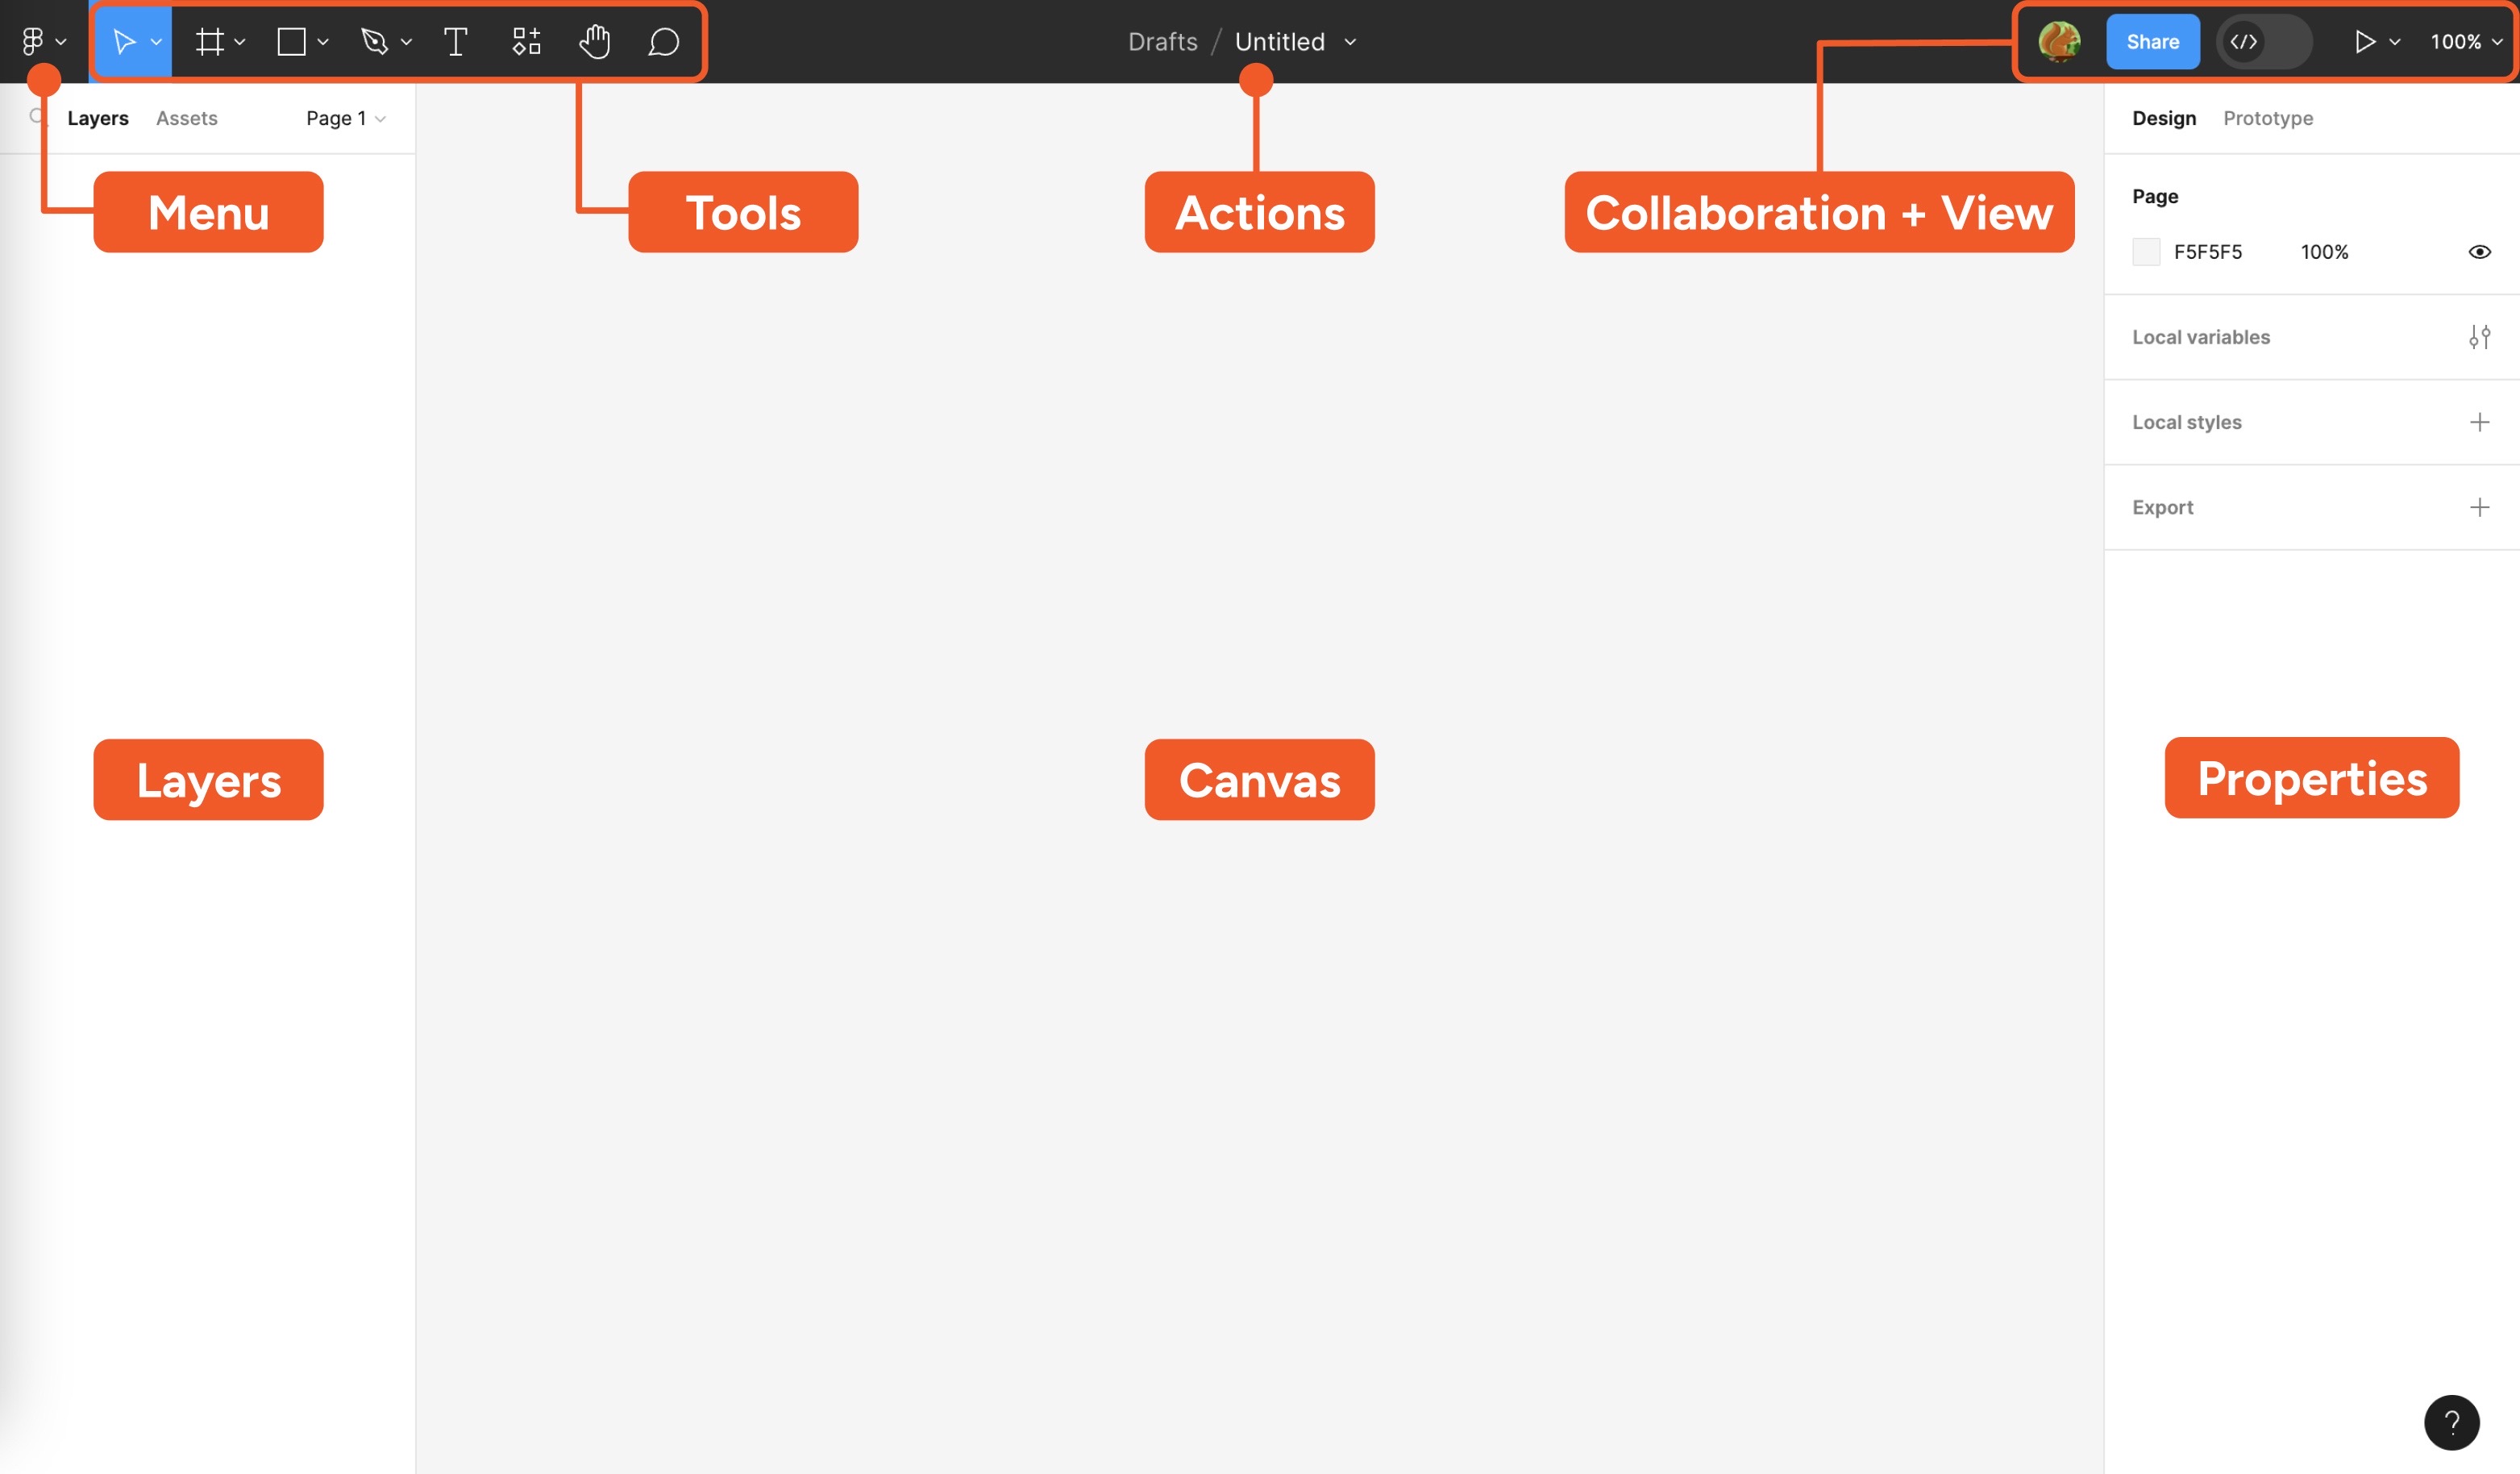
The four key areas you'll use constantly are:
- Toolbar (Top): This is where you'll find your primary tools—for creating shapes, text, frames, and more.
- Layers Panel (Left Sidebar): This panel lists every single element (or 'layer') in your design file. It's how you organize your work, much like an itemized list or a table of contents.
- Canvas (Center): This is your main workspace. It's an infinite area where all your design work happens.
- Properties Panel (Right Sidebar): This is a context-sensitive panel. It shows you all the settings and options for whatever you currently have selected—be it a shape, a piece of text, or the canvas itself.
To get a more detailed breakdown, let's start with a quick read from Designlab.
Figma 101: Introduction to Figma
This article provides a concise and clear explanation of Figma's main interface areas. It's a great way to solidify your mental map of the tool.
Please read the section titled "2. Take a look around the Figma interface". As you read, focus on the descriptions for the Toolbar, Layers panel, Canvas, and Properties panel.
Seeing the Interface in Action
Now that you have a static overview, let's see how these panels interact dynamically. Watching a short demonstration will help you understand the relationship between selecting an object on the canvas and how the other panels respond.
First, watch this brief introductory video directly from Figma's education team.
Figma for Edu: Introduction to Figma Design (in UI3)
This video, "Figma for Edu: Introduction to Figma Design," gives a quick, official tour of the core interface components.
Watch from the beginning until the main interface overview. Pay close attention to how selecting an object on the canvas causes the Layers panel (left) to highlight it and the Properties panel (right) to display its specific settings, like color and size.
As you saw, the three main areas—Layers, Canvas, and Properties—are constantly communicating. Now, let's go through a slightly more detailed tour that breaks down each panel individually.
Figma Basics: INTERFACE, TOOLS and PANELS (Tutorial For Beginners)
This "Figma Basics" tutorial by Mavi Design provides a clear, step-by-step walkthrough of the key panels. We'll watch specific segments to focus on the areas relevant to today's goal.
First, watch the section on the Toolbar. Don't worry about memorizing every tool; just get a feel for the types of tools available. Next, see how the left sidebar works, focusing on the explanation of the Layers panel. Finally, understand the power of the right sidebar, noting how it has different tabs like Design, Prototype, and Inspect for different tasks.
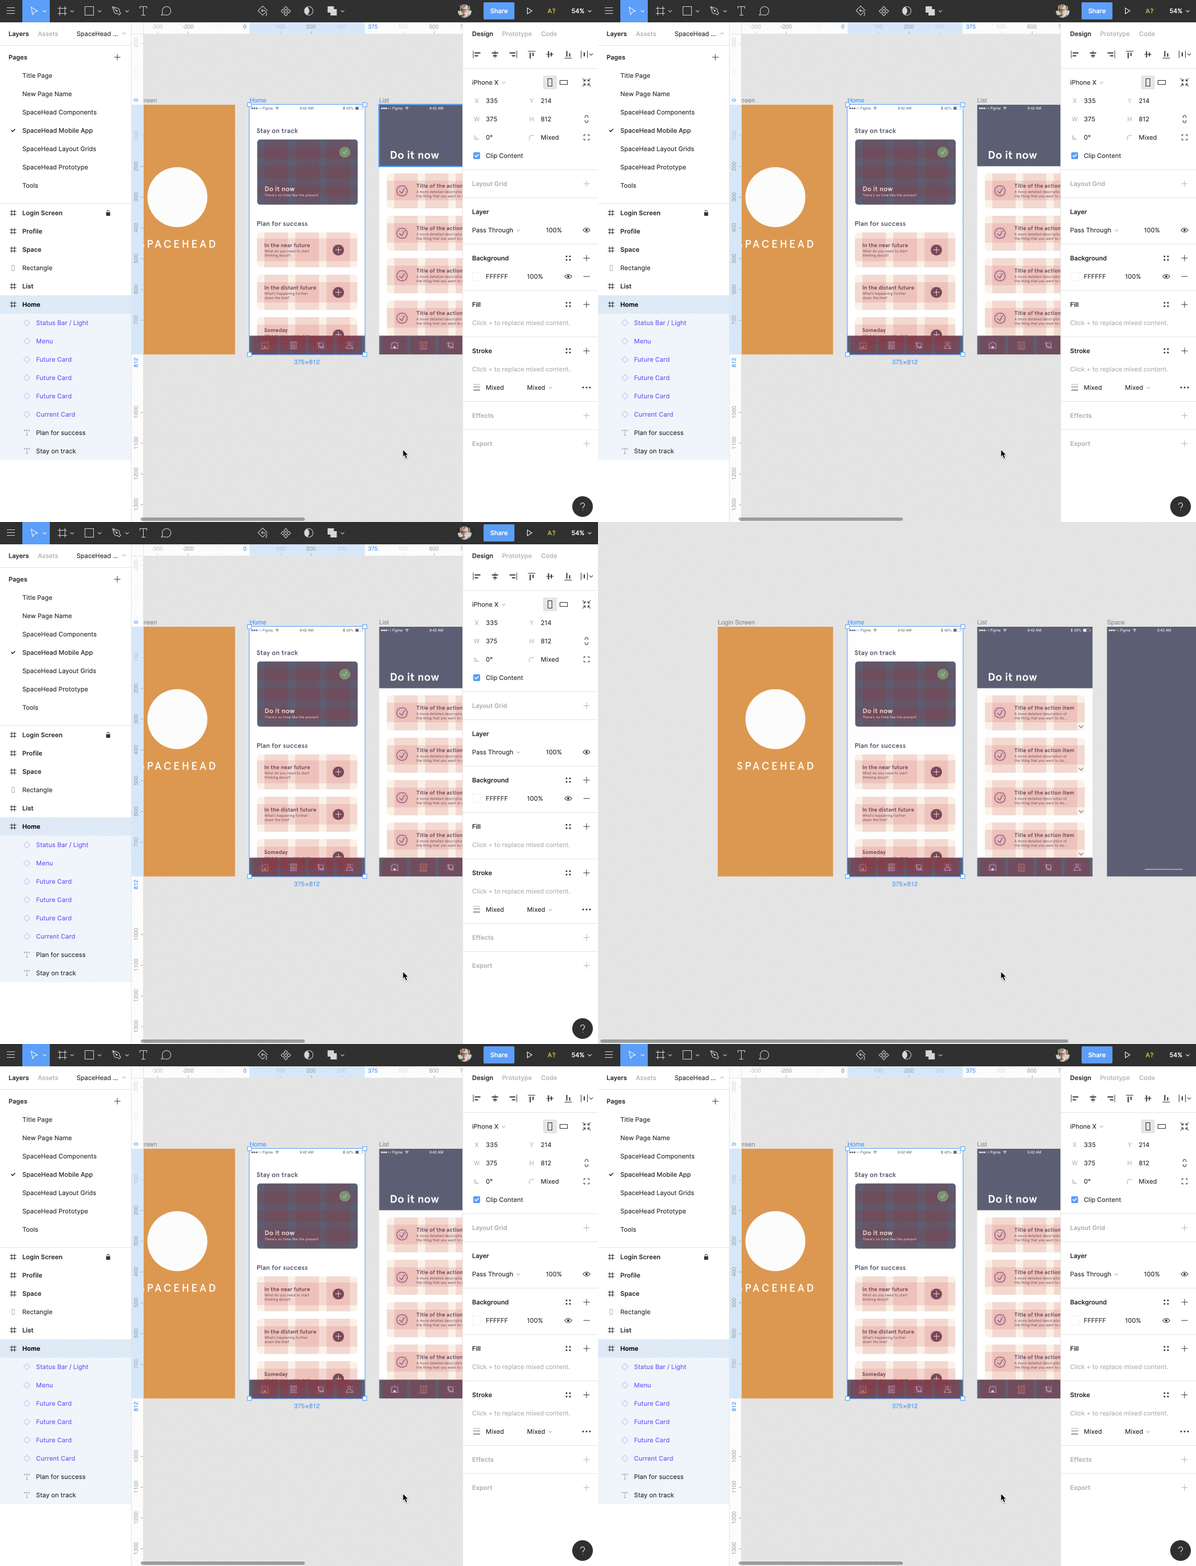
This GIF below perfectly illustrates the dynamic connection between the panels. Notice how clicking on an element in the Canvas (center) simultaneously highlights it in the Layers panel (left) and displays its details in the Properties panel (right).
Your First Steps in Figma
Theory is useful, but hands-on exploration is where the learning sticks. It's time to open Figma and get a feel for it yourself. Your goal here isn't to create a masterpiece, but simply to interact with the interface.
Action Steps:
- Open a New File: Open Figma (the desktop app or in your browser). In the file browser, find the
+ New design filebutton to create a blank document. - Explore the Toolbar: Hover your mouse over the icons in the top toolbar. Click the small downward arrows next to some tools (like the square or the pen) to see the other tools nested inside.
- Navigate the Canvas:
- Pan: Press and hold the Spacebar. Your cursor will turn into a hand. Click and drag to move around the canvas.
- Zoom: Hold Cmd (on Mac) or Ctrl (on Windows) and use your mouse's scroll wheel to zoom in and out. Alternatively, use the
+and-keys.
- Create Your First Layer:
- Press the
Rkey on your keyboard. Your cursor will become a crosshair. - Click and drag anywhere on the canvas to draw a rectangle.
- Press the
- Observe the Panels:
- Look Left: In the Layers panel, you'll now see a new layer named
Rectangle 1. - Look Right: With your rectangle still selected, look at the Properties panel. You’ll see sections for Alignment, Position (X and Y coordinates), Size (W and H), and Fill.
- Look Left: In the Layers panel, you'll now see a new layer named
- Make a Change: In the Properties panel on the right, find the Fill section. Click the grey square to open the color picker and choose a new color for your rectangle. Notice how the change is instantly reflected on the canvas.
This simple exercise of creating one shape and changing its color demonstrates the fundamental workflow you'll use thousands of times as a designer.
A Powerful Tip for Beginners
When you're starting out, it's easy to forget where a specific function is located. Figma has a brilliant feature for this called Quick Actions.
Press Cmd + / (on Mac) or Ctrl + / (on Windows). A search bar will appear. You can type anything you want to do—like "dark mode," "show rulers," or "rename"—and Figma will find the command for you. It's your personal assistant for navigating the tool.
Conclusion
In this lesson, we took our first crucial step into Figma. You've learned to identify and understand the purpose of the four most important parts of the interface.
Key Takeaways:
- Toolbar (Top): This is your toolbox for creating elements.
- Layers Panel (Left): This is the organized list of everything on your canvas.
- Canvas (Center): This is your infinite workspace where your designs come to life.
- Properties Panel (Right): This is where you adjust the settings and appearance of any selected element.
You now have a mental map of your new digital workshop.
Preview of the Next Lesson:
Now that you know your way around, it's time to start using the tools. In our next lesson, we will focus on creating and manipulating basic shapes, text, and images. We'll move from simply navigating to actively building the fundamental blocks of any interface.